Practical GRP Flat-Table Boatbuilding 4
Traditional Foam Construction
Traditional Construction method
To make a foam sandwich boat the method originally used was as follows:
- A building raft was built and levelled
- 1. Wooden cross-section frames were fixed to the raft
- 2. Stringers ran the length of the boat, attached to the frames, to define the shape of the craft
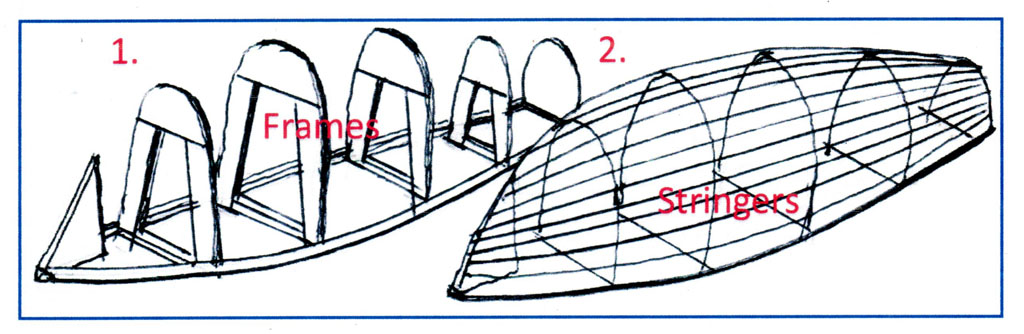 This process can be quite rapid, as the shape of the hull is immediately visible and it is encouraging for the builder to see it. The materials are cheap and easy to access. It is worth noting that the more accurately the former is made, the better, for it will save much fairing work later.
3. Foam sheets are used to clad the framework. This is another easy process, for the foam is relatively soft and can be formed and shaped easily. The foam can be scored with a craft knife to make it conform to sharper curves. It can be fine-trimmed with a grinderette (see chapter 5 picture).The early builders used fishing line to ‘sew’ the foam to the stringers, but this was soon changed to screwing it in place from the inside. This just involved drilling lots of clearance holes through the stringers from the outside, prior to applying the foam. Screws had to be the correct length so that they did not pierce right through the foam.
External finishing
4. The foam hull is glassed externally which makes it strong, but it has the pattern of the glass cloth visible on the outside. If a smooth 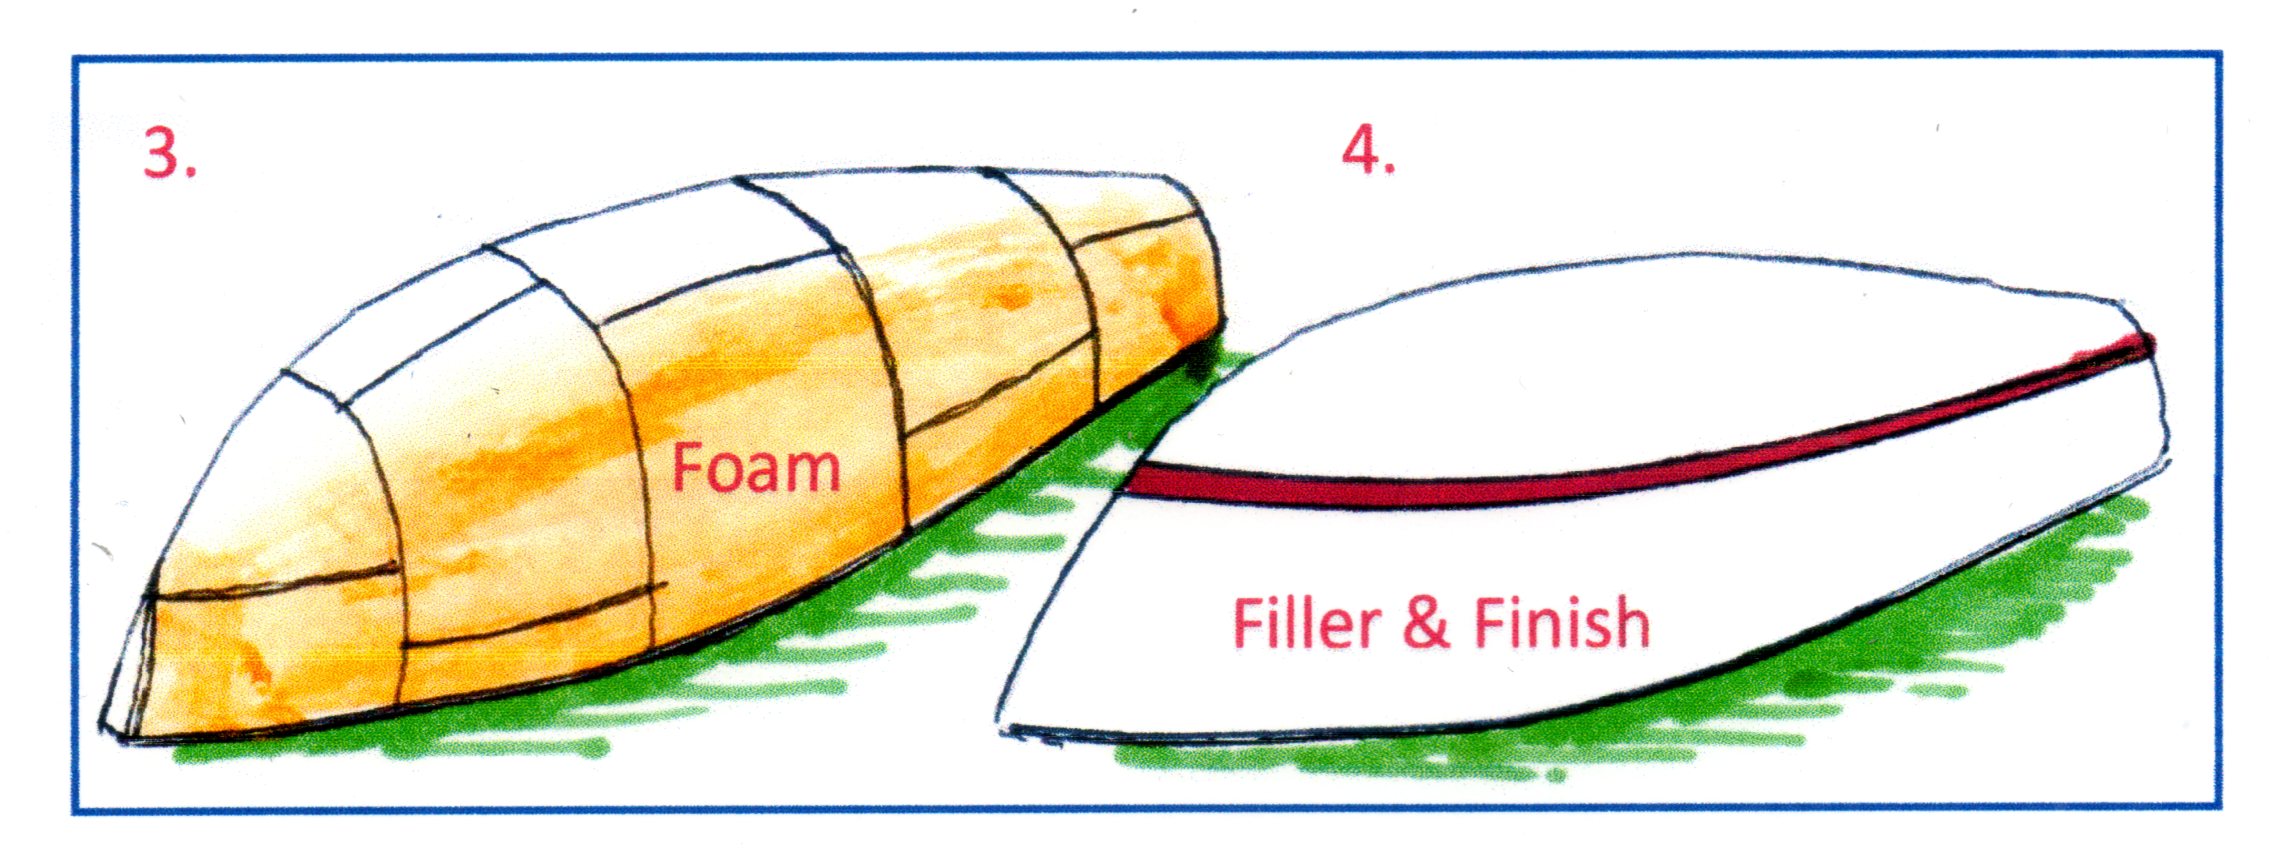 finish is needed it must be filled. I have seen hulls left with a very fine woven cloth showing, which can be almost invisible from a short distance away. Traditionally, skimming the outside with ‘body filler’ or ‘resin putty’ was a big job and time consuming. The filler was polyester resin mixed with a filler powder, similar to the fillers used to repair car bodywork. Car body fillers use talcum powder mixed with resin to make the putty, but boats use micro-balloons. Talcum powder is heavier than water and will sink, but each grain of micro-
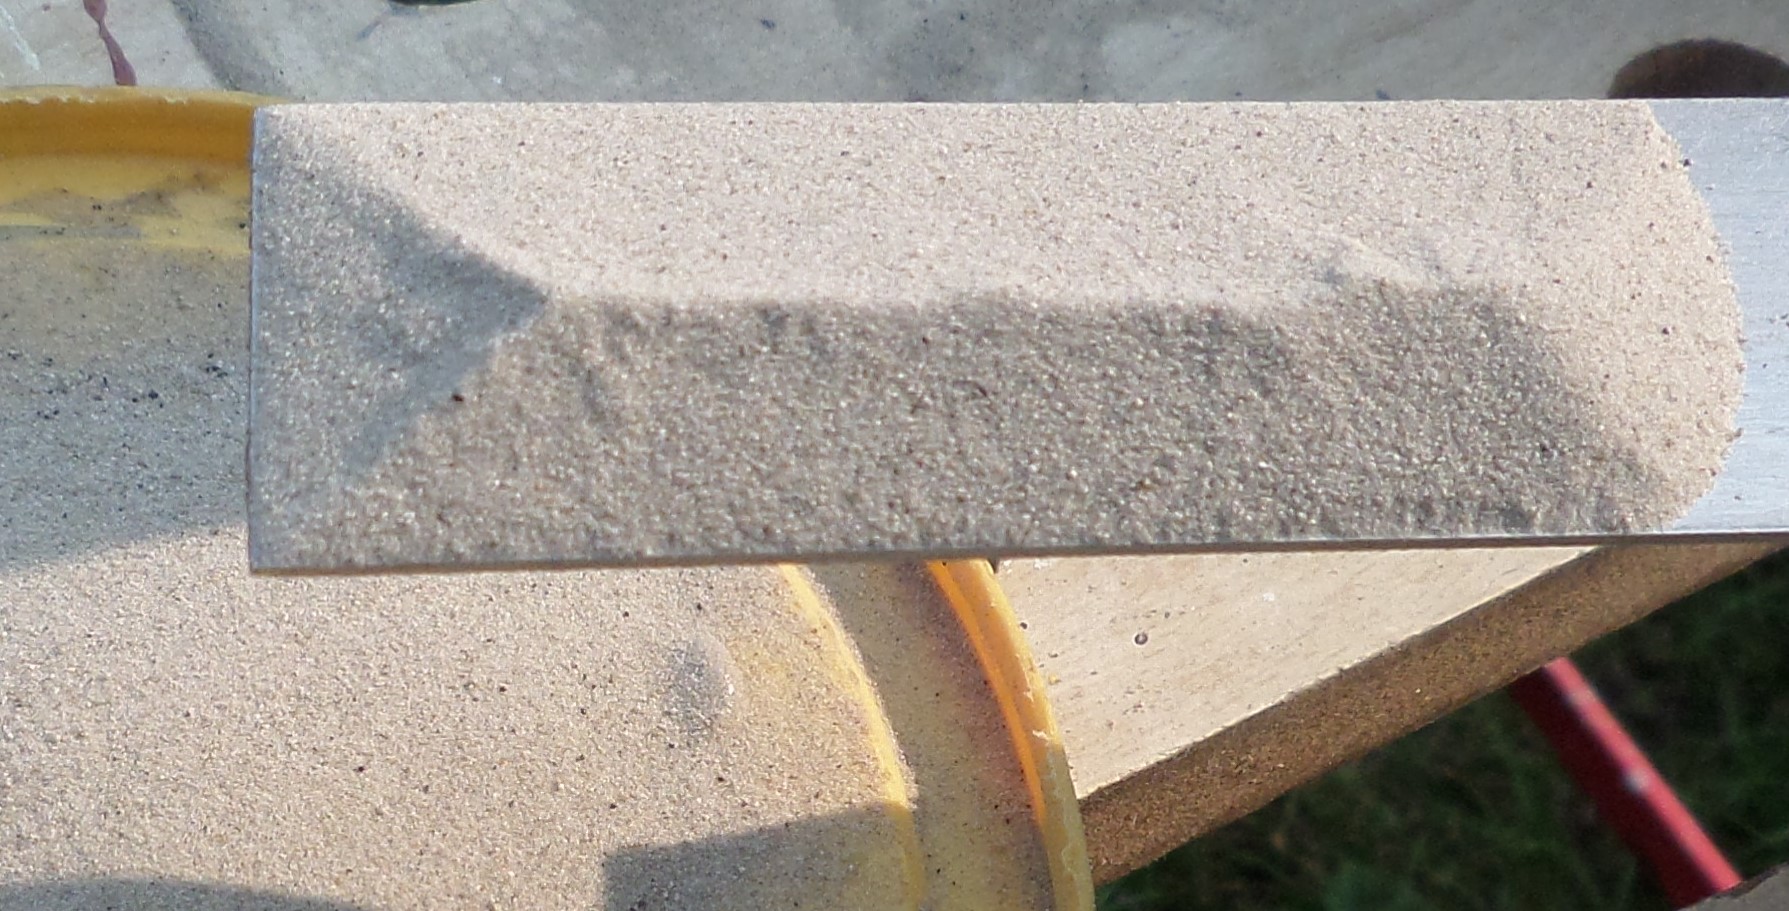 balloons filler is a tiny, hollow sphere that will float. It is interesting to see that when the powder is lifted on a ruler or scraper it will take on a geometric form. Each sphere is like a marble that will perfectly mesh with the spheres below it (see picture left). When mixed with the polyester resin it looks like concrete, but it floats. It may take up to 4 graded applications of filler, followed by the smoothing of each layer, to get a final perfect finish which is then painted. The quality of the finish is proportional to the application. There are special techniques used to try to minimise the work such as ‘combing’ and ‘longboarding’, but they are not needed on flat-panel work.
- The hull is turned the right way up, supported and then, the internal formwork is taken out by removing all the screws.
- After smoothing and fairing if needed, the interior is glassed.
- Internal work is added.
- The deck made in a similar way to the hull can be attached to complete the boat.
 Finish problem
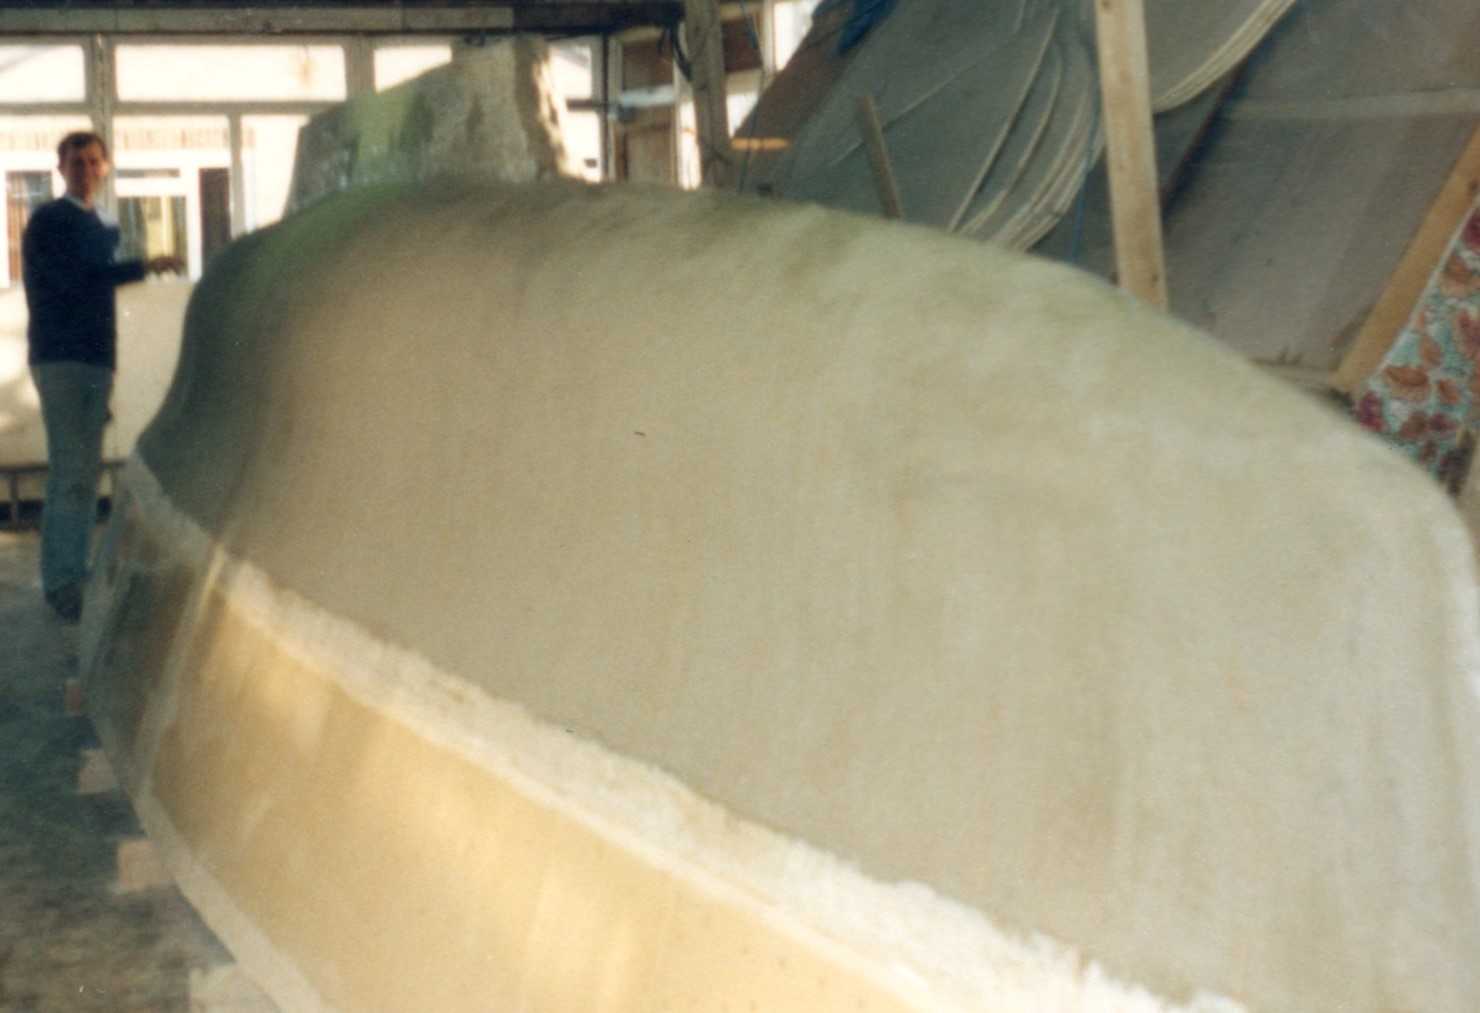
On the right is an upside-down catamaran hull. The top, rounded part has been traditionally finished with micro-balloons filler, but the lower part was constructed using flat panels. Picture. Paul Brown
The old filler-method is straightforward, but probably the most tedious, dusty, dirty, uncomfortable, time-consuming and expensive process. The smoothing of the outside filler requires some skill to get the perfect finish that can be seen on commercially-produced craft. So how was that glossy finish produced on those boats?
Commercial craft
As has been seen, commercial craft are produced in a contact mould. Much work is invested in making a smooth ‘plug’ similar to the process described above. Then the ‘mould’ is taken off the plug. This preliminary work is the expensive part of the process that the amateur is avoiding with flat table. Suffice it to say, the mould is very smooth on the inside. To make a boat hull the first resin layer applied to the inside of the mould is the Gel Coat. This resin will provide the smooth/glossy outside layer of the boat. It has a special quality in that it only truly sets hard when the air is excluded from it. It is not, therefore, possible to paint it onto the outside layer of glass matting on a traditional foam-sandwich boat skin.
It is possible to use waxed resin, sometimes called Flowcoat. Once this resin is spread, the wax rises to the surface and effectively prevents the air from reaching the resin, thus allowing it to set firm. The method is not wholly suited to the constantly-curving and occasional vertical surfaces often found on boat hulls. It would appear that the true, gelcoat method can’t reliably be used on traditional, external foam sandwich, mainly because of this problem of air exclusion.
Gelcoat finish
The process of how get a gel coat finish on the outside of a GRP panel, NOT using the traditional build method – is the flat-table method which will be explained here, in more detail:
- Prepare a polished flat surface
- Mark out the desired panel
- Lay-up the gel coat on the flat surface
- Lay-up the external layers of fibreglass laminate on the gel coat
- Attach the foam
- Apply more fibreglass as the internal skin
When the structure is set, it can be peeled away from the polished surface. It will be rigid and have the smooth, gel-coat finish 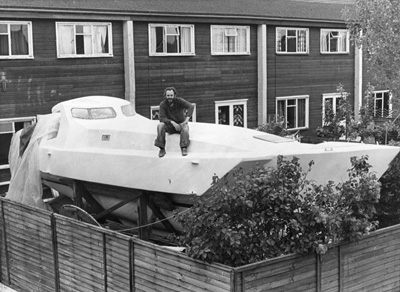 usually seen on the outside of commercially produced boats.
My Boats
The first cruising craft that I constructed used the traditional method of screwing the foam to a wooden former and then, fairing the outside with micro balloons. It was 35ft long and was built in my back garden (see the picture on the right), It also features in the book Serial Starship on this website, relating the story of how we sailed this craft around Britain.
I have also built a 25ft cruiser ' Estuary cruiser' using the flat-table method. These craft are the basis of the explanations here.