GRP Flat-Table Boatbuilding 8
Panel Joints Preparations
The panel shape and size has been worked out.
A foam panel to those overall dimensions has been cut out.
 Small Panels
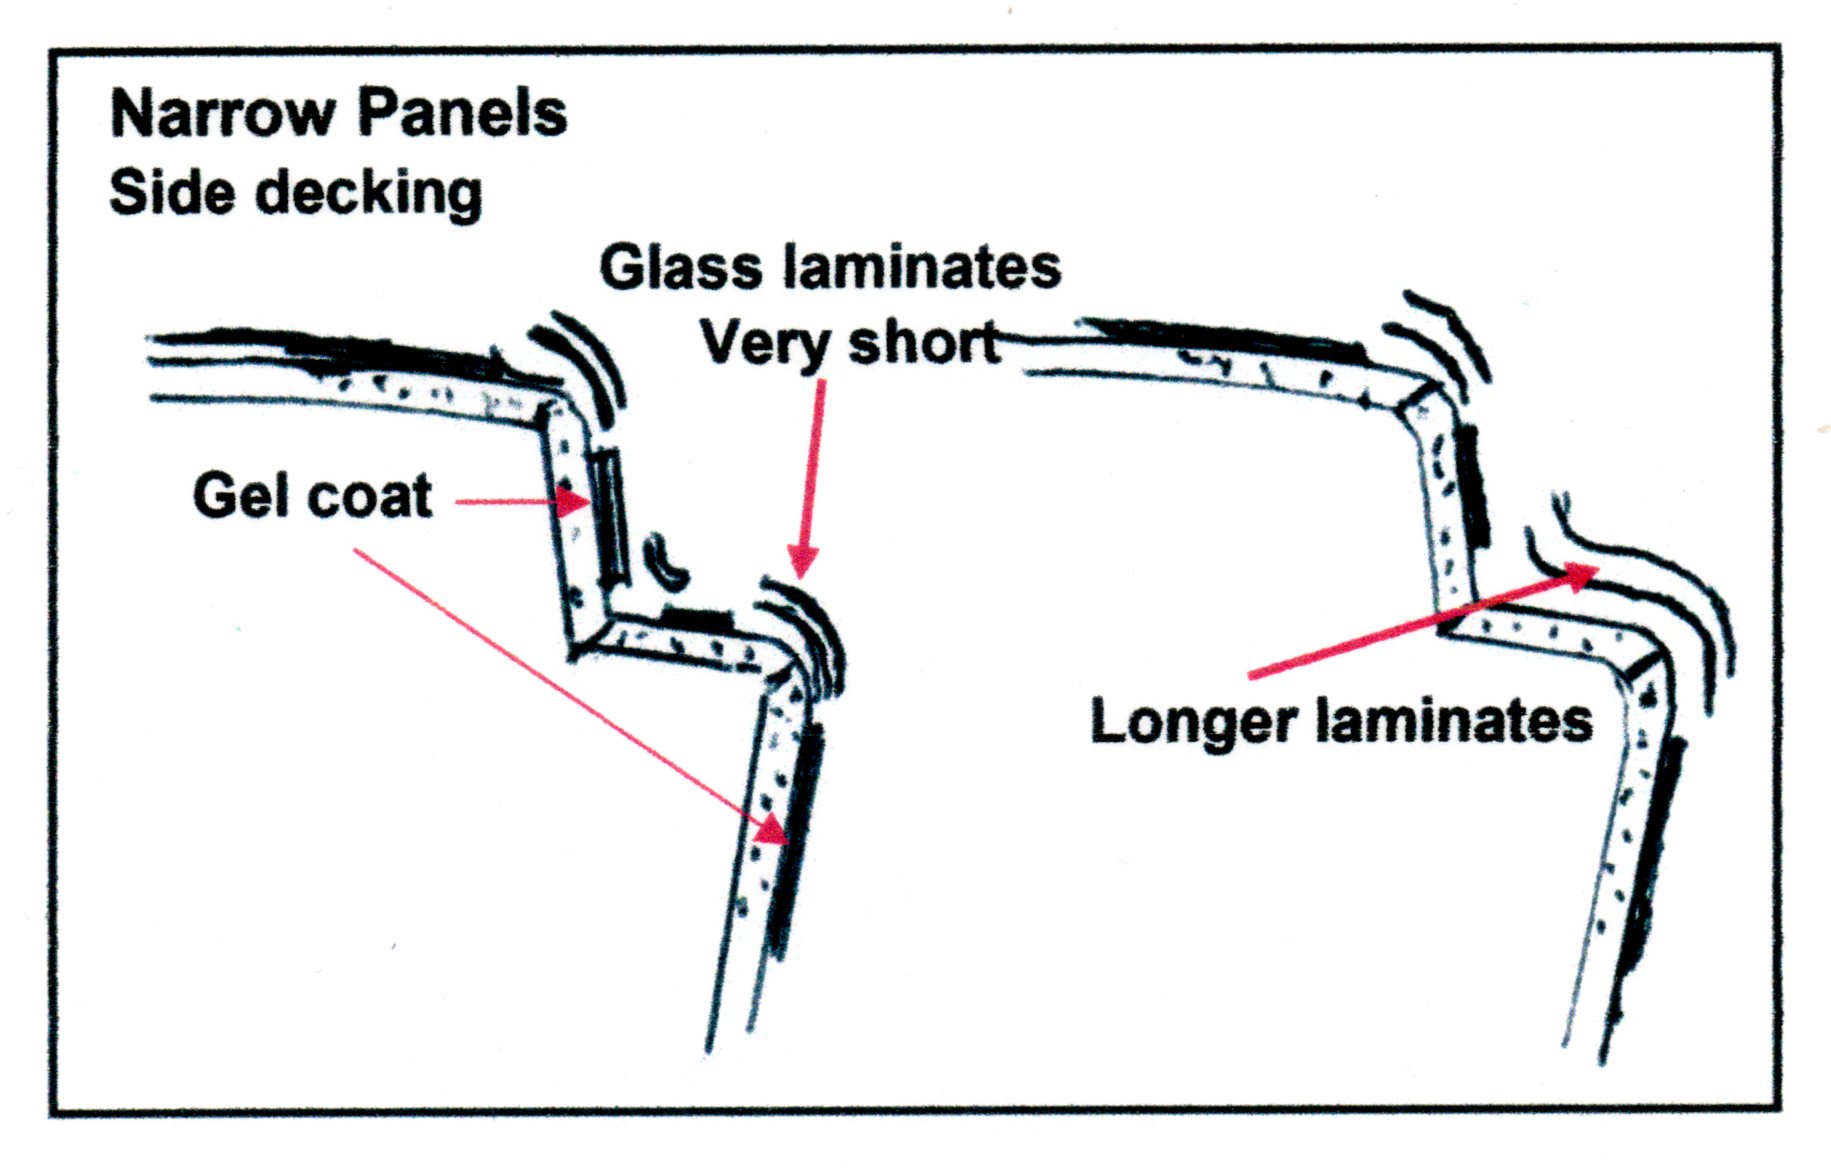
Unless there are special circumstances, if a panel is less than 150mm wide it is hardly worthwhile making a gelcoat facing. An example of this might be if there is a narrow sidedeck between cabin side and topsides of the hull which will involve two narrow attachment-joint lay-ups. The deck may be wider than 150mm, but it will have joints on either side effectively reducing the gelcoat area. The diagrams exaggerate the thickness of the external glass/gelcoat and omit internal glass. In order to get a workable width of seam when joining the panels it is easier just to secure a piece of foam in place, prime it and then apply the external laminate in the traditional manner, as a single lay-up, to be fillered and smoothed in the traditional-build method. This will be quicker and stronger due to the longer glass strands. This assumes that a more advanced, solid-glass laminate is not connecting the foam sections (see Chapter 10).
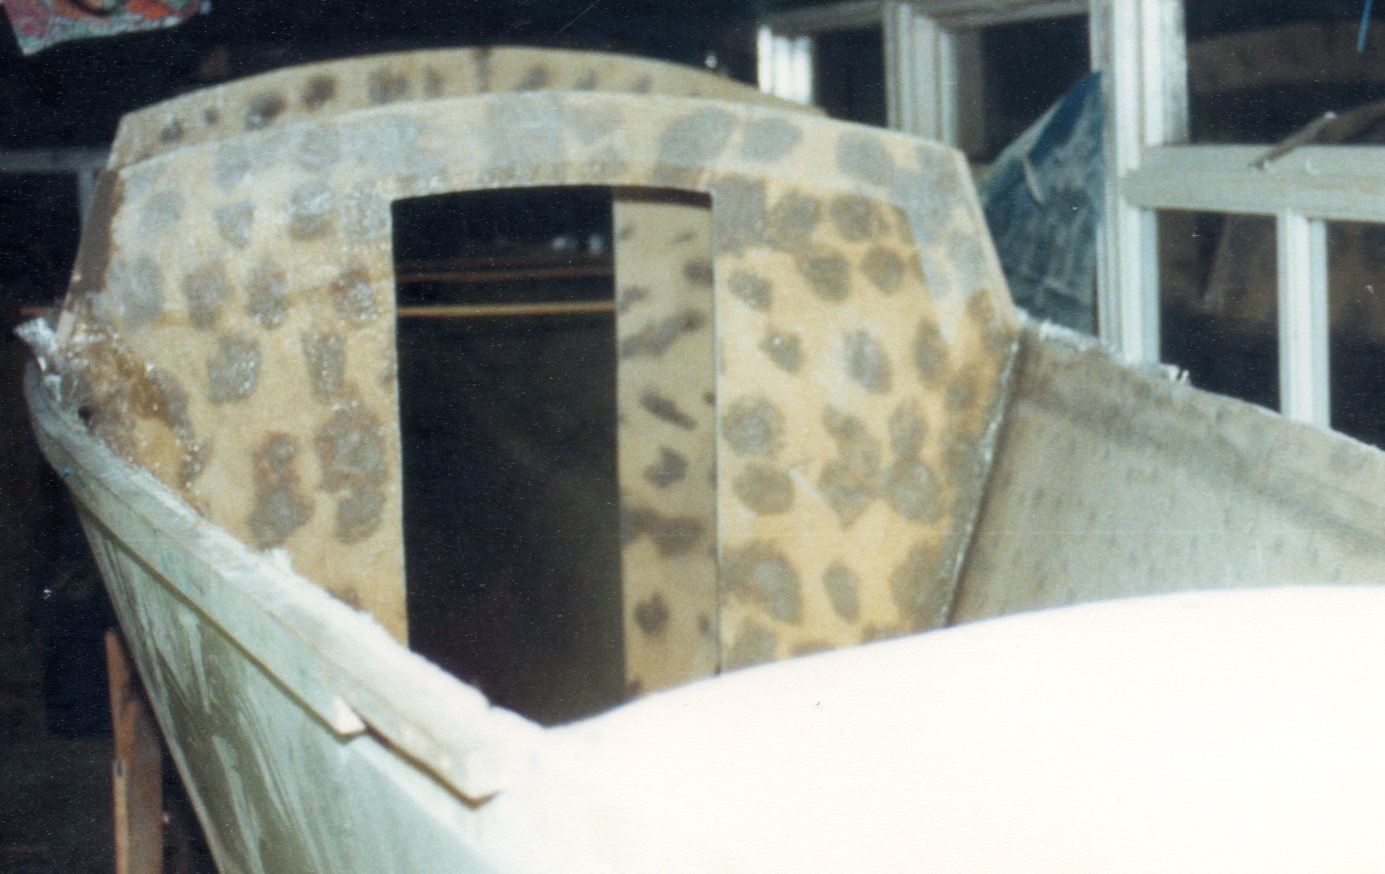
Below. Bulkhead with holes made-good on inside. Picture. Paul Brown
 Trapped air
Later, when the foam is placed on the wet, polyester-resin laminate and vacuum bagged down it will squeeze surplus air out from below it and force a bond by driving resin into the many bubble holes in the under-surface of the foam. It is possible for some air to be trapped below the foam and so this air must have an escape route. To enable this, holes are made through the foam at roughly 100mm (4ins) intervals. The foam is soft enough to make the holes by just pushing a nail through it. Making individual holes is a 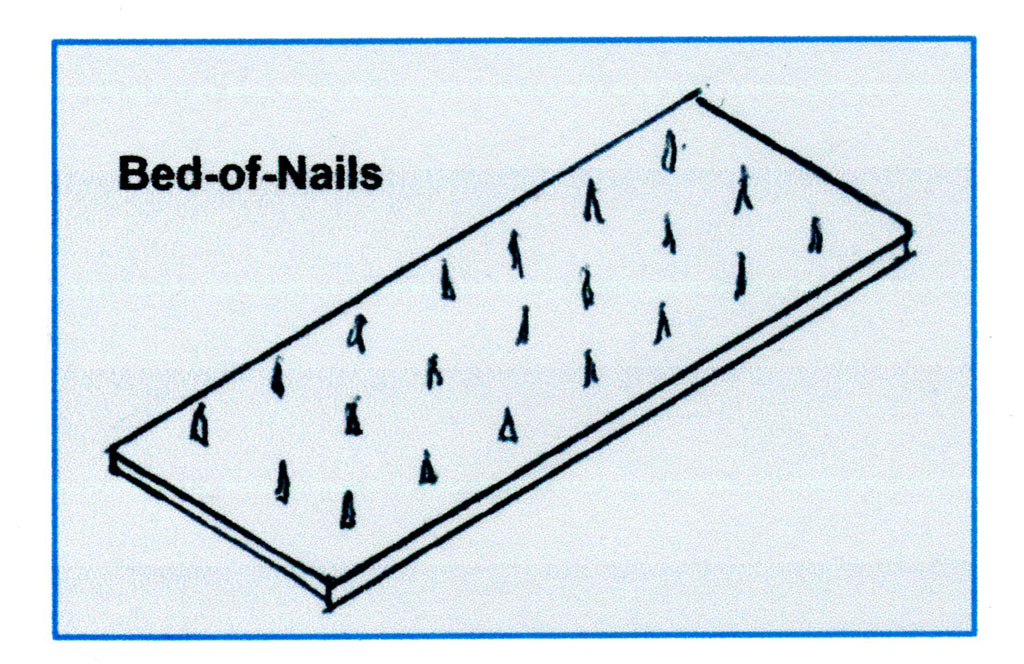 slow process so a bed-of-nails can be made by driving nails through a piece of plywood at the corners of 4"- side (100mm) squares. This can be applied to the foam lying on a soft, wooden surface and tapped down to make the holes. These holes also allow any surplus resin to be squeezed up through them, to come out on the top surface of the foam when it is being bagged (see picture above left). It does not stick to the polythene bag. This is a further method of locking the foam to the laminates on either side of it and linking them together.
For the purpose of easy description in what follows, assume that the panel has straight edges. Many panels will actually have curving shapes, but the treatment of the joints can be arranged in a similar manner to straight edges.
Joint concept
Panels needs a shallow recess along their joining edges on the outside. Two panels can be placed alongside each other and then additional fibreglass can be laid across the joint within the two recesses to bond them together. The fibreglassed joint can then be faired with filler on the outside. The inside of the joint can be bonded with fibreglass and the resulting joint will be as strong, if not stronger than the surrounding material. Panels can be bonded flat – in line with each other, mainly to extend the panel length. More commonly, they are often forming a corner – an angle of various degrees. Just the angled shape will give added strength (see Chapter 2) to the structure. If additional strength is needed it can be applied with extra layers to the inside.
Making the recess
Hardboard is a soft, particle board like Medium Density Fibreboard (MDF) about 2.5mm (⅛ins) thick. It is just the right thickness to form the recess for the joint on the edge of a panel. Cut hardboard strips 75mm (3ins) wide. Mark 2 pencil lines along the length on the smooth side 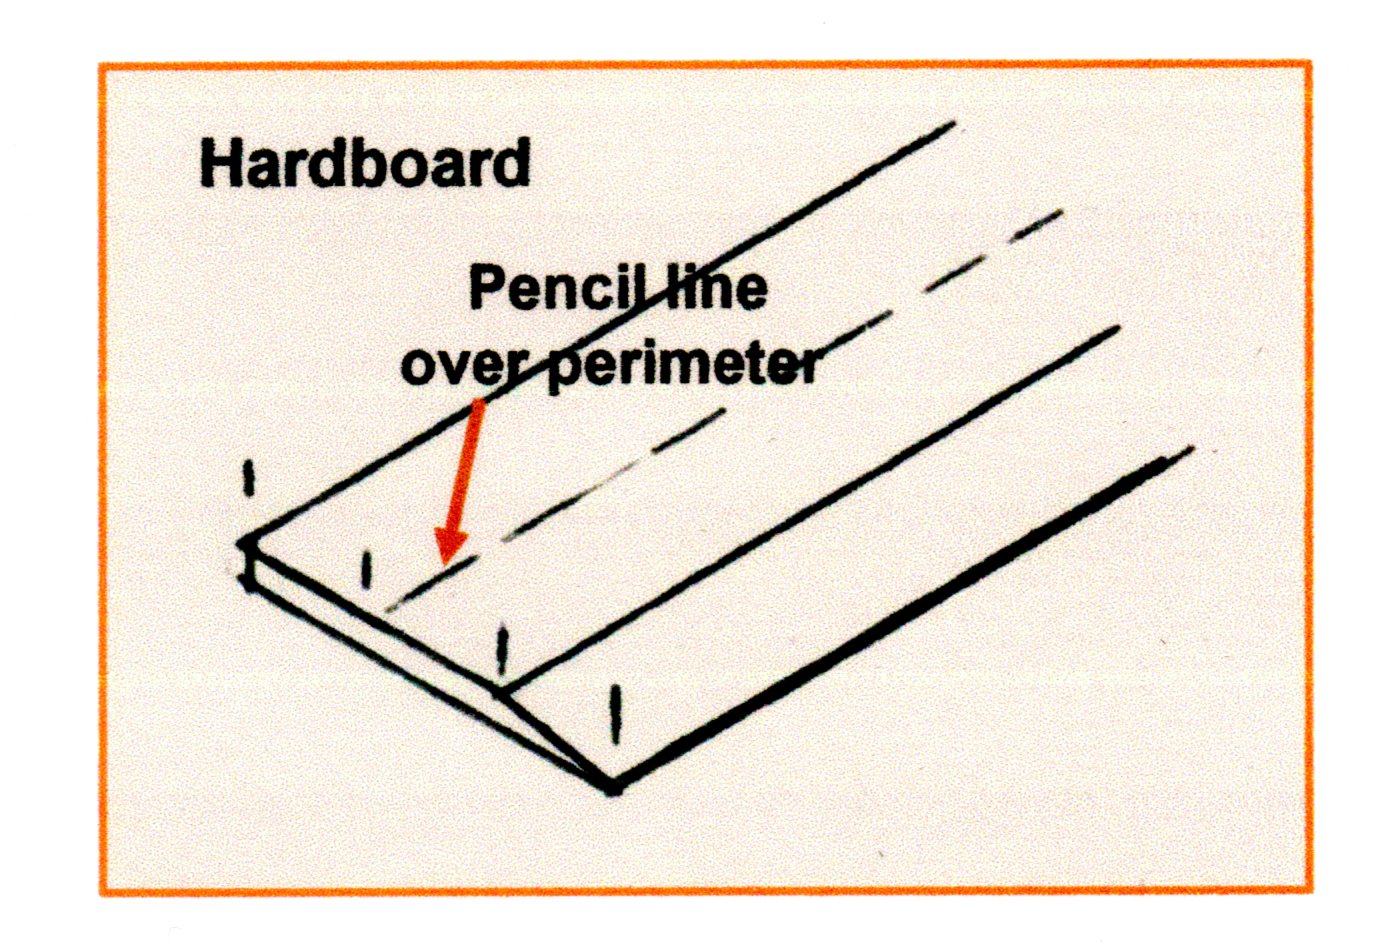 of the strips, 25mm (1ins) inwards from either edge. Plane a taper along one of the marked edges, back to the 25mm line, so that it is not quite a feather edge on the inside. The hardboard strip is going to be secured down onto the table to define the recessed edge of the panel. When the glass is laid on the table it will ride up onto the tapered hardboard and this will create the recess needed around the panel for the joint. To stop the glass from sticking to the hardboard, it will be covered in parcel tape and polished with release wax. The pencil line will be over the perimeter line that will be marked on the table.
Preparing Glass
It is surprising how long it takes to prepare the glass. It is worthwhile making a glass-preparation bench where the rolls of glass can be secured at the end on an ‘axle’. Lengths of glass can be pulled off and cut to size. They can then be rolled up and temporarily tied with a glass roving. Layers of glass do not need to overlap on each other, they can be laid side-by-side.
Treatment of the foam
The edges of the foam panel can be prepared for the joint rebate by marking 50mm (2ins) inwards from its edge where the joint recess is to be made. The marked strip is then cut off with a craft knife and retained.
Further explanations will be given when the total sequence of panel making is described.