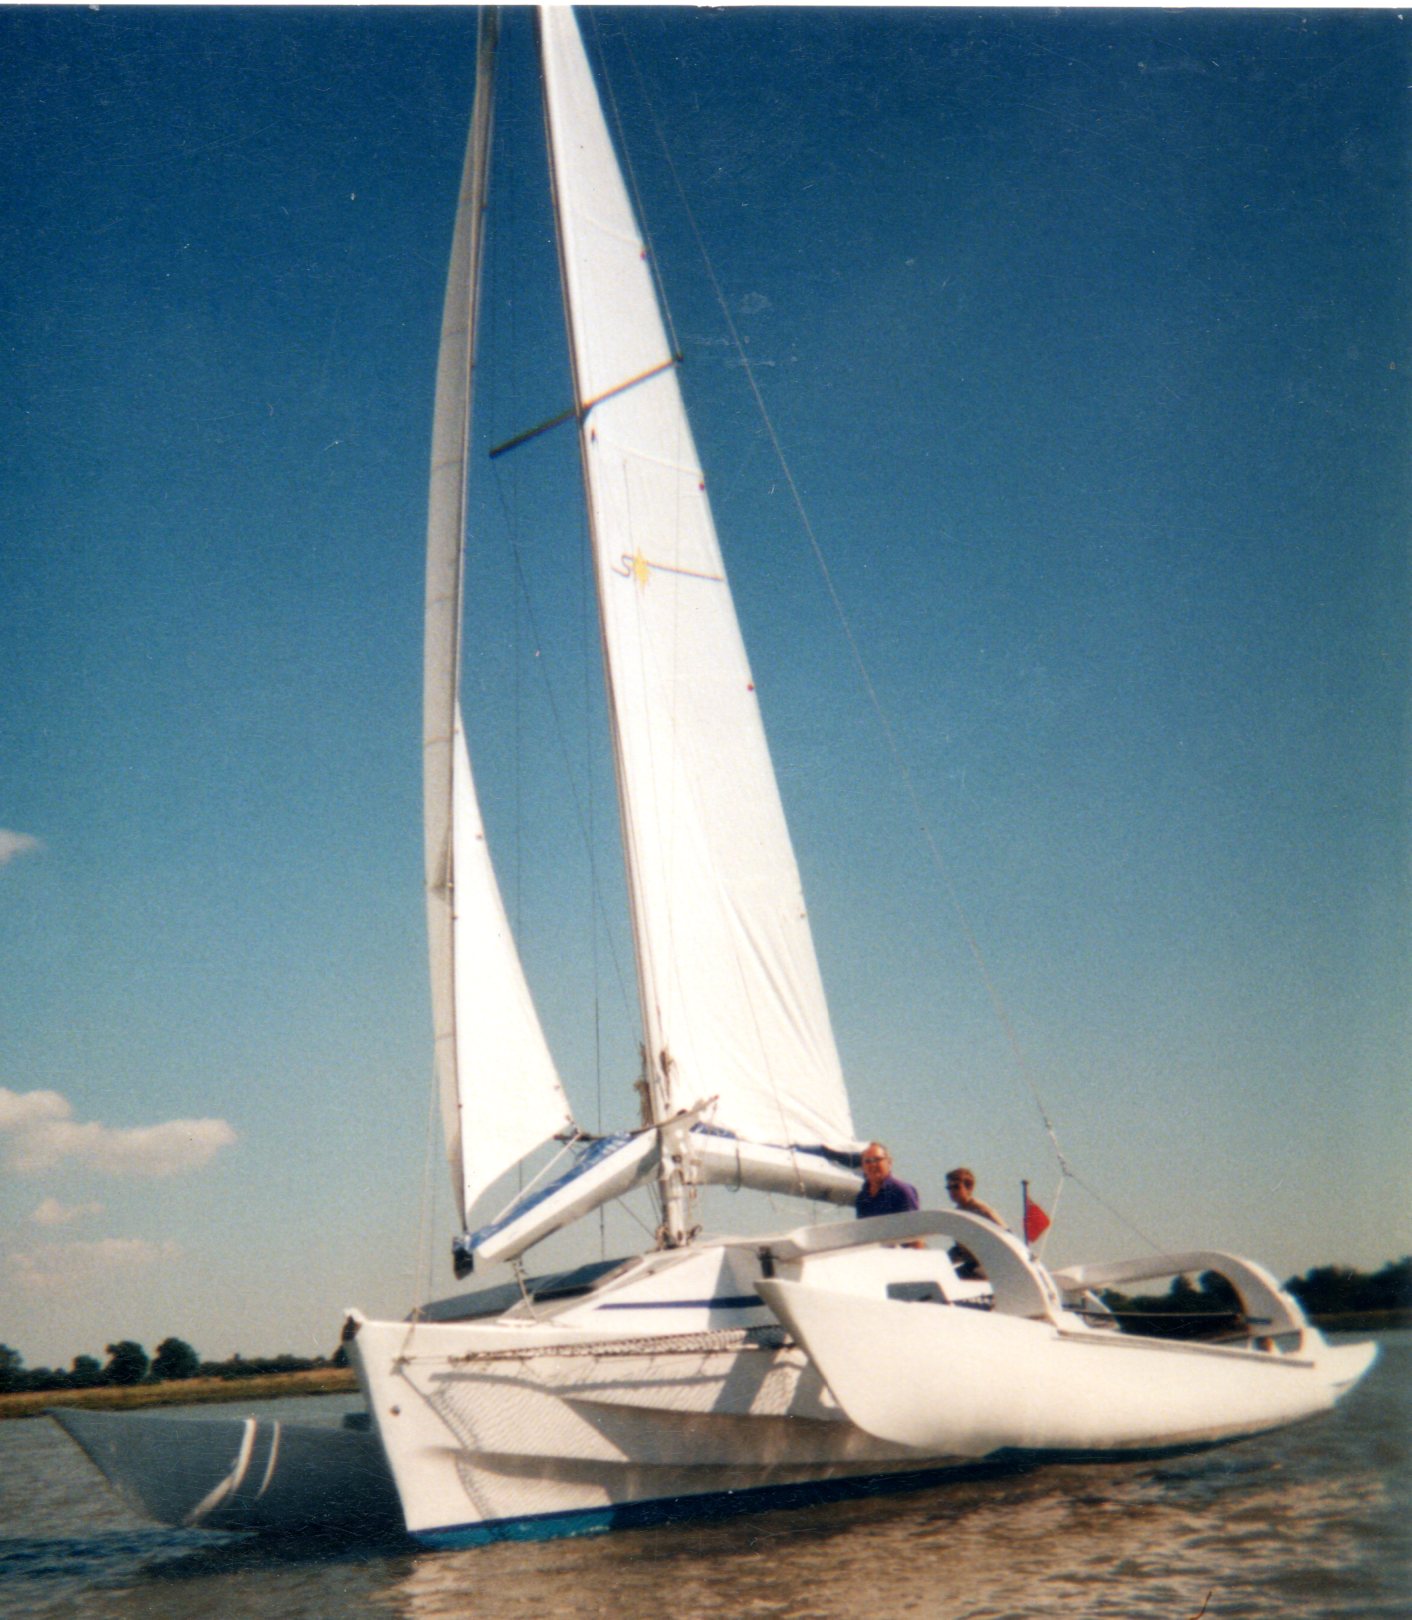
GRP Estuary Cruiser
My Rig
What did I do?
Having read so far, you - the reader, now know more about Swing Rigs than I did when I started. All the magazine explanations you have been reading in the previous section, were written 10 years after I was trying to understand the rig issues. Roger Stollery had written quite a bit of material which comprised the basis of the Yachts and Yachting report, but there are a couple of diagrams that were not included in that review or in the many others which later examined the Hirondelle catamaran after I had sorted things out for my boat. These diagrams show how the forces are not the same as in the Bermuda rig, despite the apparent visual similarity. I think that they are important and so, I reproduce them here and select from his description, because I think that they are essential to beginning to understand the difference in the forces involved. Roger uses the words ‘boom’ and ‘yard’ to indicate the same spar. Of the rig  Roger said:
‘The structure is more different from the conventional than one might imagine at first glance.
Conventional. Traditional.
Consider the mast and the boom. The mast is the bow and the boom is the arrow. The leech and the kicking strap form the string. The tension in the string alters as the wind strength increases and so does the amount of bend in the bow. Any increase in tension in the mainsail leech bends the mast and so slackens the rigging. Pulling down on the mainsheet, bends the mast even more. The forces may even cause the mast to fail.
Swing Rig
The parts change places. The yard becomes the bow and the mast becomes the arrow. The luff of the jib and the leech of the mainsail becomes the string and any bending created by changes in tension in the string is not taken by the mast, but by the yard. The jib luff in the conventional rig complicated the forces, because it was attached to the hull of the craft. Jib luff tension is automatically produced by the leech tension of the mainsail, (with no reference to the hull at all). The bending of the yard is under greater control because the spar is much shorter than the mast and does not have the compressive rigging forces acting upon it. The freely pivoting yard cannot produce any bending moment at the gooseneck. The mast can be unstayed.’
Real life
Reading all the rig’s positive, descriptive words in all the magazine articles makes it all seem so easy. It all works so perfectly – first time, BUT, not so in the real world for me, which was in my back garden and on the water. To extend the boom on a Mirror or Punch dinghy just requires another piece of wood for the jib extension and a couple of bits of plywood to fix it to the boom around the mast - easy. For model boaters to make adjustments to their boats they just lift the boat out of the water – lay it down, cut off a bit of sail or add a piece of string (I simplify) and then try again - easy. Experimenting doesn’t work quite as easily with a rather expensive 33ft mast and the forces produced by associated sails, when the wind begins to blow.
Looking back at the Swing rig, Bow & Arrow diagram, the aim was to try to get tension in the ‘string’, that is, the leech of the main sail and the luff of the jib, but before that, it is necessary to have the ‘yard’ or 'boom' and it has to rotate around the (fixed - for me) mast and the mast is not round. I will run through some of the steps I took in evolving a working system for my rig, which, as has already been mentioned had to have cap shouds, so it could not be unstayed. To try to get some clarity of terms I will use main boom and jib boom when I am referring to them as individual spars and yard when I refer to them as a combined, single unit.
Rotating around the mast
 I tried to make a section of the mast circular by glassing on a section of drainage pipe. This did not work, but I found I could use the pipe to make a stronger glassfibre tube. Almost all of the structure, called the ‘collar’, that I made to go around the mast was constructed in fibreglass. The mast was not circular. The section carrying the collar was rounded by the addition of vertical wooden strips attached to it with machine screws. I drew the mast section on paper full size, drew a circular tube over it and sketched in the various strips needed to make it round, to determine their shape. The strips dissipate the loads up and down the mast rather than concentrating them, as a gooseneck fitting does. In use, the pressures are great and the weakest parts were the machine screws into the aluminium mast wall, but it worked. The strips allow the yard to slide up and down the mast to tension the sails. I did not know Wooden strips on the mast how tight a fit the collar should be on the mast and I still don’t. If the leverage of a jib luff is delivered through a long lever (the jib’s boom) onto the mast it can be appreciated that there will be a considerable force.
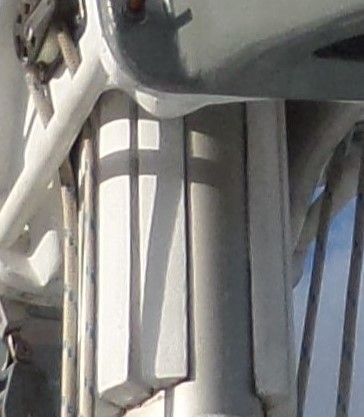
 Tension of the mainsail leech should counterbalance jib luff tension, but it’s not always possible to guarantee this. I opted for a sloppy fit of the collar all round the mast. This wasn’t quite right. It is okay to have a loose fit front and back which will allow the boom to see-saw a bit and reduce leverage forces on the mast, but the sides should be a good fit to reduce the different vertical, twisting movements of the boom produced by going from one tack to another. I corrected this with packing strips inside the sides of the collar tube (see the picture right), to keep it as upright as possible. The sail pressure is always pressing the collar against the mast or mast strips from the sides. To fit this collar onto the mast it has to be slid into place from the foot of the mast, without the booms attached, prior to raising the mast. On my boat I have a halliard exit and cleat below the Elongated oval and internal packing strps collar and these are able to pass through the elongated, internal tube of thecollar when removing it from the mast.
Attaching the booms
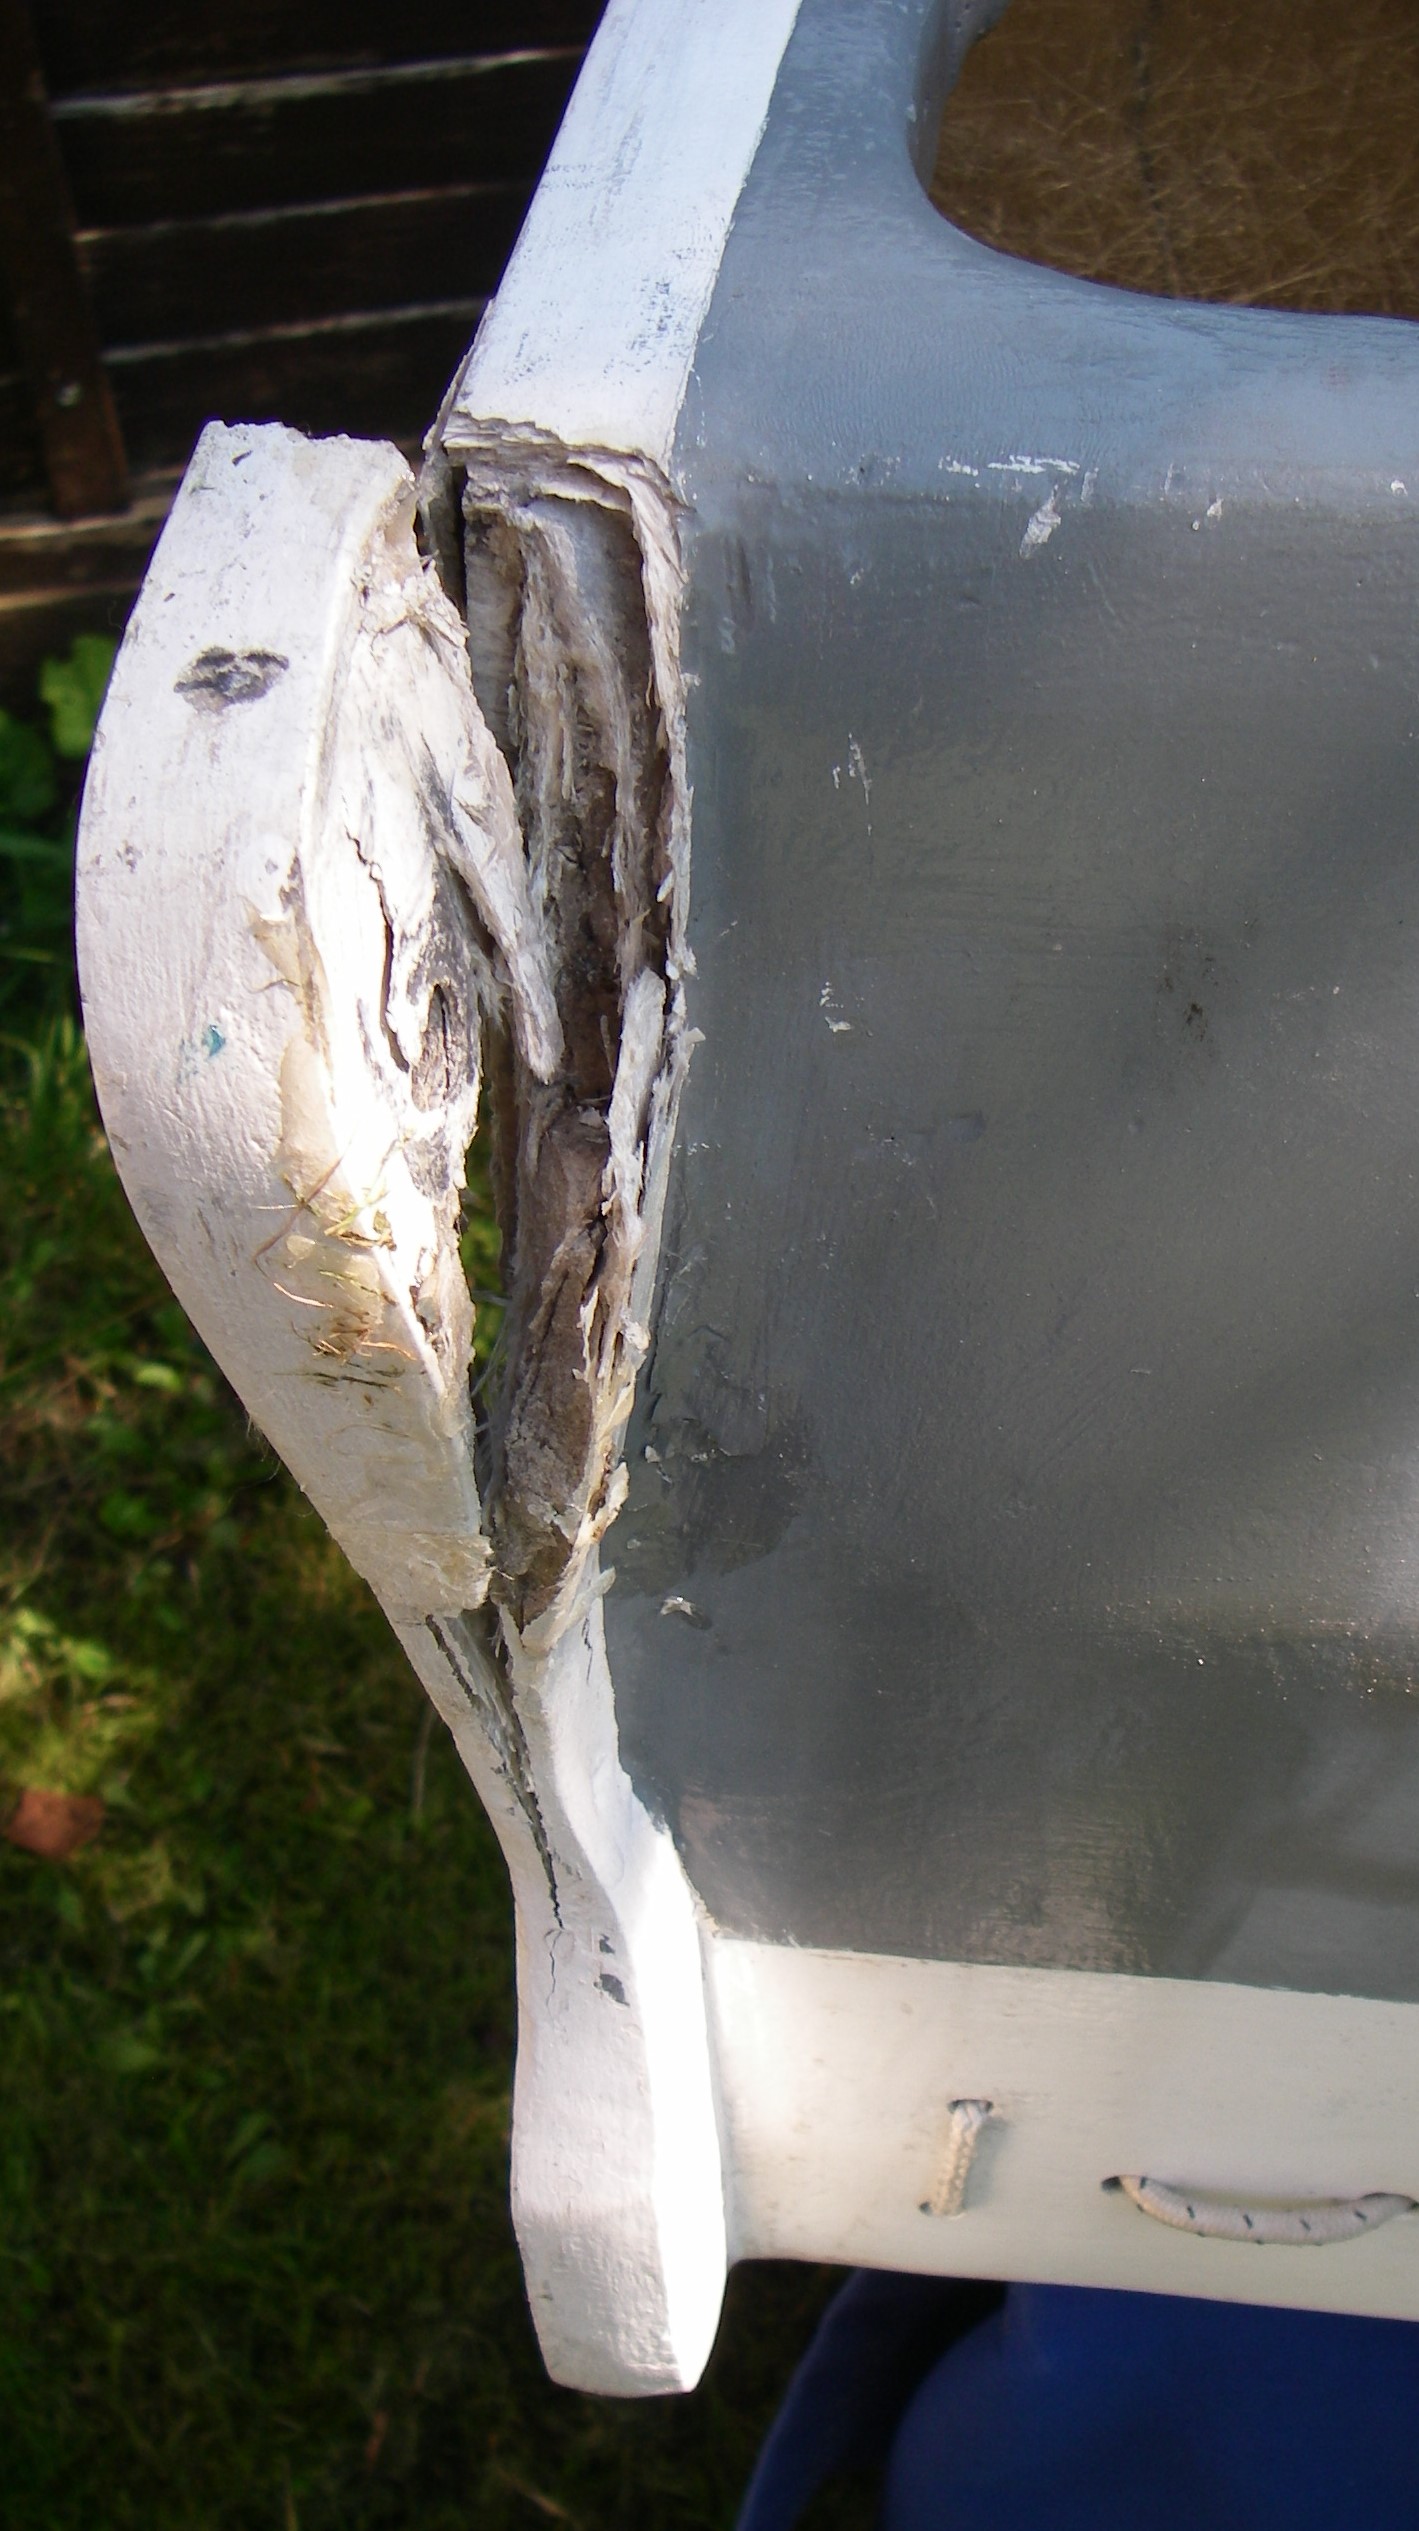 My loose-fitting tube around the mast had been elongated fore and aft into an oblong, with flat lugs for attaching the booms front and back. I then made matching lugs on the two booms. I did this by fixing flat (plywood) contact areas to the two booms and glassed over them. Bolts passing through these contact lugs fastened everything together. I made the mistake of allowing the plywood that produced the lug shapes to remain in the area that the bolts passed through. Plywood could not take the bolt compression
 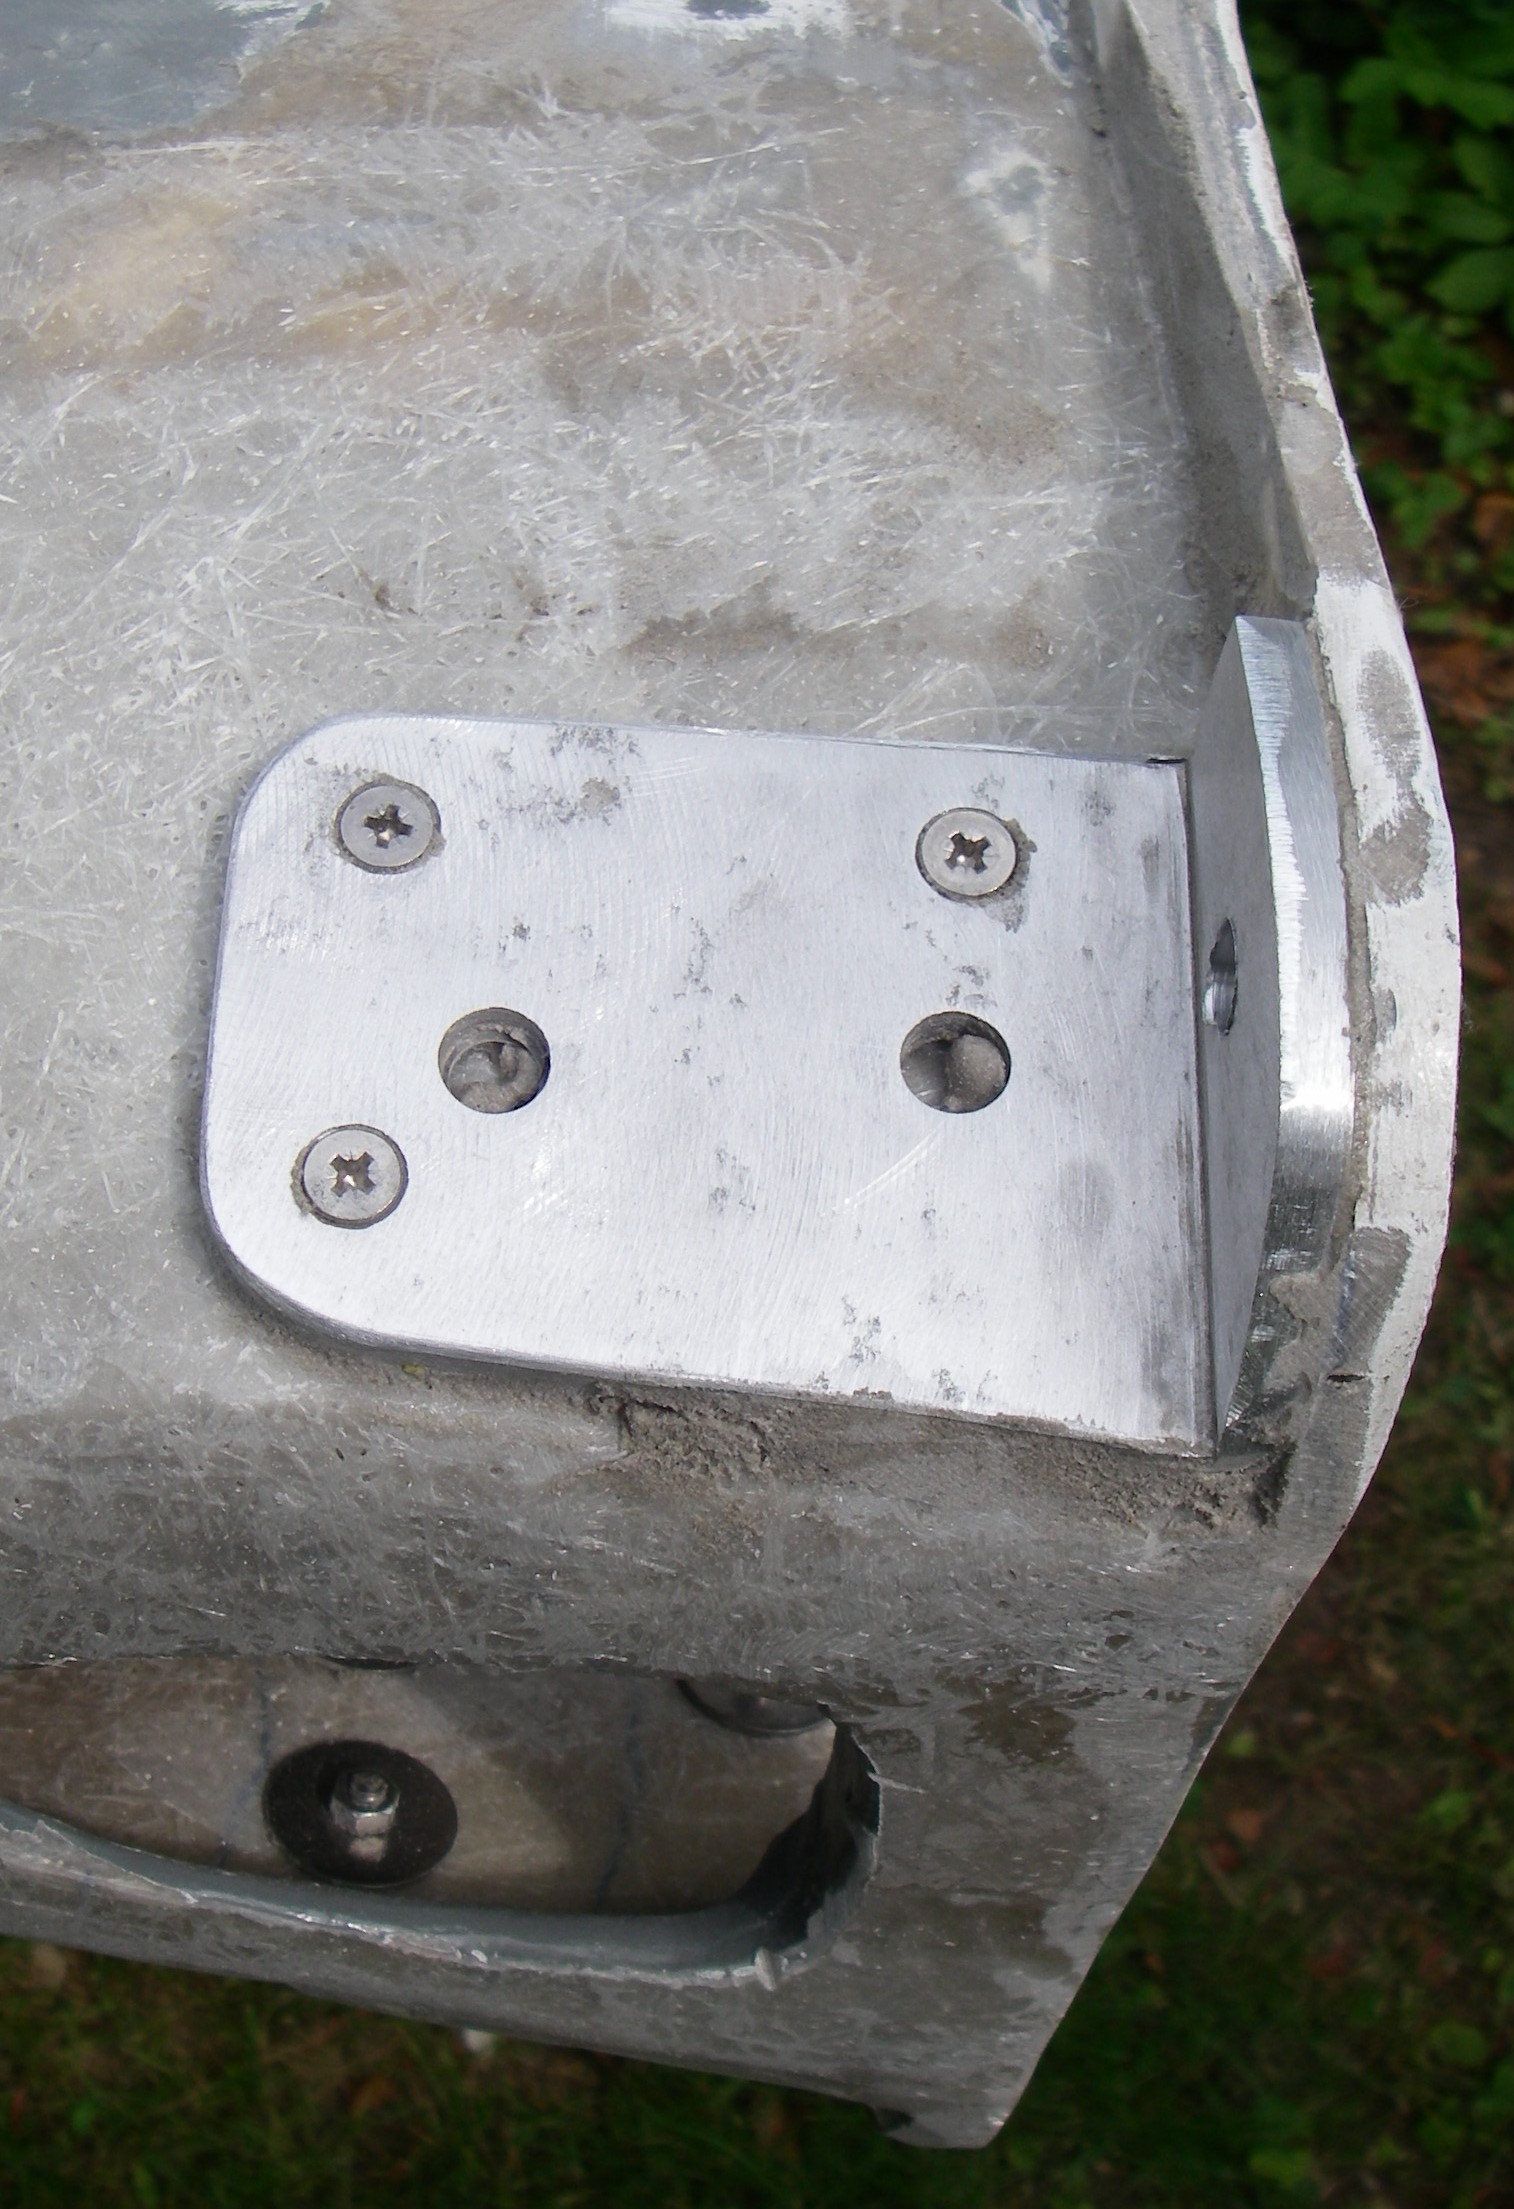 and failed (see picture right) in sailing conditions. Bolts must pass only through solid glass or metal as the loads are great, especially so in the lower lugs. The repair in process (left) used a rebuilt lug backed with aluminium angle, through bolted. A penny washer backing on a bolt can be seen through the access hole in the bottom of the boom, (picture left). This bracket was encapsulated with reinforcing glass laid from the lugs along the boom, being tapered away as the concentrated load was reduced. On the lugs, the glass had to be about 12mm thick as a minimum, which
 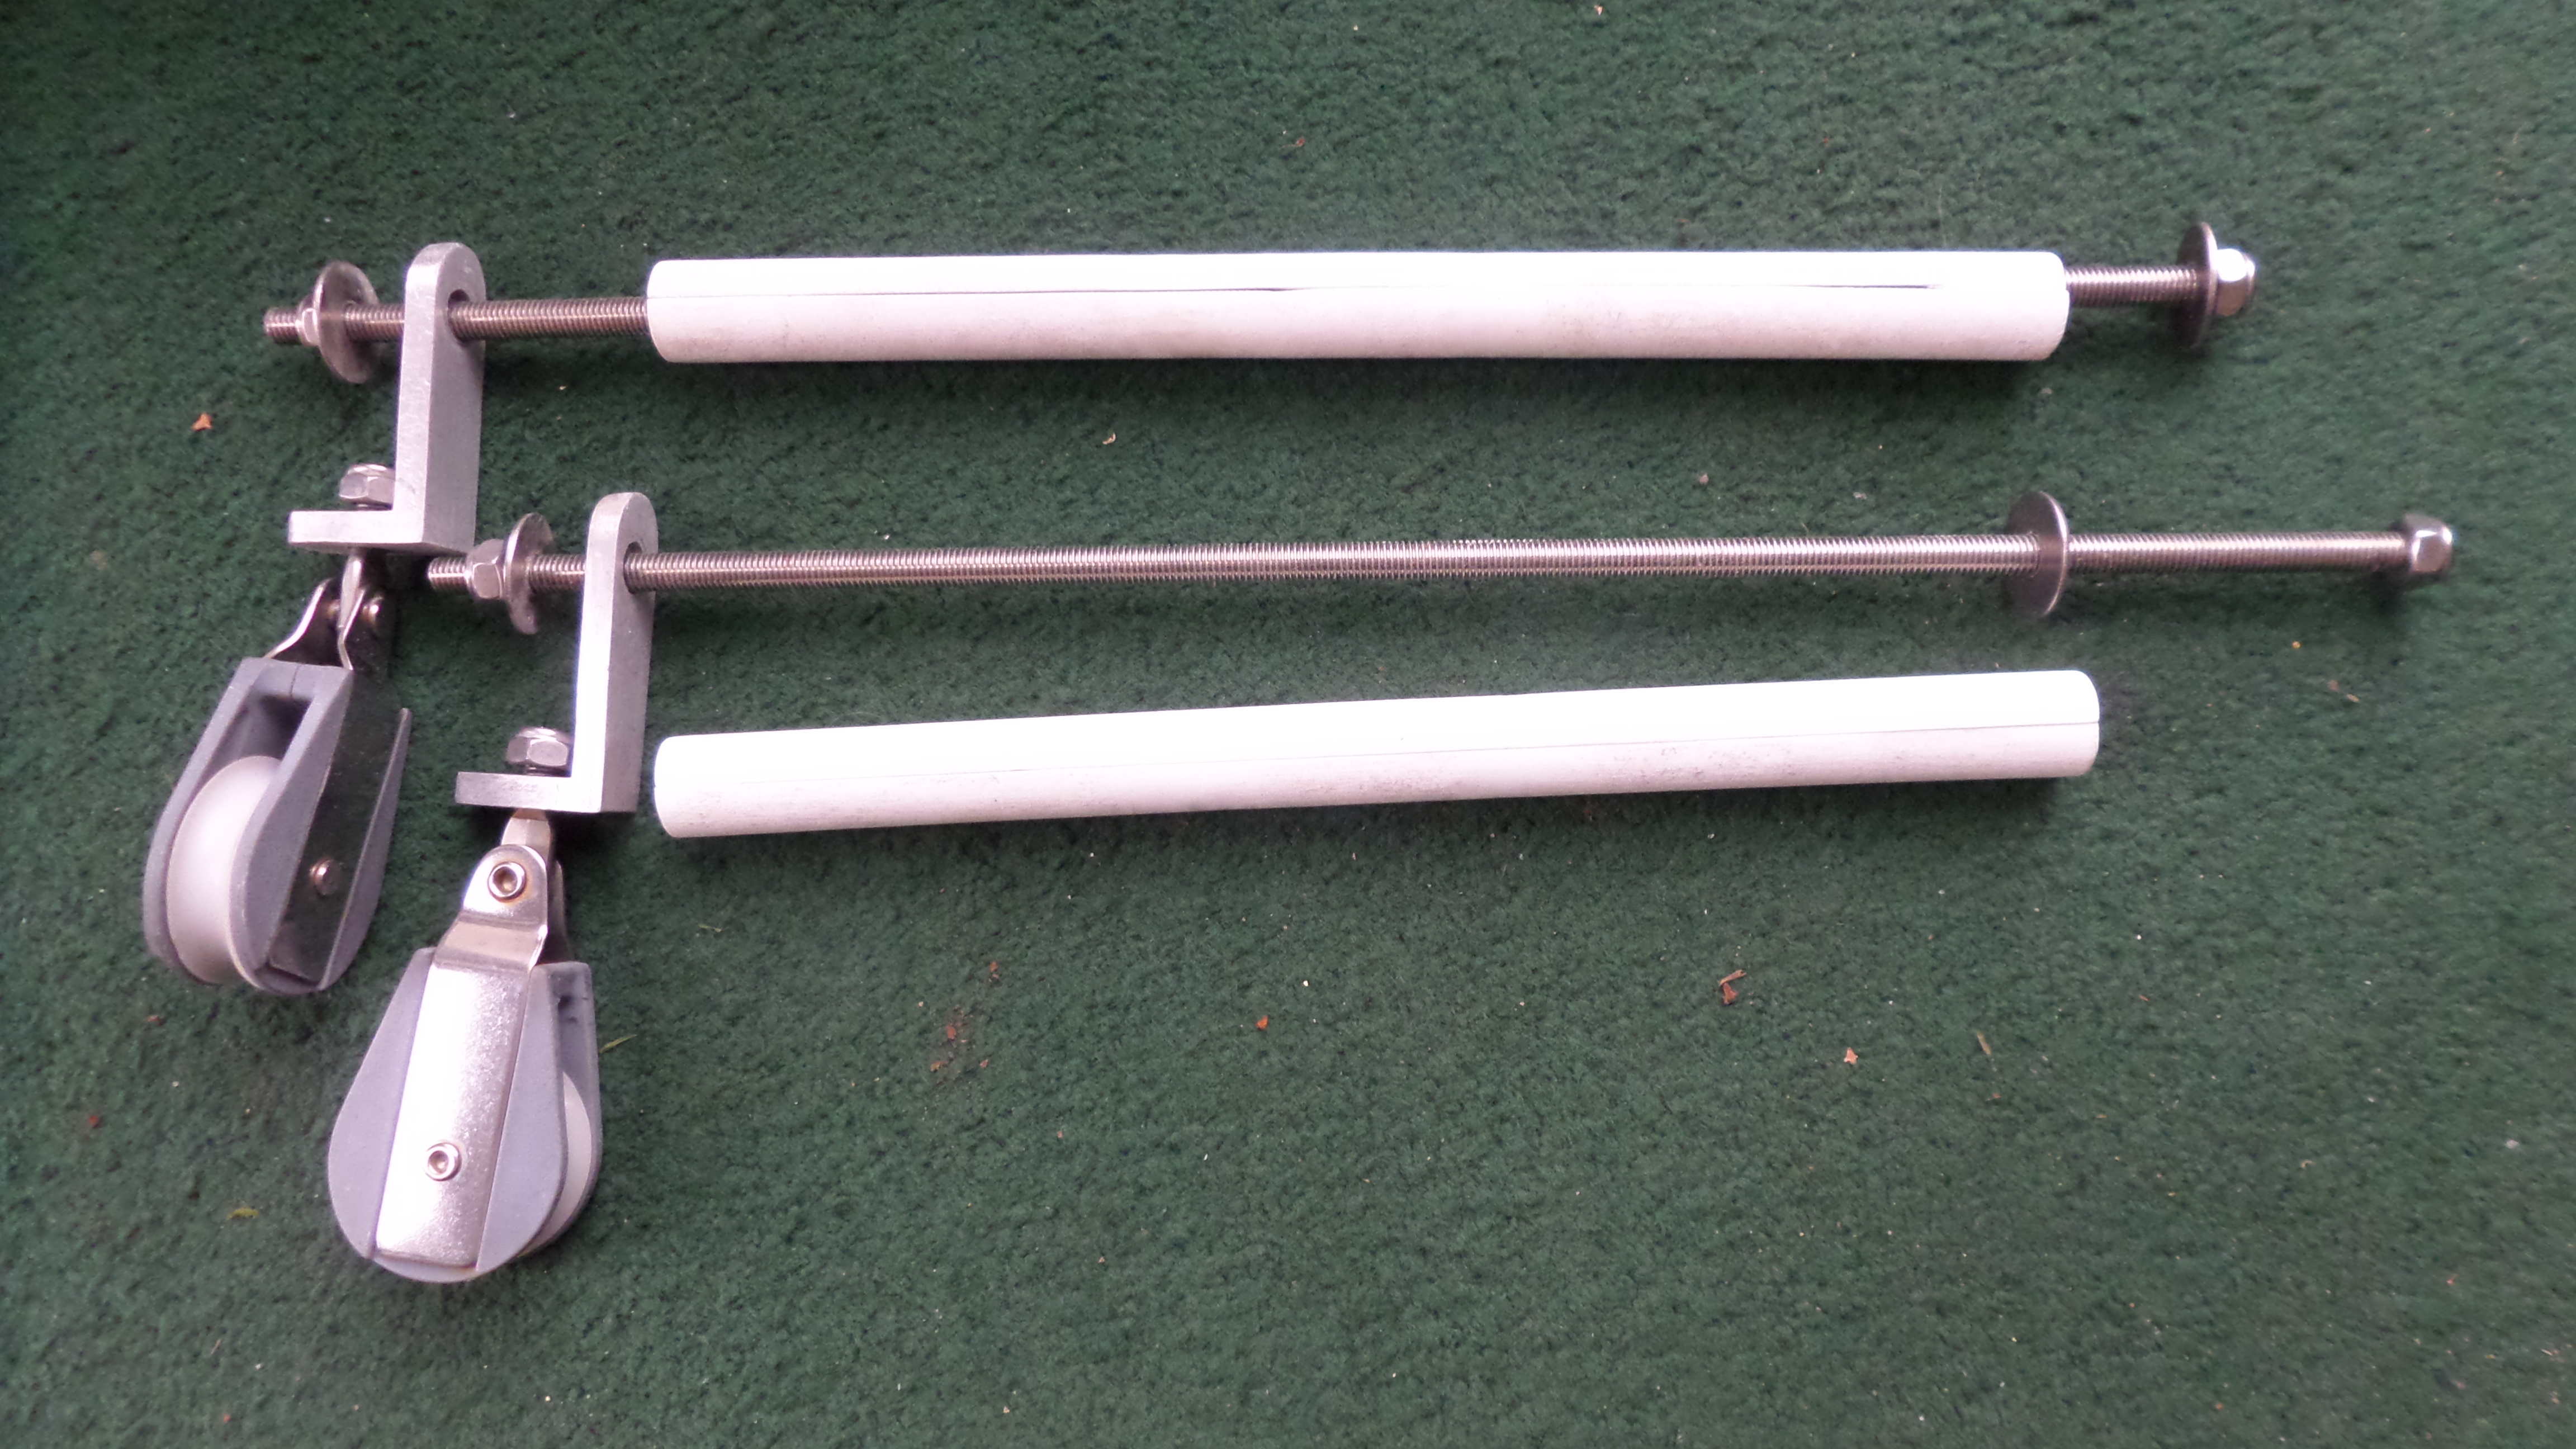 is quite a bit of glass in addtion to the metal. Initially, each boom was bolted to the collar through all of its four contacts, but after careful thought, the bottom two lugs which take the greatest load were secured right across to each other with single rods (studding). The rods carry all the load across the collar from main to jib booms, rather than transferring the load to the collar as individual lower bolts would do. These tension rods (right) are covered in split-plastic, waste-water pipe to protect the yard downhaul lines which contact them. The bottom boom-lugs are under high tension, whilst the upper, bolted ones are being compressed. The pulley blocks are part of the multi-purchase downhaul system.
Self-tacking jib track
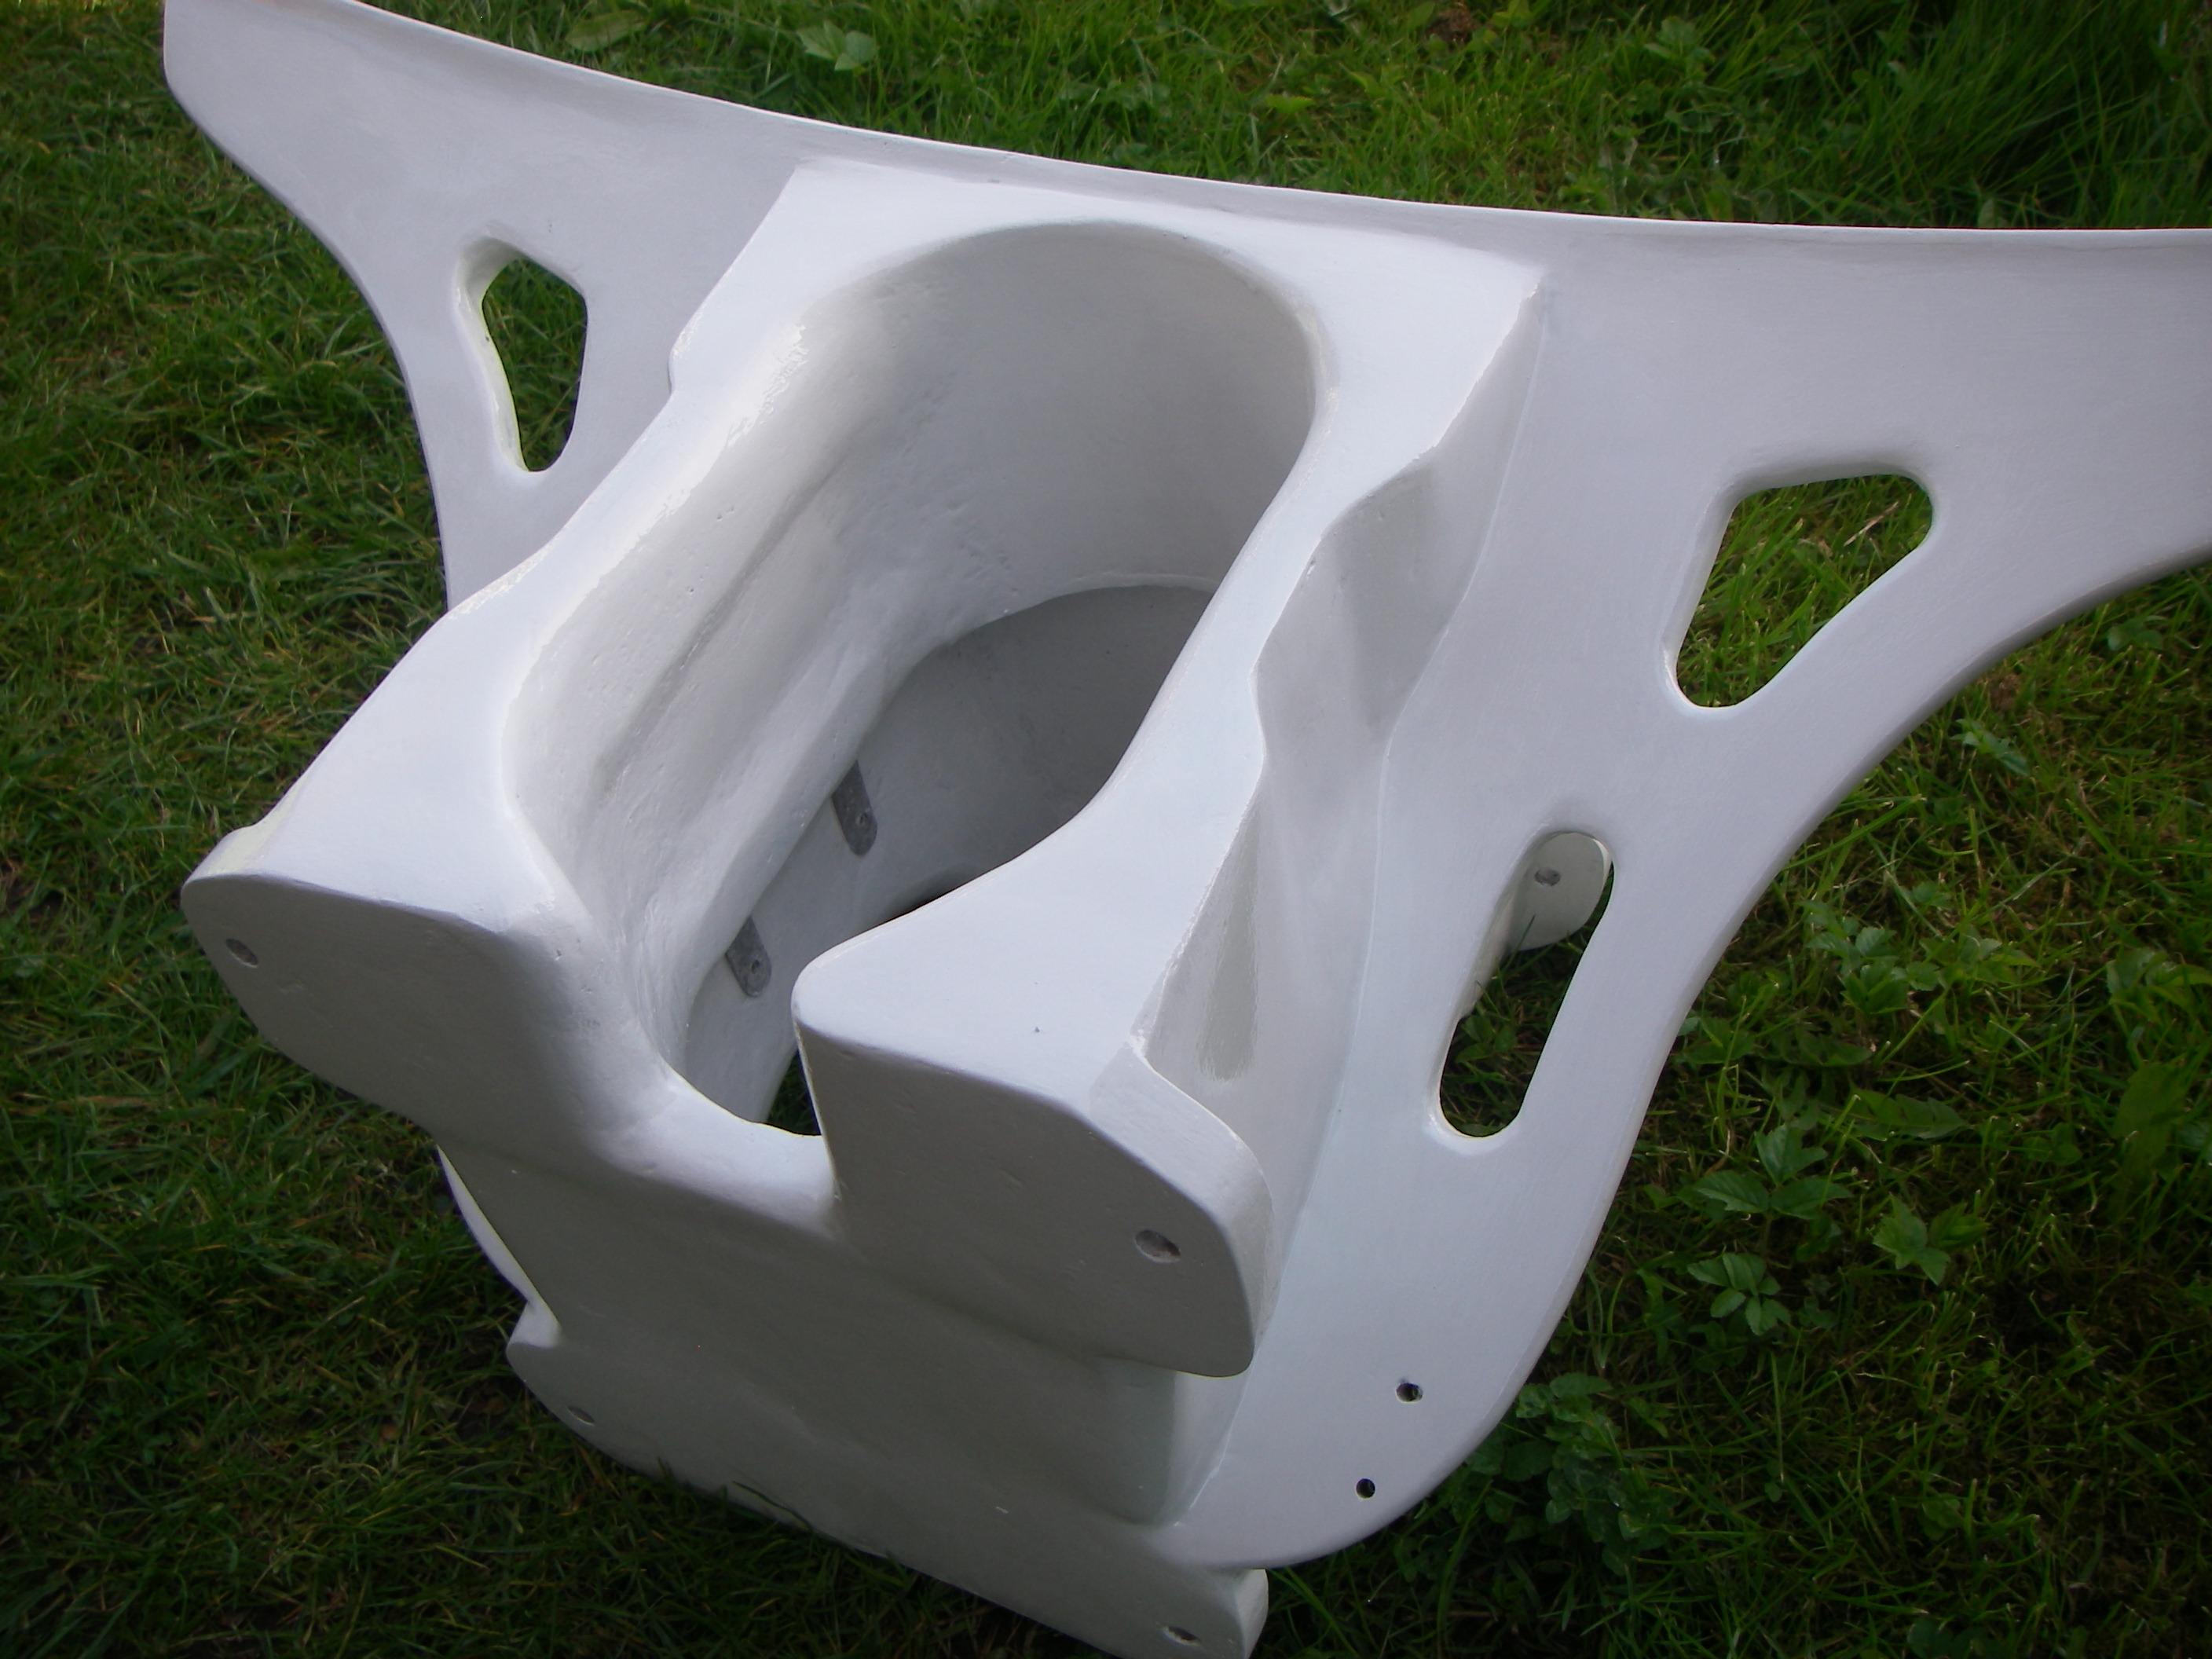
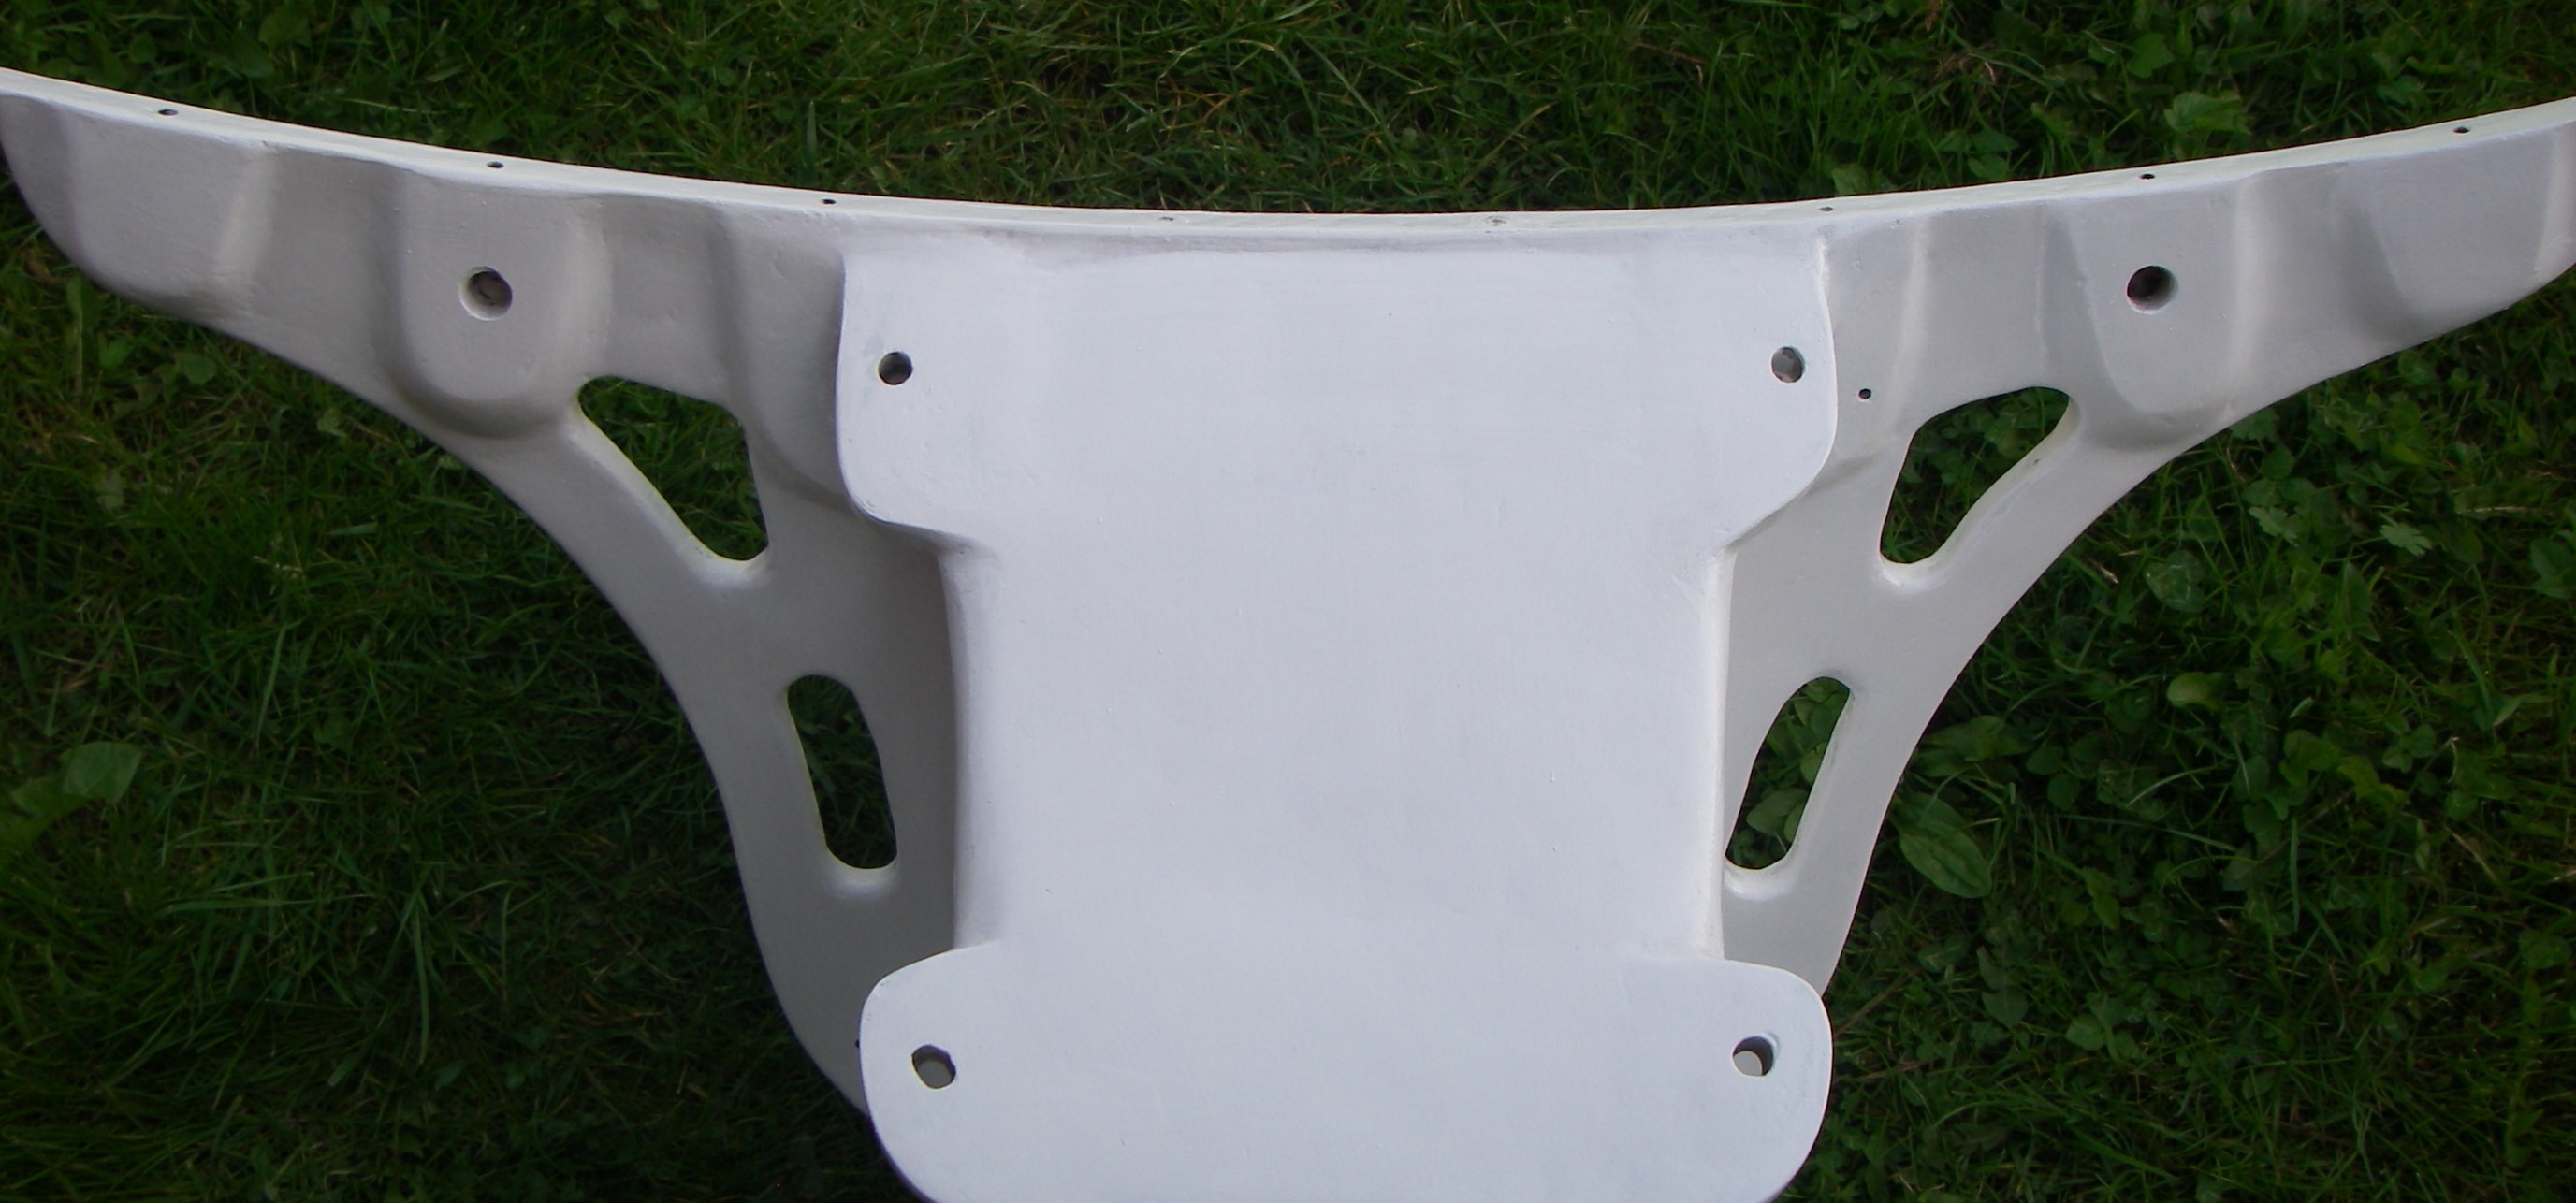
My early experiments used a straight wooden track just to see how the system worked, but it was clear that a curved track was essential. To fit the track it had to be supported, so plywood ‘wings’ reinforced with glass were added to either side of the collar. To reduce the plywood windage more studding stabilises the outer ends of the track (see picture below right). Securing the track to the wings needs bolts and careful planning to secure the nuts on the bolts. Pictures shows the underside of the wings and double thickness for bolting, with round holes for nuts to be inserted on bolts. The large unusual shaped holes are for lifting handles. Below. Complete Collar with track and latch
Downhauling
The simple description of ‘not needing a kicking strap’ with the Aero rig might be accurate, which probably uses a fixed yard and winched halliards for luff tension, but it is a bit misleading for my rig which does not have the 'locked' yard, but one which slides up and down. Instead of the kicking strap a 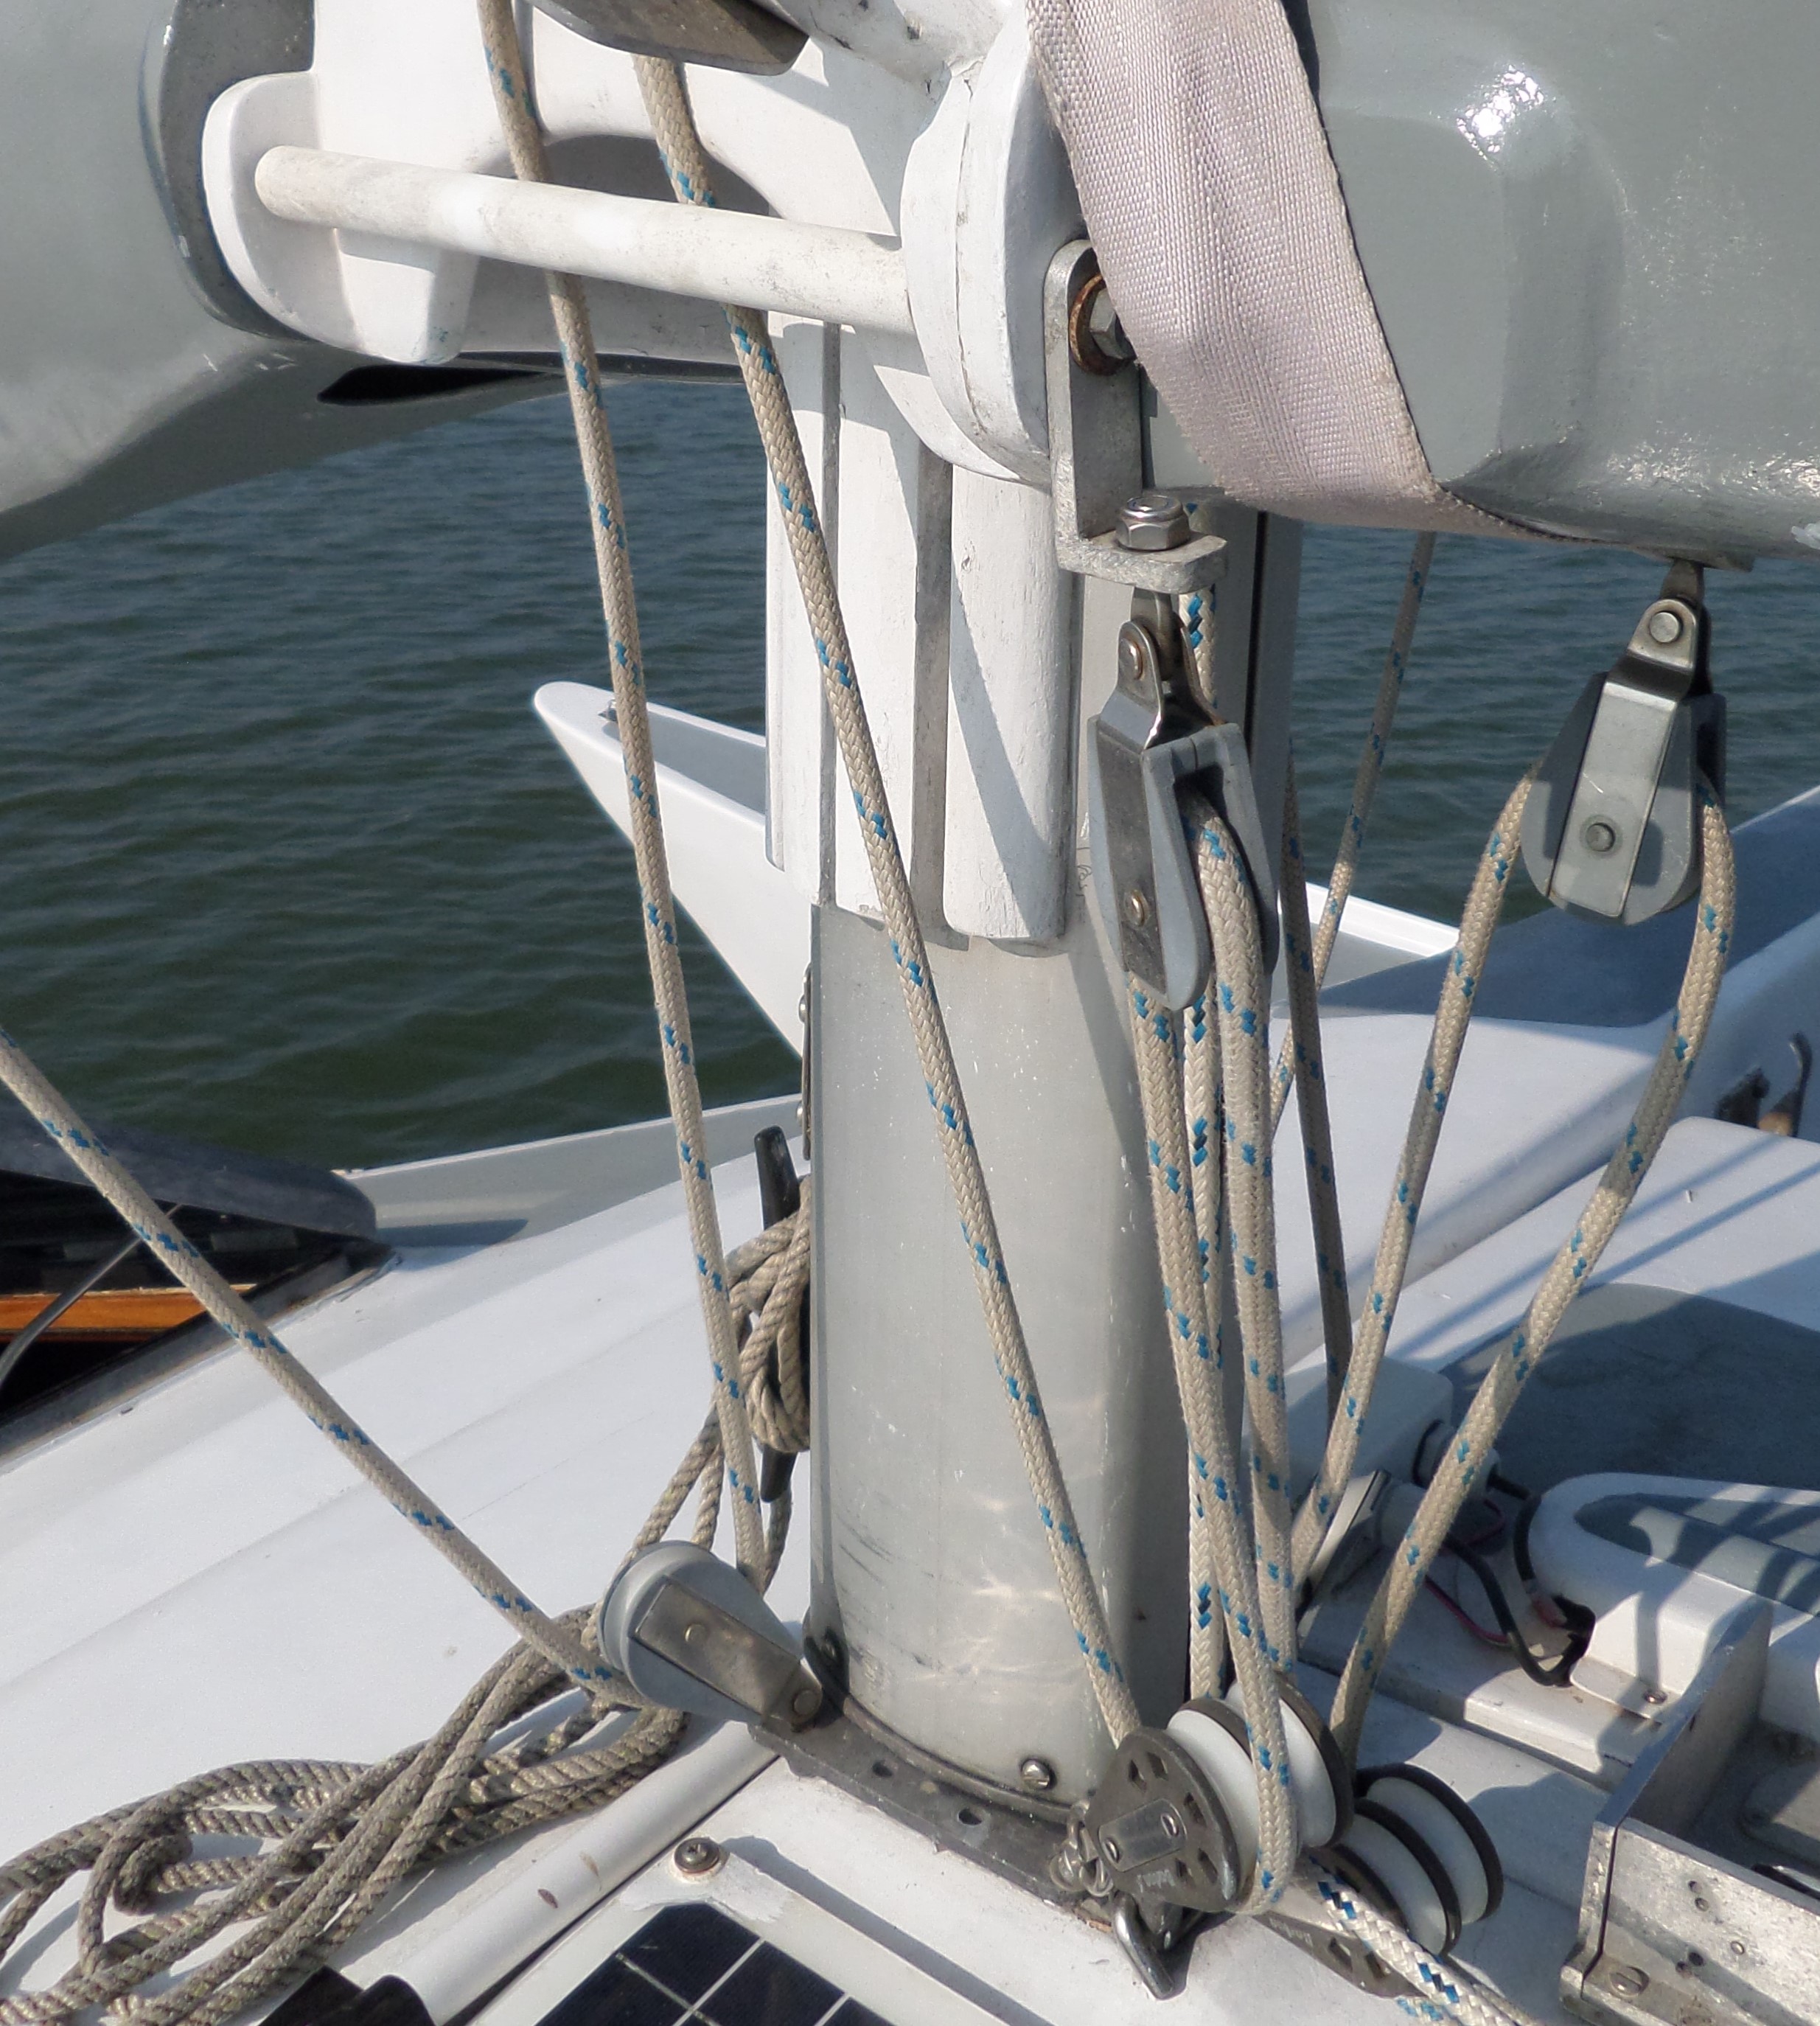 much more powerful down-haul system is needed. The boom/yard has to take the total load of all 4 ‘vertical’ edges of the two sails and that is a lot of strain.
For going to windward in conventional craft: 1. People winch the main luff tight. 2. They winch the jib luff tight. 3. The jib sheets are winched in tight. On the Swing rig using a rotating yard on a fixed mast like mine, all those tight lines get tensioned in one go, right at the beginning of the sail, before leaving the mooring and it is done by downhauling the yard at the mast. This is by means of a many-part purchase similar to the usual mainsheet, but at the mast's base, that has to be winched down. This means that the boom moves up and down on the mast and this must be allowed for when calculating the length of the wooden strips on the mast. It also had to be allowed for in the rigging of the jib’s luff spar which can’t be locked both to the mast at the top and to the jib-boom at the front end.
Aesthetics and efficiency
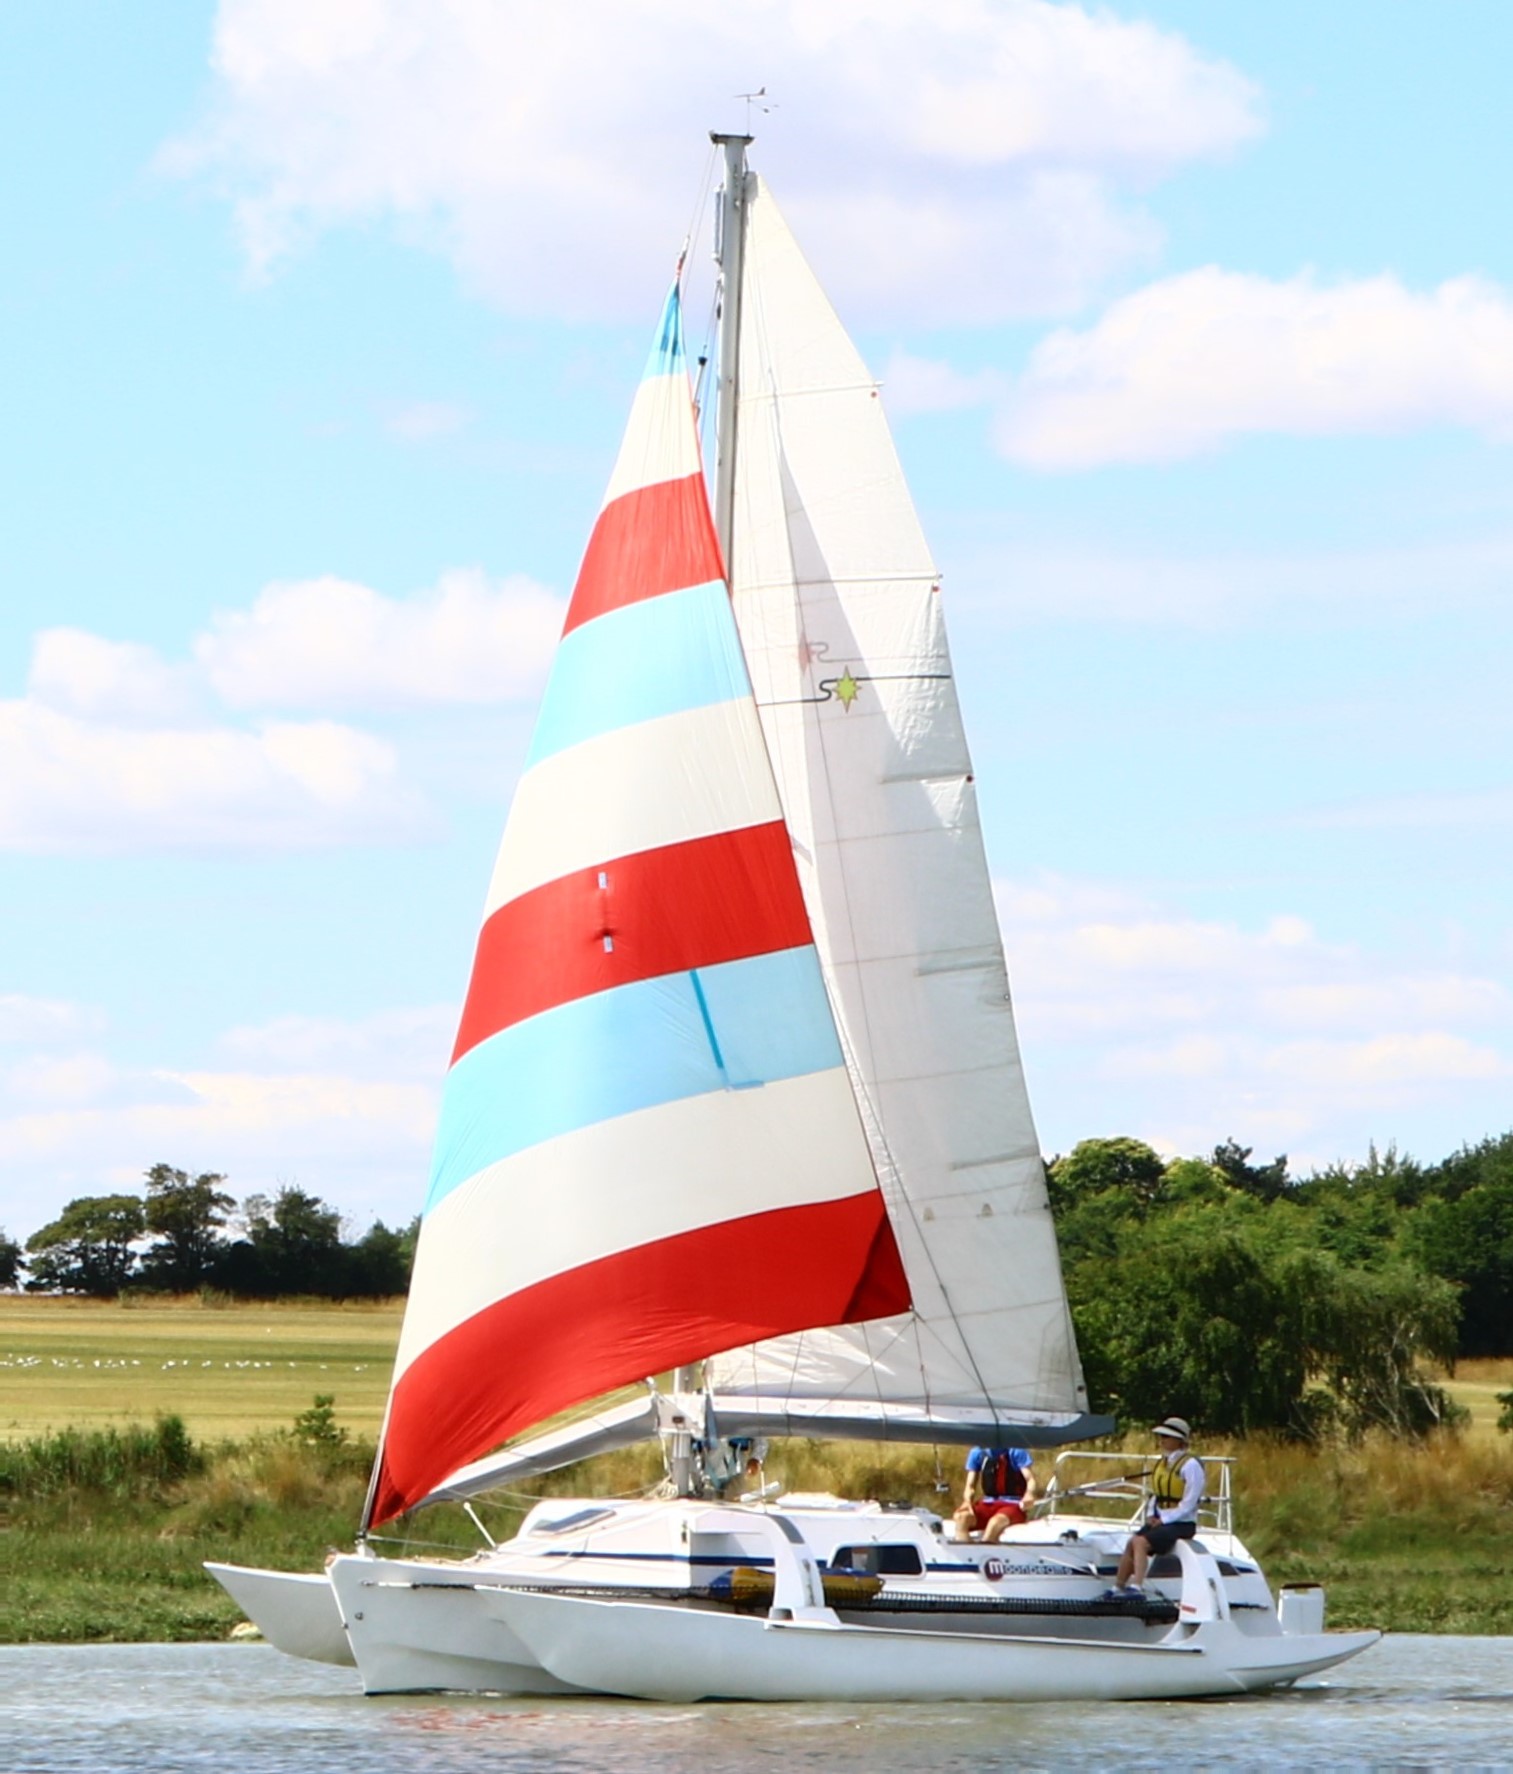
One thing about the usual Swing rig that I did not like, was the way it looked. The straight jib boom sticking out at the front looked odd. It also shortened the luff length of the jib and therefore reduced its power, for it is the luff that does the pulling. I have sailed boats with a ‘yankee’ jib headsail and they have enormous luff length compared with the narrow width of sail from luff to clew. Their actual sail area may be small, but the power they generate is exceptional. I wanted to have the maximum luff length possible on the jib and I wanted to make the rig look more conventional, so I angled the jib boom downwards to make it more parallel to the coachroof line. Aesthetically it removed that ‘clunky’ look and it balances the boom vertically, by having a component below its balance point. I have not seen this on any other craft. This does introduce another lever arm that could twist the boom if the boom was not attached to the boat at the ends, but my craft does use end-boom attachments when going to windward. More about this shortly, as it is not a classic Swing rig feature. My short boat has a short foredeck and the jib boom does obstruct it. Most sailors are accustomed to using the foredeck for passing from one side of the craft to the other, so it takes a little time to get used to it. When the sail is not set it is possible to step over the jib boom. At anchor, if we move the main boom to one side to clear the cockpit it automatically clears the boom from the foredeck.
Development problems
Developing any system takes time and much experimenting. People who sail on the boat may see some feature that they like and may comment on it. I have to explain that they could be looking at the sixth or seventh version of that system, as imperfections in all the previous ones have had to be ironed out. How high should the boom be when setting sail tensions? How much downhaul? No sooner is one problem solved than the instant distractions of ten others get in the way. Where to put the winches? Where to lead the lines? Which side? The clean and orderly version of what is written here and what is about to follow was not the reality of the process. To test any system, it had to be made strong enough in all its parts to be able to sail with it. This was expensive on hardware and time.
The Jib luff
I started with a conventional rig on the boat as I didn’t know whether I could develop the Swing rig successfully. It is still possible to rig the boat conventionally. The jib hanked onto a conventional forestay attached to the hull and was hoisted via its halliard from the mast. Then I tried to hoist the jib attached to the yard. The yard could not have a fixed ‘forestay’ as it moves up and down to tension the sails. Hoisting or lowering the jib ‘flying’ (unsecured to a stay) was a recipe for disaster, as it flogged in any wind strength. It was likely to toss me overboard or beat the rig to pieces. This was a problem of ‘scale’. Model boaters have no problem with fitting and raising their tiny, model sails, but even for my 25footer, it was positively dangerous trying to hoist an unstayed sail in a weight of wind. The jib had to be hoisted up 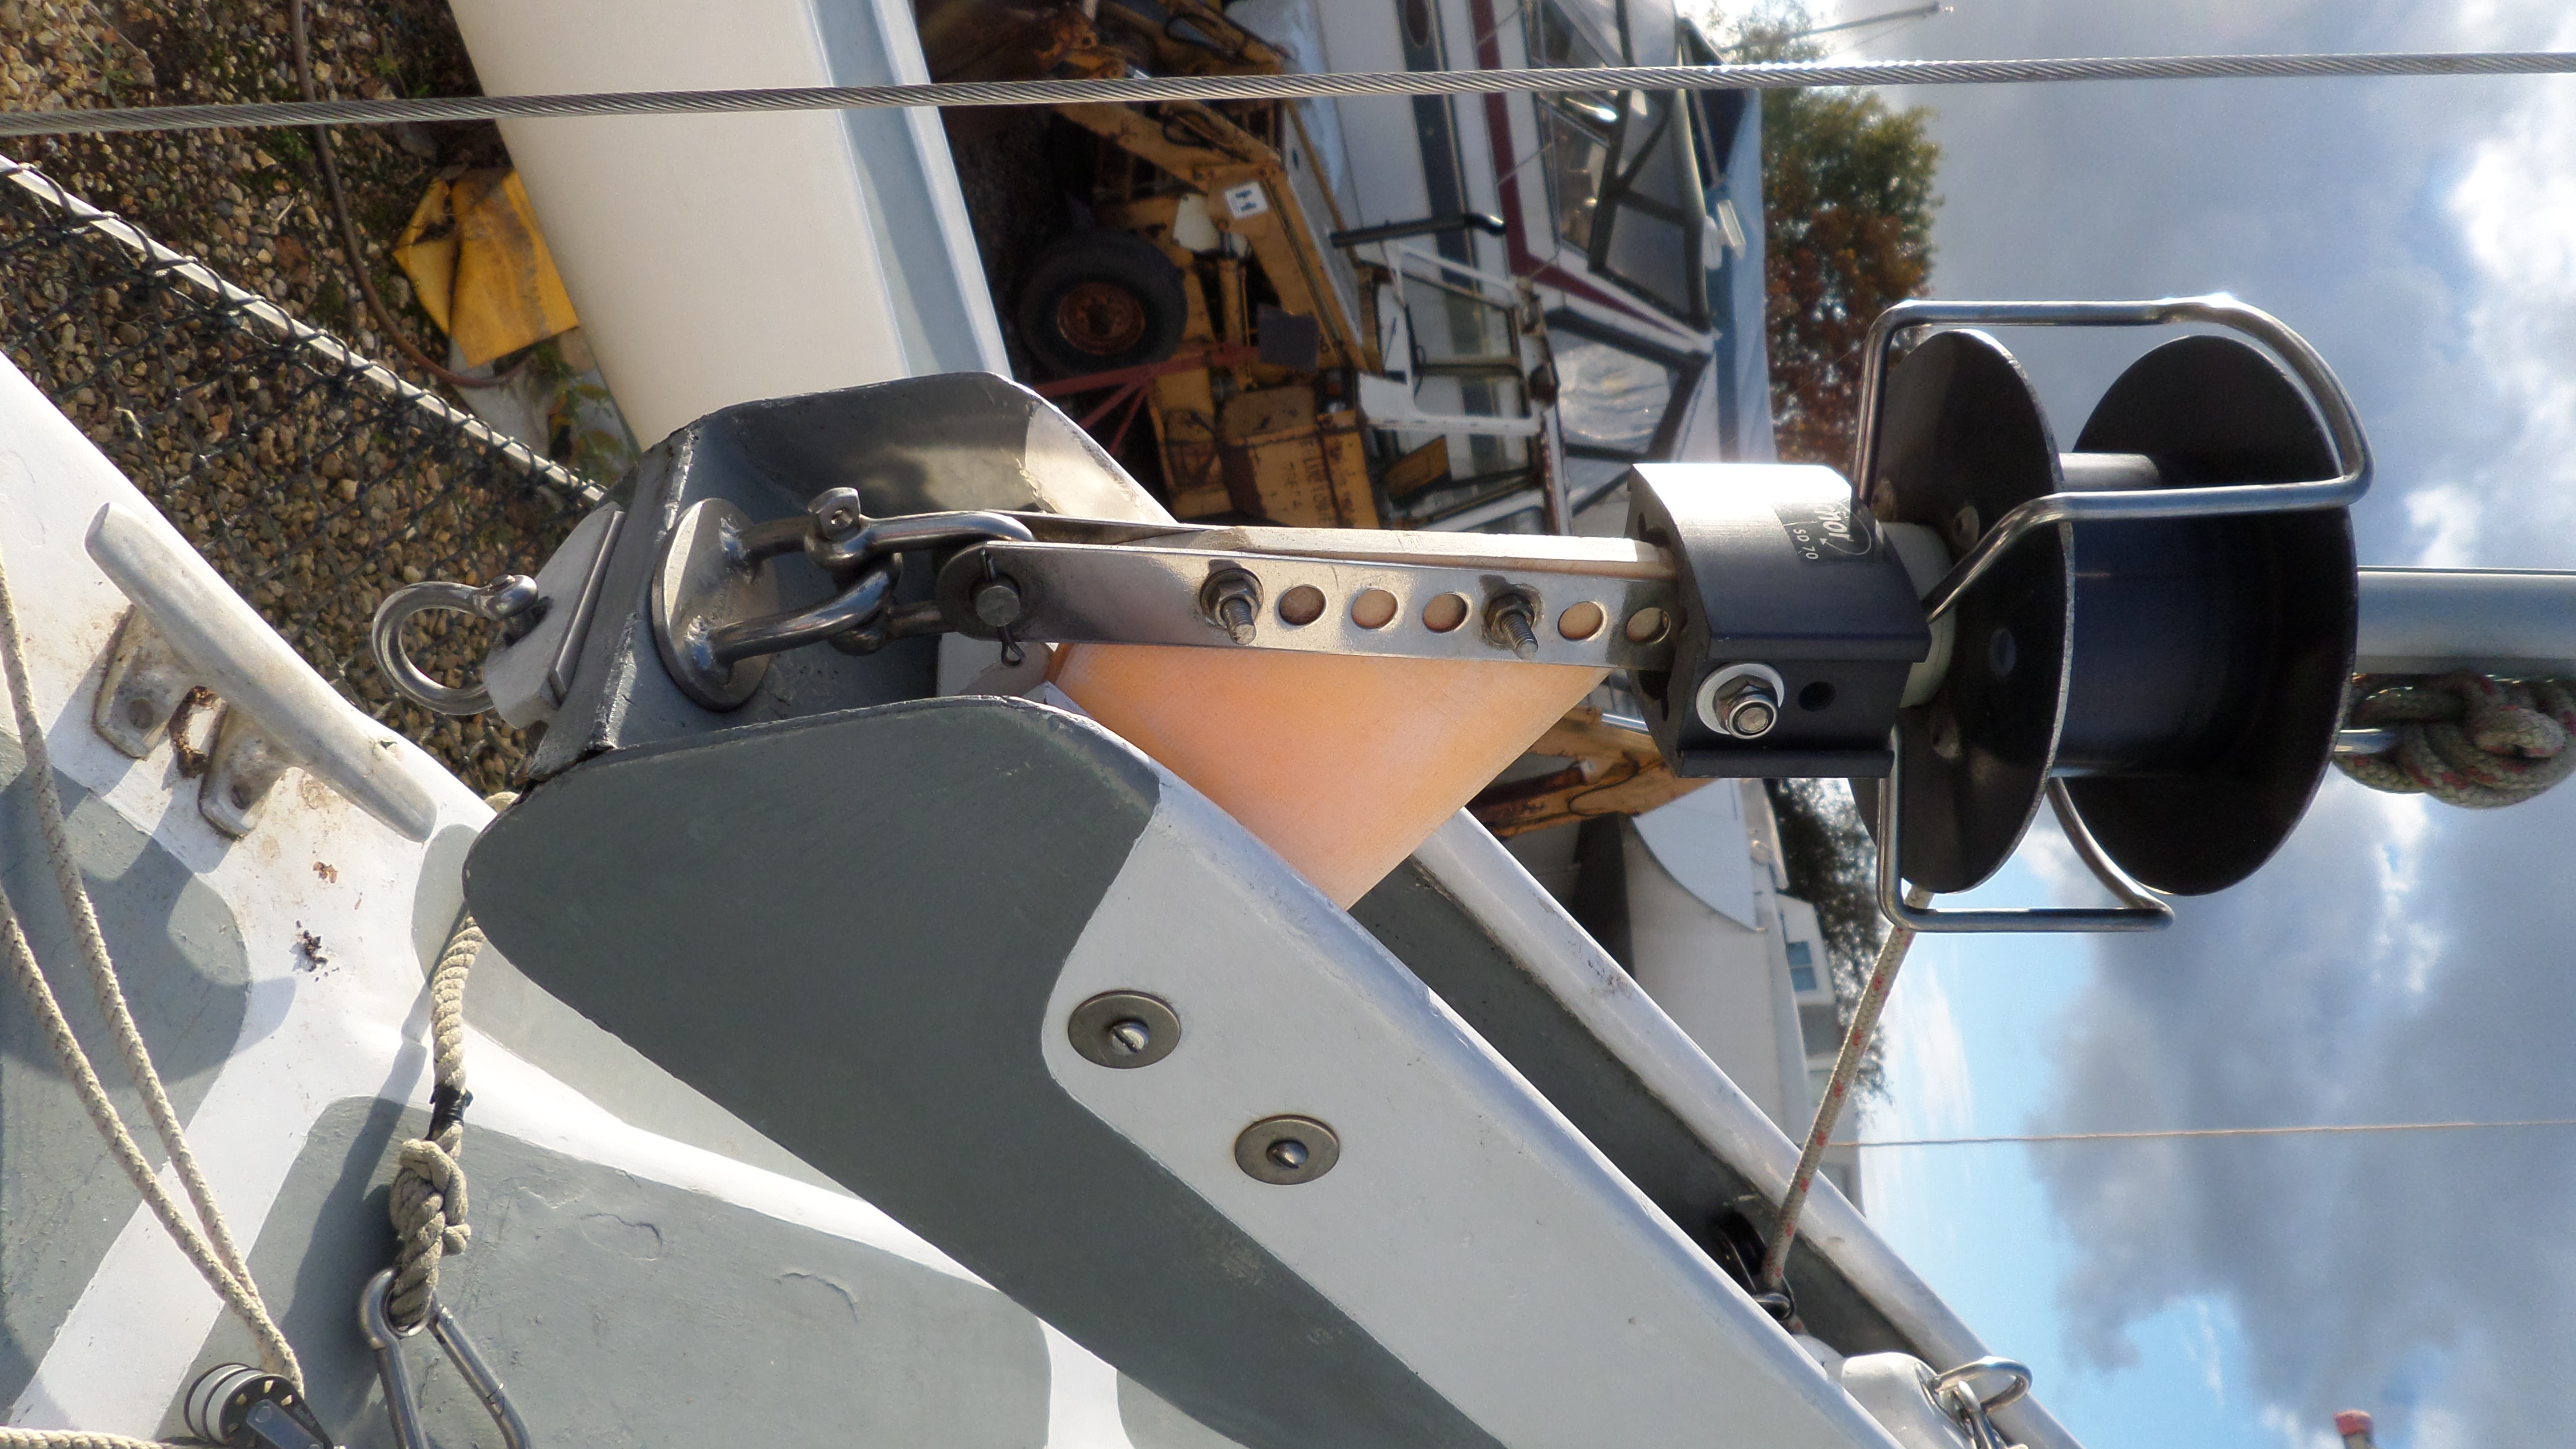 a stay, but if I put a fixed stay to the front of my boom it would take the rig tension when I really wanted that tension to be in the luff of the jib. I experimented with hoisting it on its own halliard turned around a block at the top and clipping it on as it went up, but that wouldn’t work either. I made captive socks, like spinnaker squeezers and also lashed-up luff rollers. Throughout this I knew that it was all just testing. I really wanted a roller arrangement, but the cost of a luff-spar roller, then the cost of a new sail to go with the roller was going to be considerable and I had to know that it was going to work before I committed to it. Even with a roller I had to be able to lift and lower the boom, so how could that be arranged? Eventually, I grasped the nettle and invested in a roller luff spar and had the sail made. It was the working solution, but not simple, as is described below. One problem was that the lower end of the roller spar could be pulled from side to side on different tacks. I stiffened it by bolting a nylon web between the link plates (see right). The web is sandwiched with wooden blocks screwed to the boom channel on either side. Earlier plywood webs were insufficiently strong.
The Jib Clew
 This is really about the sheet. The sheet had to be pulled in and tensioned and there wasn’t much space to do this. The fore triangle is quite limited and restricts the sail size. The sheet attaches to the clew then runs to the travelling car on the curved track, from the traveller car it goes forwards around another block towards the front of the boom then back to a horn cleat in the boom channel near the mast end. This gives me sufficient length to be able to manipulate the sheet which has to be long enough to allow the sail to roll around the luff spar in a roller system. All the angles had to be correct; angle of the luff and the length of foot and leech to lead the sheet onto the track traveller, otherwise either the foot or the leech would flap. There is only one sheet and once set, it is fixed for that sailing session. The roller-reefing line for the luff spa is also on a second cleat within the boom channel. I tried to exit the boom with it and lead it back along the yard to a cleat above the cockpit, but it is easier to have access to both sheet and reefing line together on the jib boom, as they are only used before sailing and for removing the sail at the conclusion of sailing. I move forward to set or remove the sail.
Backing the jib
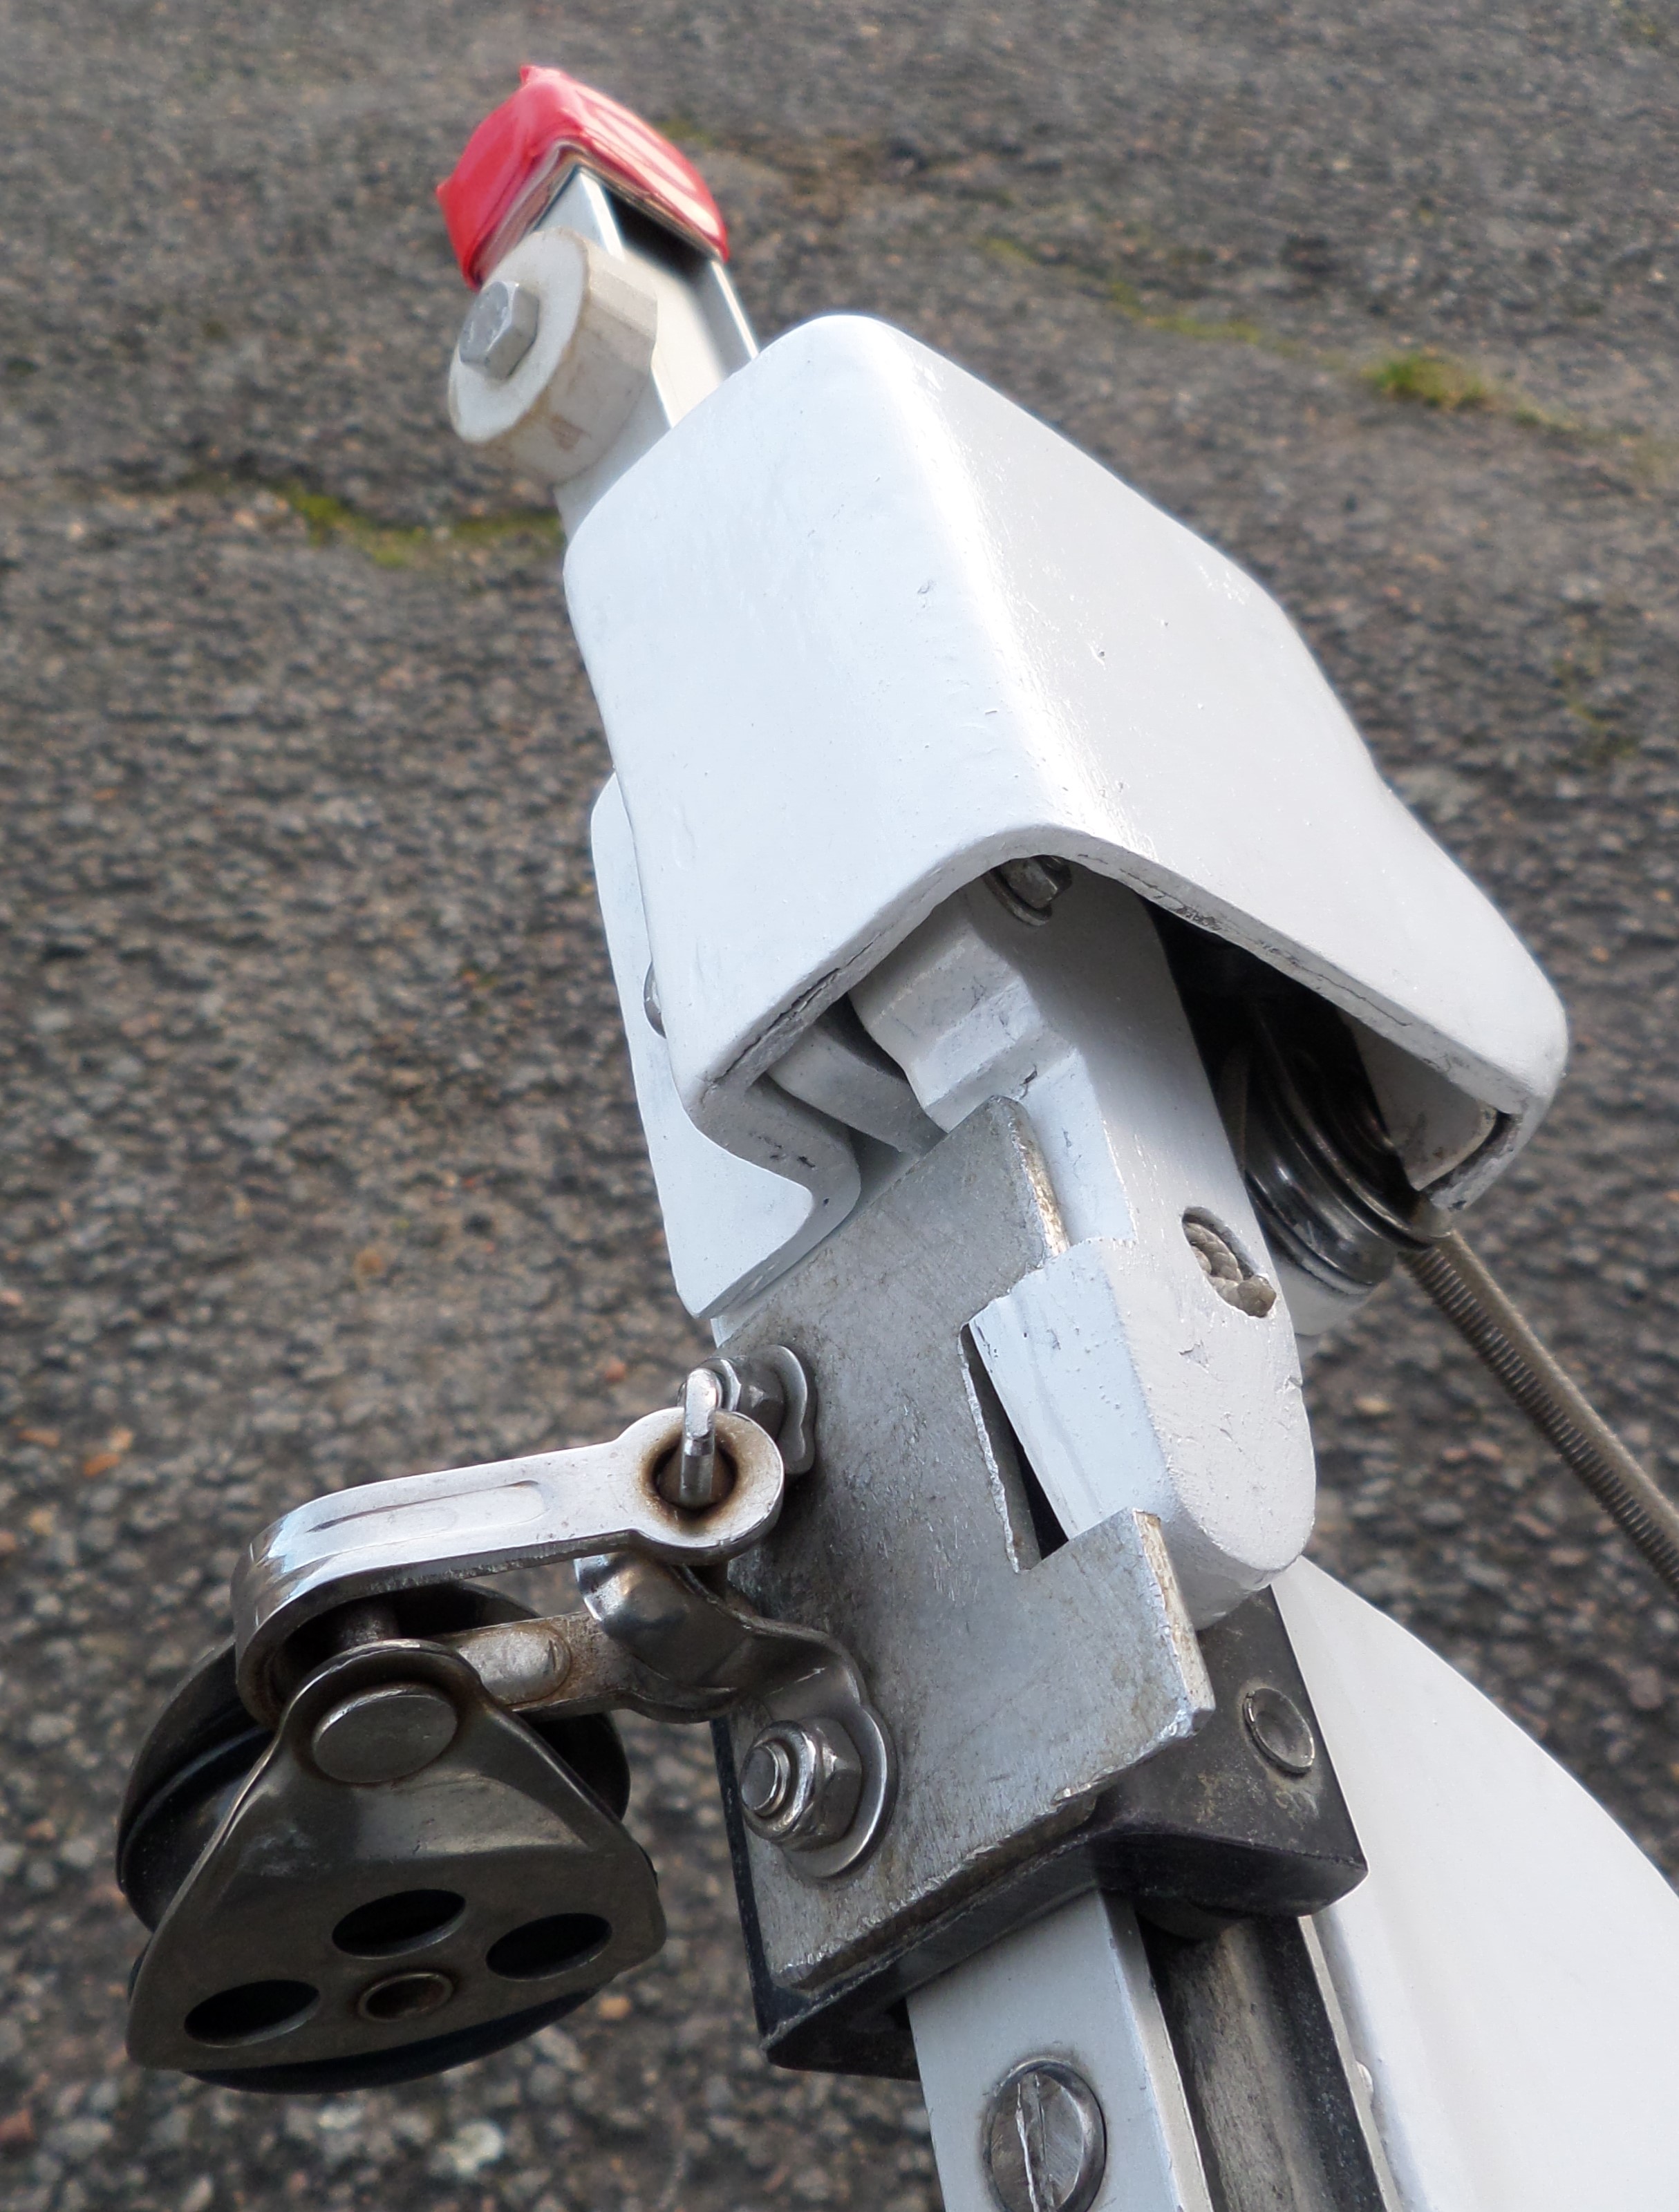
This was later identified as a potential problem for heaving-to in the yachting magazine reviews. I didn’t need it for heaving-to, I wanted to back the jib to help bow movement when tacking. It is a technique that I have always used from dinghy-sailing days. What was needed was some kind of a latch to hold the jib aback during tacking. The wheeled traveller has to slide across and be automatically caught by a catch or latch. In tacking, the latch is released by pulling a control line positioned towards the back of the main boom above the cockpit. I evolved the latch. This is one device that is much admired by visitors and consistently voted ‘Top Device’ on board. It keeps the boat sailing right through the tack with consistent speed and can be used to make the boat fall off on either chosen tack as required. It can be disabled by hooking the control line up onto a hook on the boom above the cockpit. This is how it is set when the boat is running off the wind. The line holds the latches open, so that the traveller is free to slide across as the boat gybes. It is useful when setting the sail, when motoring and when luffing to a mooring.
This device would work on any self-tacking jib, so I include a detailed drawing of it here. It is not rocket science. The metal I used was aluminium. The 2.4mm Traveller Plate (diagram top right) is attached to the track's slider car (see pics below) which already has a fixing loop. I used the same two bolts for this loop to attach the plate. The Locators (diagram top left) fix to the sliding tracks at either end by just pushing a 6mm bolt through the holes already in the track. On top of the Locators are Mounting Plates thick enough to have threads cut for the various machine 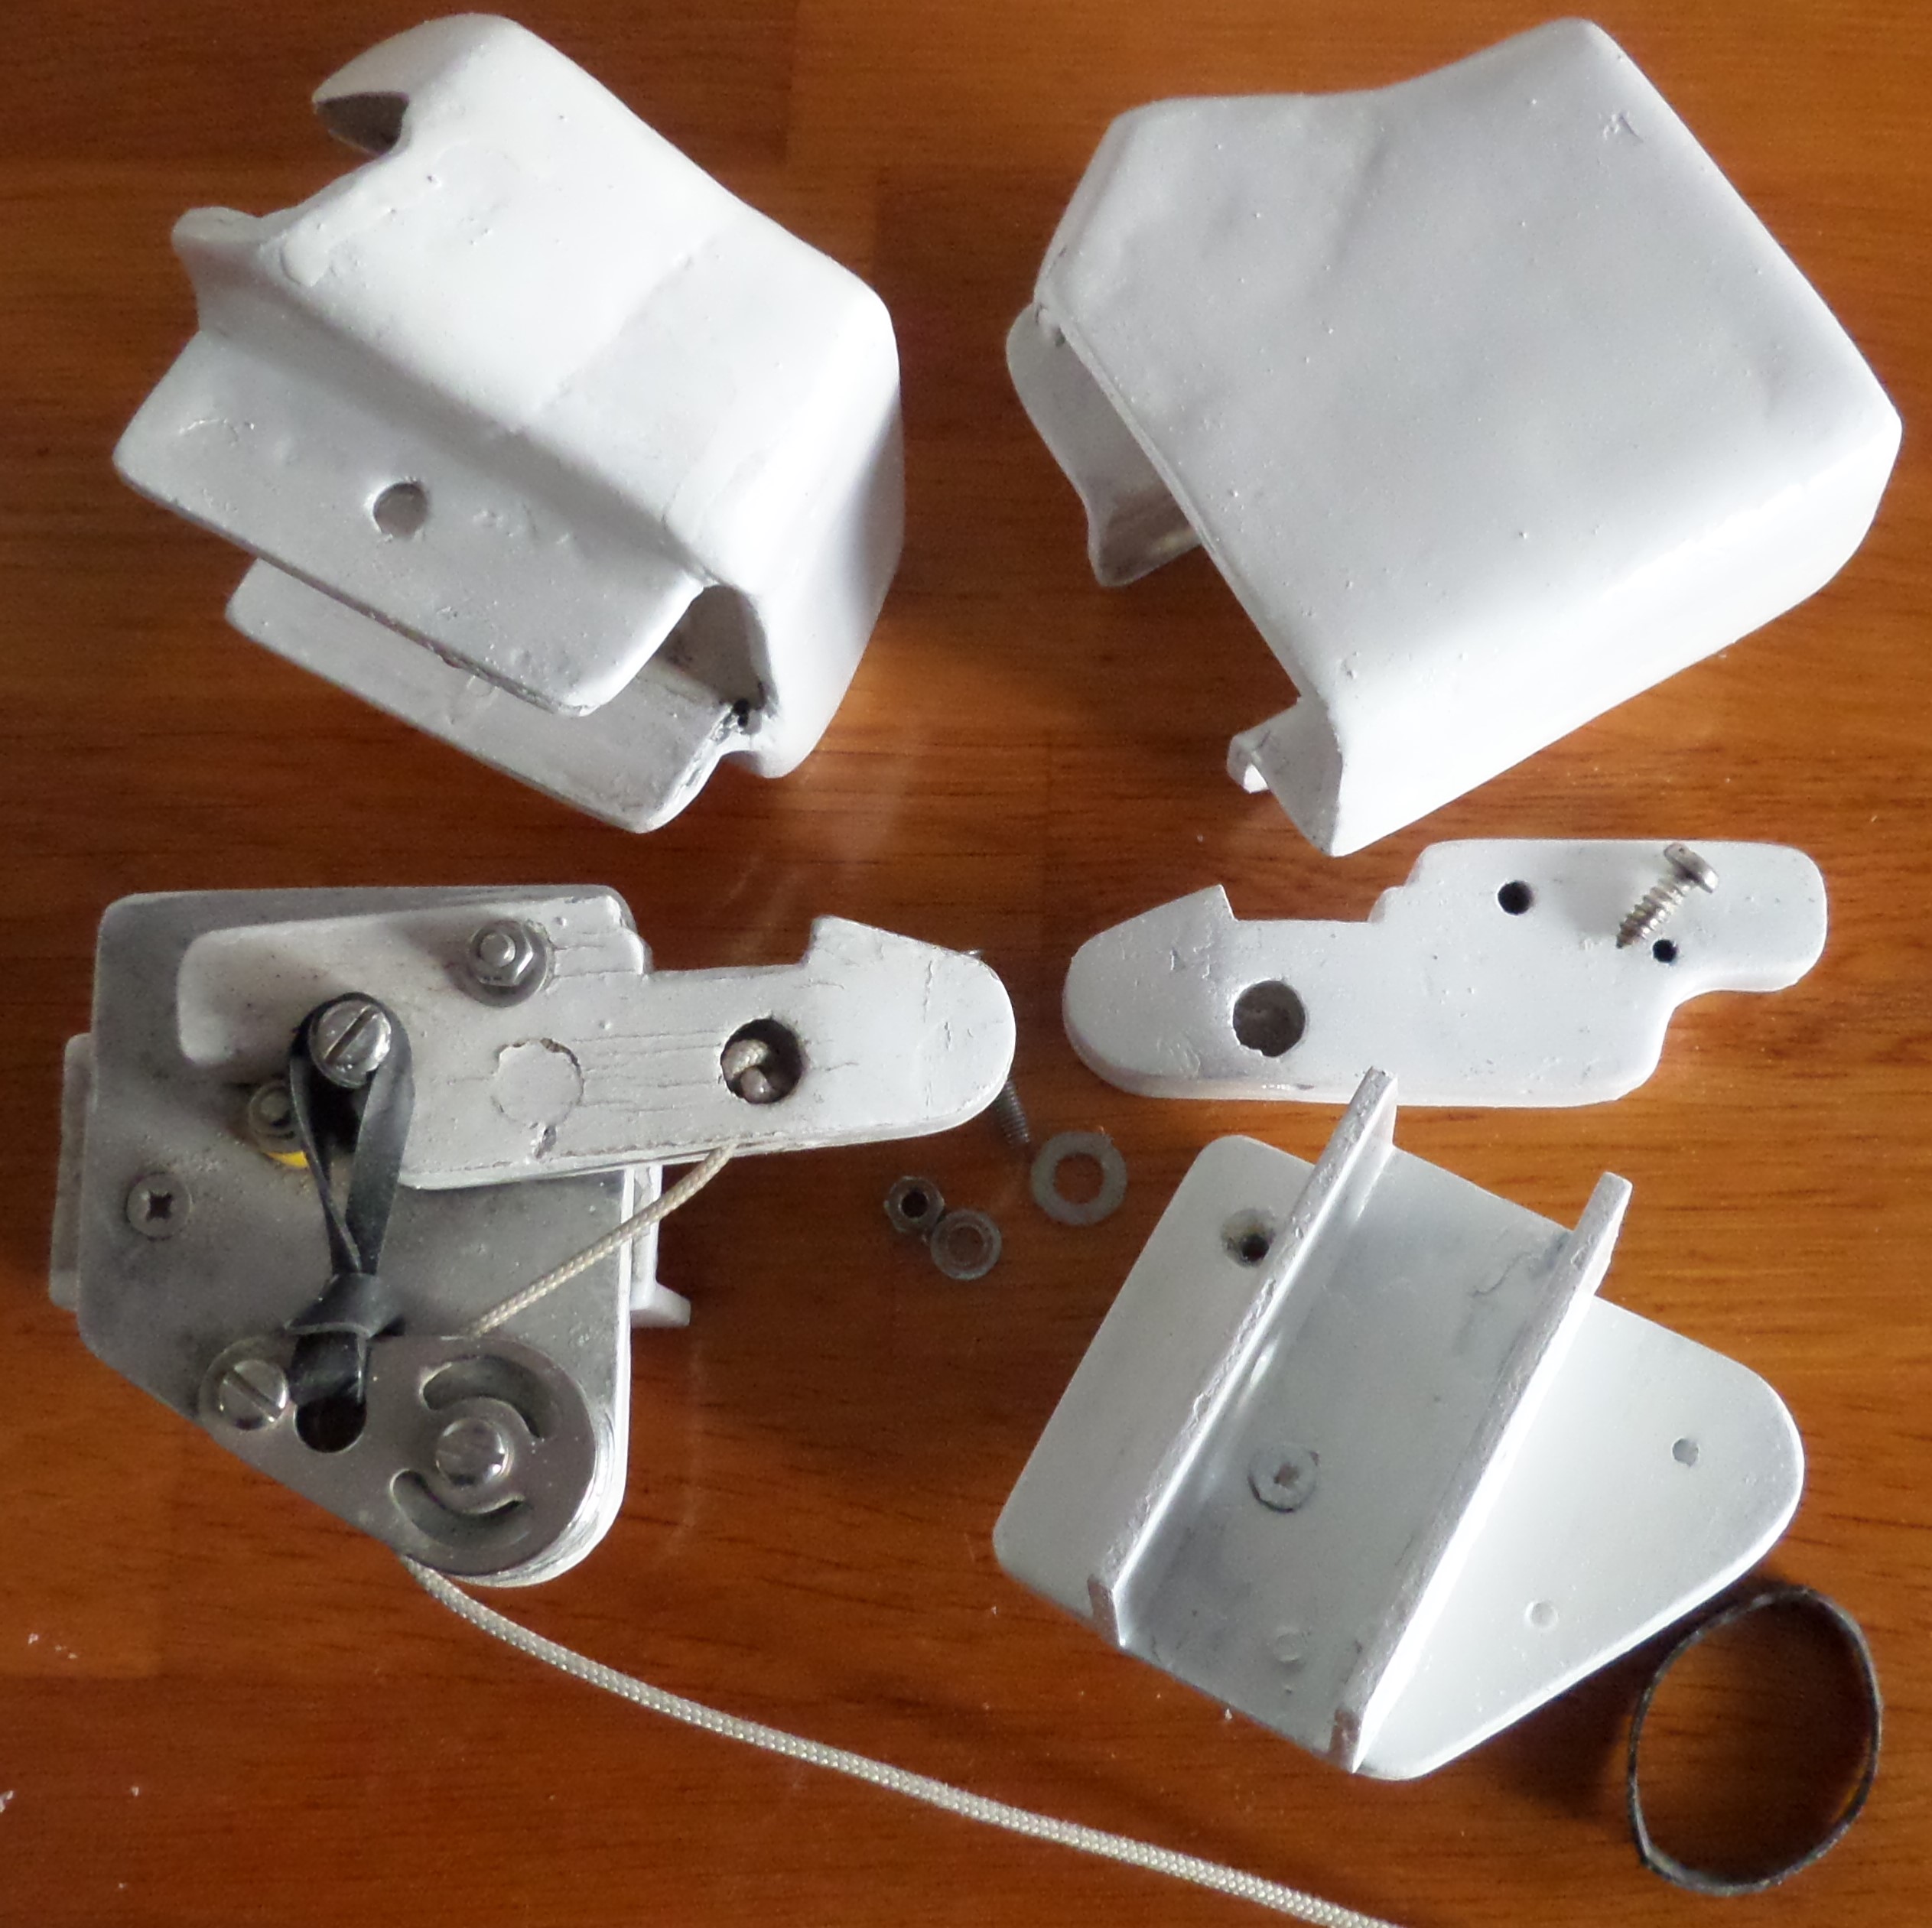
 screws that are used to hold the working components in place. The principle is to have Rockers with hooks to catch the slider’s Traveller Plates. The Rockers are kept closed by Rubber Bands cut from bicycle inner tube. The Traveller Plate clicks into the hooks and is secured. There are spacing washers under the Rockers to reduce their frictional contact with the Mounting Plates. To release the Traveller Plates a thin Control Line passing around a turning block is pulled from the cockpit. To protect the whole device I made up Shields from plastic channel. Square drainpipe does nicely. I then covered the moulded shields in glassfibre. The mechanisms push into the
 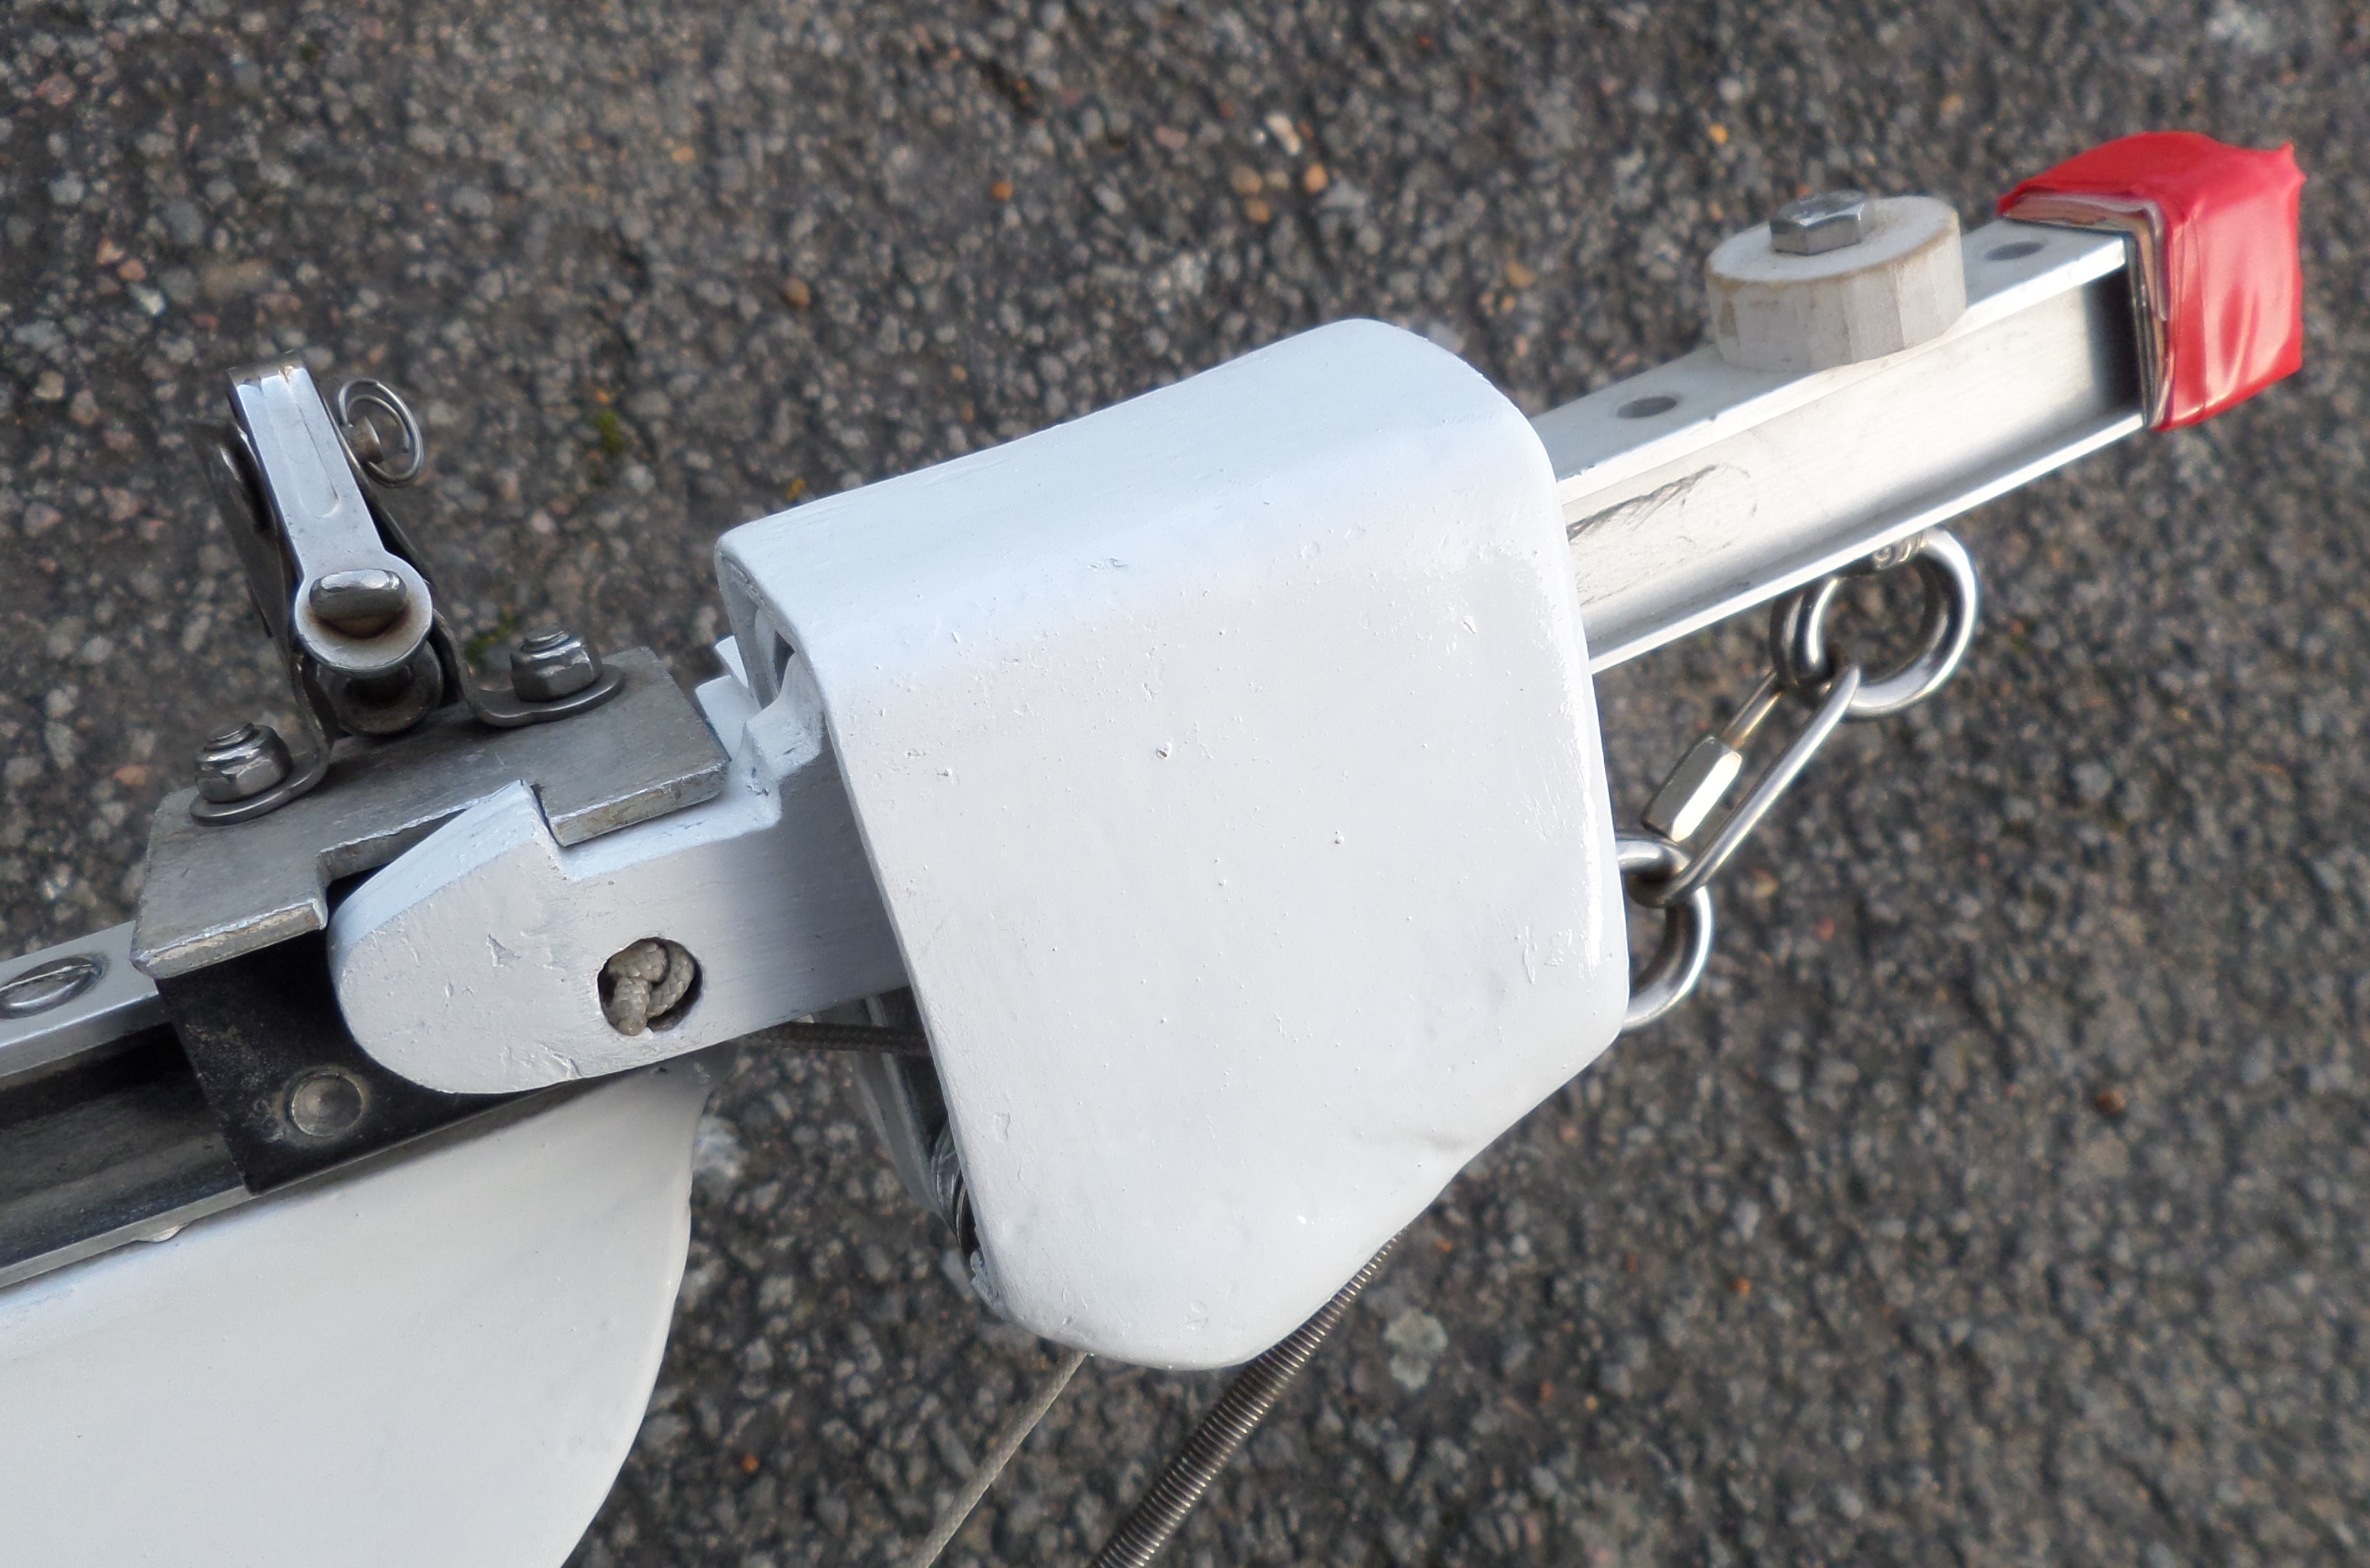 Shields and they are held together by the same 6mm bolts passing through the track. This has worked well throughout the life of the boat and the only maintenance needed is to replace the heavy rubber bands periodically. This can be done under sail and takes about 5 minutes. Below. Traveller plate on slider
 The main boom support
There is no gooseneck to hold the yard up at the mast. To keep it at the correct height there is an adjustable strap we call the Boom-lift. It is secured to the mast, passes under the boom and is secured on the opposite side of the mast. After the main is hoisted the boom-lift strap is eased, to allow the yard to be downhauled to tension the sails. It is re-secured after the downhaul is released to allow the boom to lift again, prior to dropping the main. The yard with the sail in it is very heavy. It is also supported by the lazy jacks.
Boom shape
When I first thought of the boat’s design, I could see that compared with my previous boat, the deck would be rather flat. I briefly considered using the flat deck to 'fence' the mainsail to greatly increase its efficiency. This would have meant pivoting the (conventional) boom from the mast base or removing the boom altogether. The idea of using the deck to fence the sail was being used in all the 2021 America's Cup racing foil-borne cats. For me it meant a host of problems, forwards visibility, windows in sails etc. and for river work it was a non-starter without building a totally different craft. However ! I could see that a wide, flat, channel-boom might help, acting as a kind of fence. It would allow me to have the curvature of a ‘loose-footed’ sail, set within it, without the gaps caused by sail-slide attachment to a conventional boom. Bolts ropes are too big a problem to consider them. The loose foot would allow the sail to take up its shape and the raised sides also had advantages in sail storage. The flatness of the channel did not have its stiffness in the right direction, so the boom needed to be deeper. In this way, the boom designed itself. It is more complex than the usual aluminium tube, but it does much more than just stretch the foot of the sail. It cleanly houses several other systems.
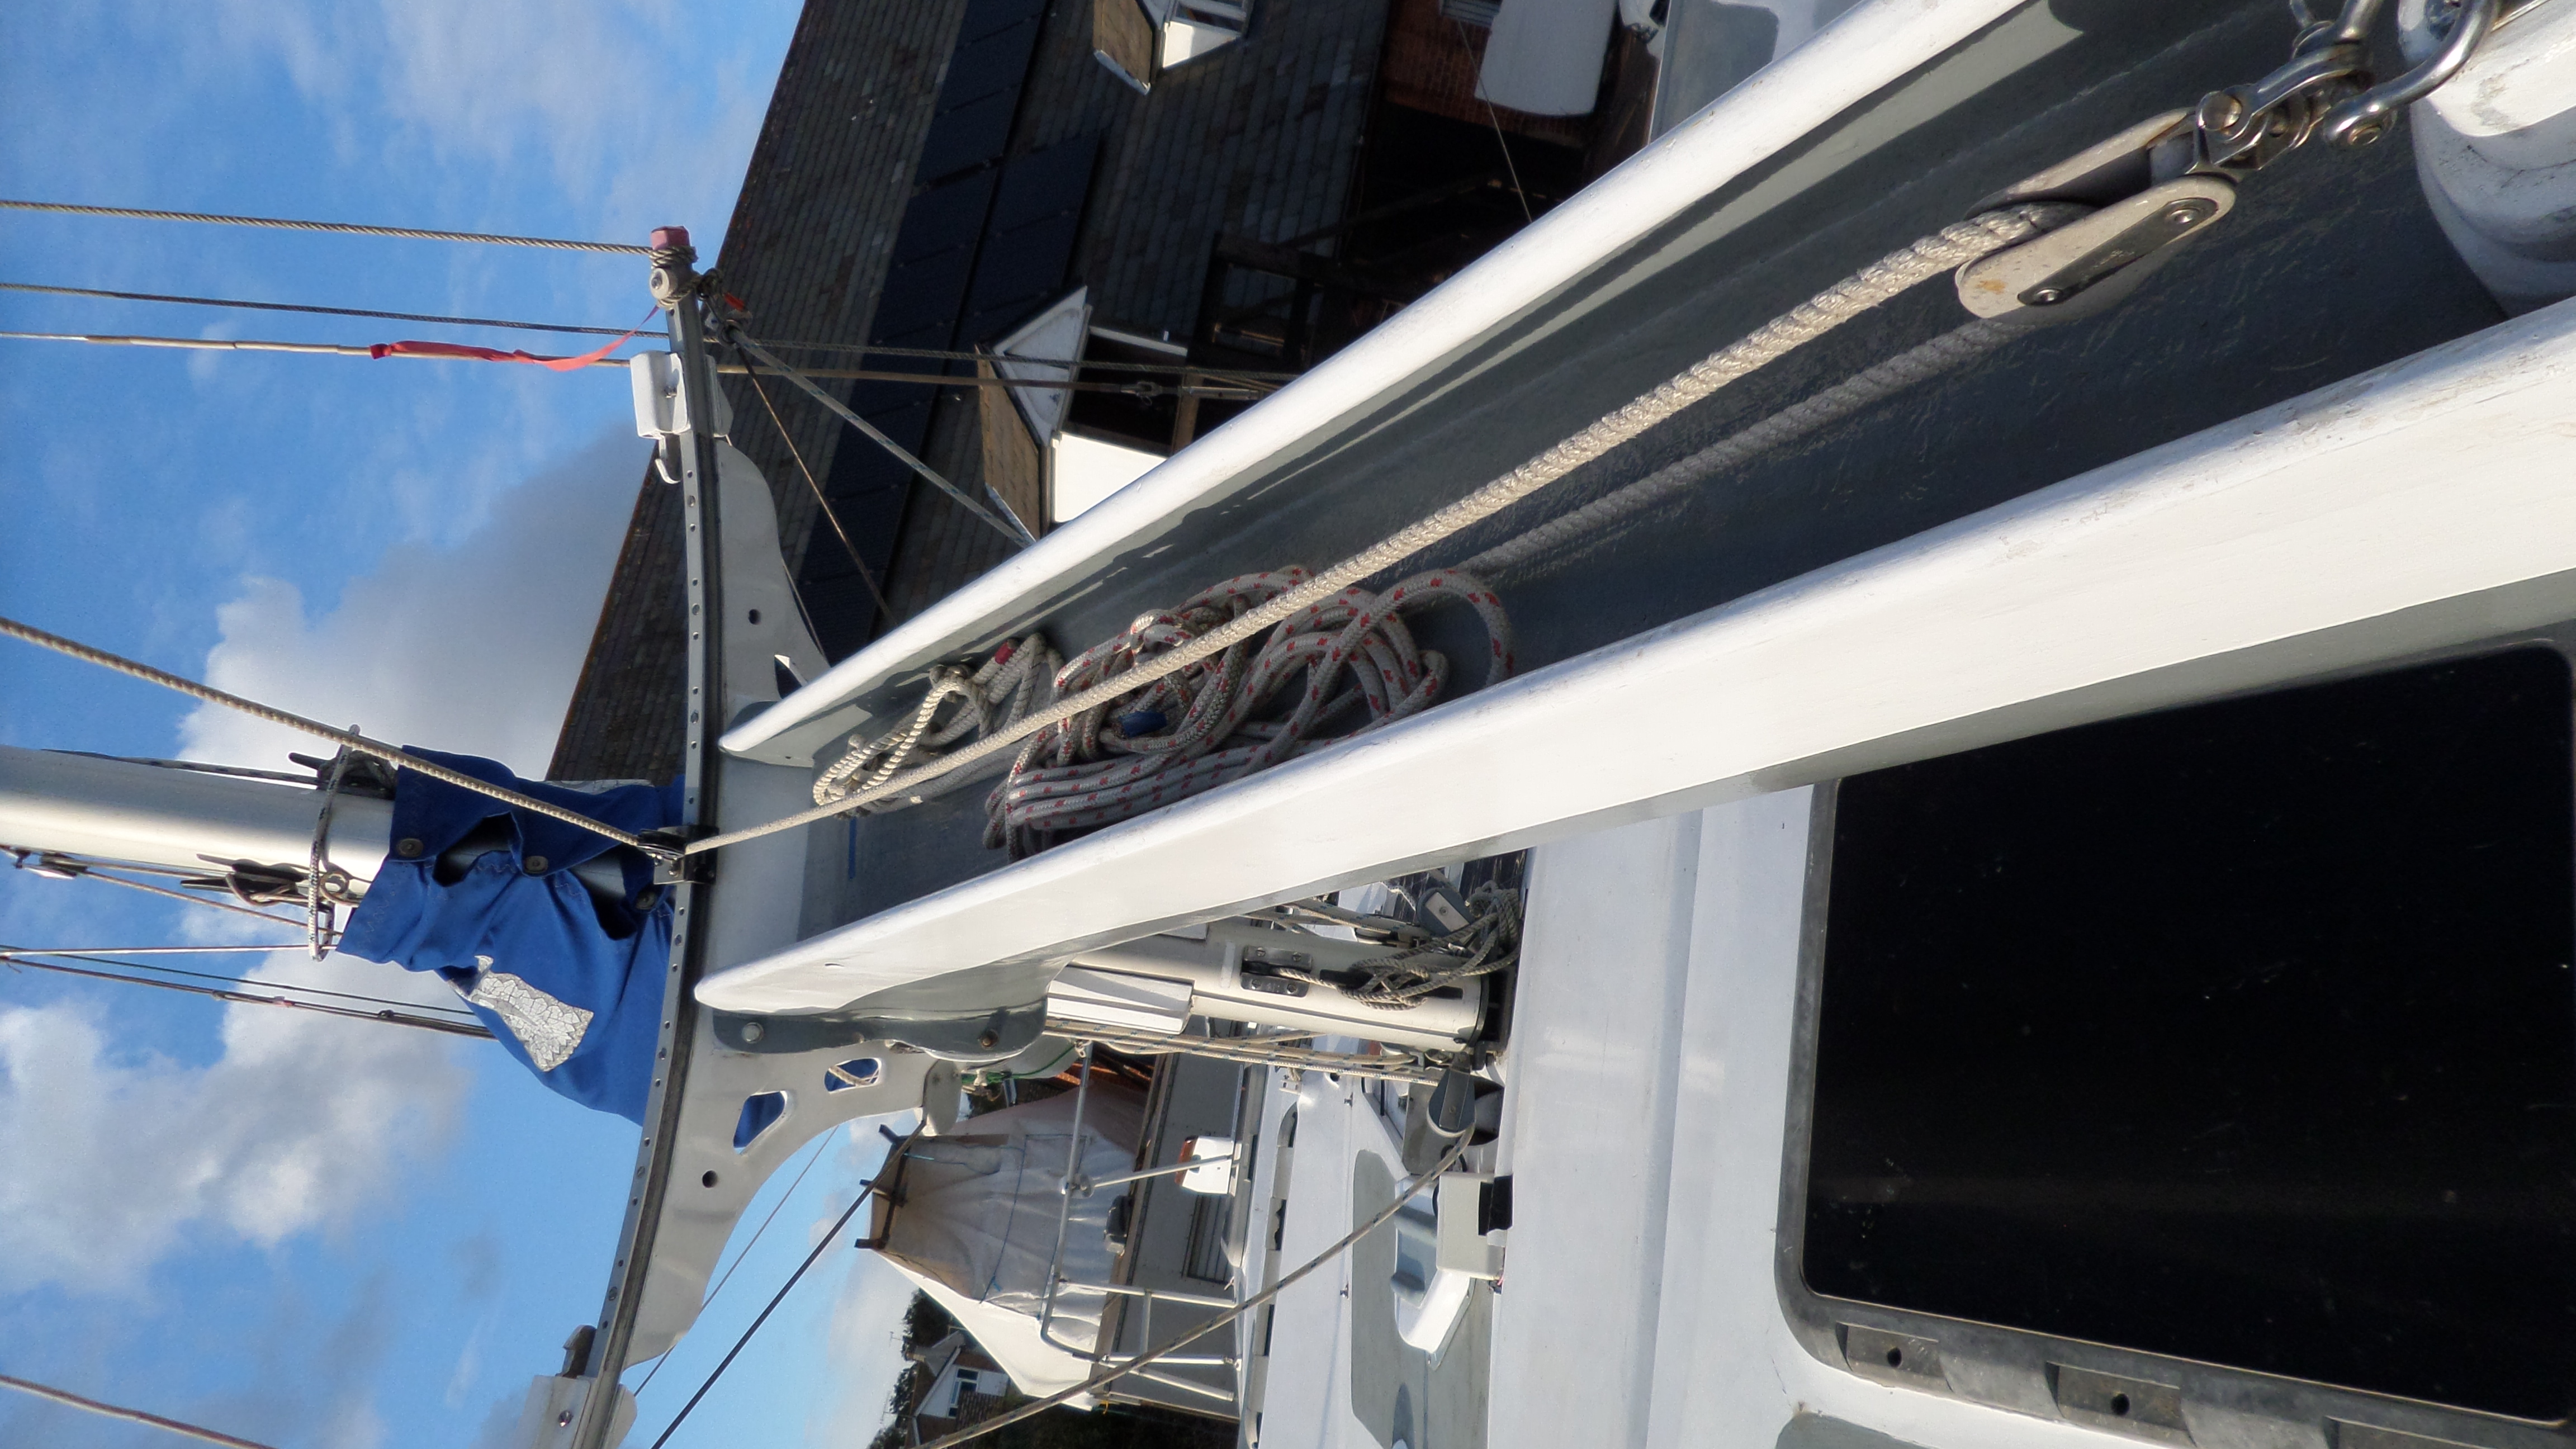
·  The main boom is an integral part of the mainsail handling system. The boom is an upside-down ‘A’ shape. The extended upper wings of the boom can hold all the lines and much of the sail in what I refer to as the boom channel. The boom is a glassfibre construction as described in Chapter 10 of GRP Flat Table (on this website). It is very deep compared with aluminium booms. The depth and shape give it strength and stiffness. The paint scheme is white at the top where the sail is, to look like part of the sail. It is grey at the bottom to disguise its depth.
Lazy Jacks
A system of lazy jacks goes high up on the mast to act as guides for the sail being hoisted or lowered and also as a topping lift when the main halliard is not fulfilling this function. Without the goooseneck the boom itself will not droop down at the back. The whole yard 'floats' and moves as a unit.
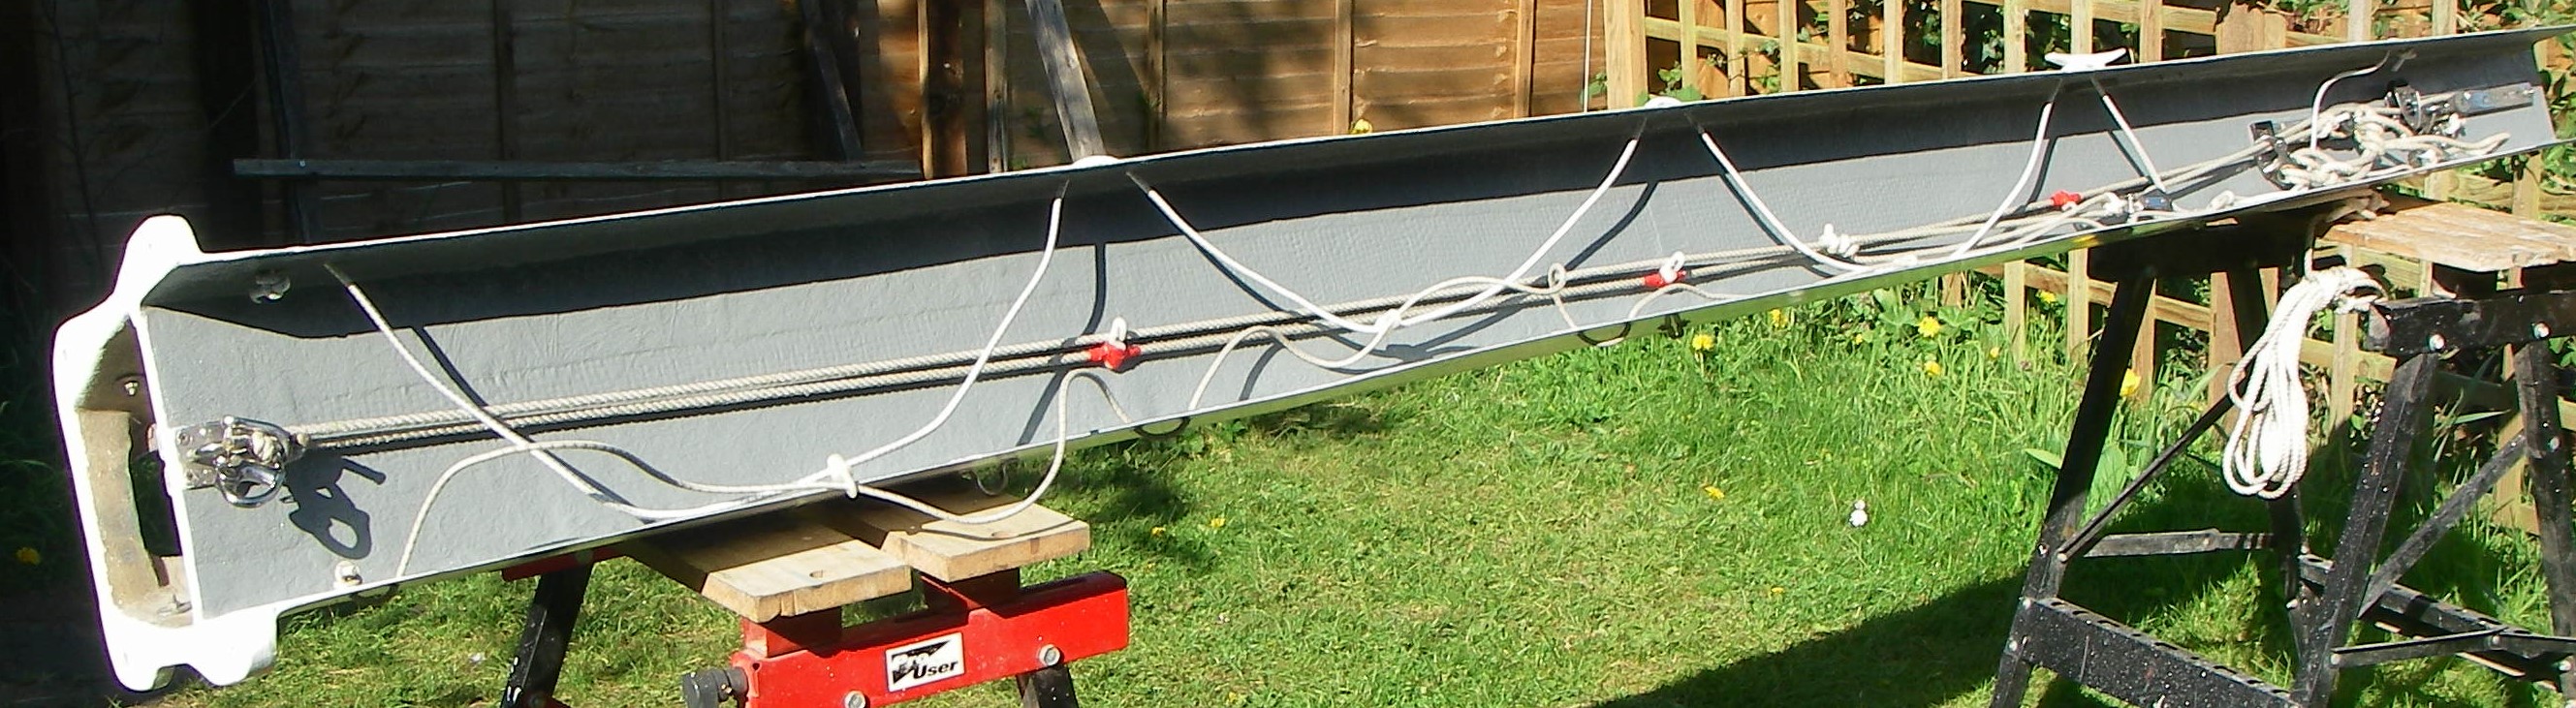
· Running along inside the deep, top channel of the boom are lengths of elastic shock-cord. On one side there are hooks. When the sail is dropped into the channel the shock cords can be hooked together over it at the top, to control and stow the sail. They are the large loops in the picture.
· Running centrally along the channel a line with hooks can be seen. These are spaced to engage in a reefing line across the mainsail. The sail is pulled down at tack and clew with a single-line system and then, if required, the hooks are locked onto the line across the sail as described below. Attached to the top of the channel edges are the sail covers, not present in these pictures, that are secured with press studs over the sail for weather protection.
 The mainsail
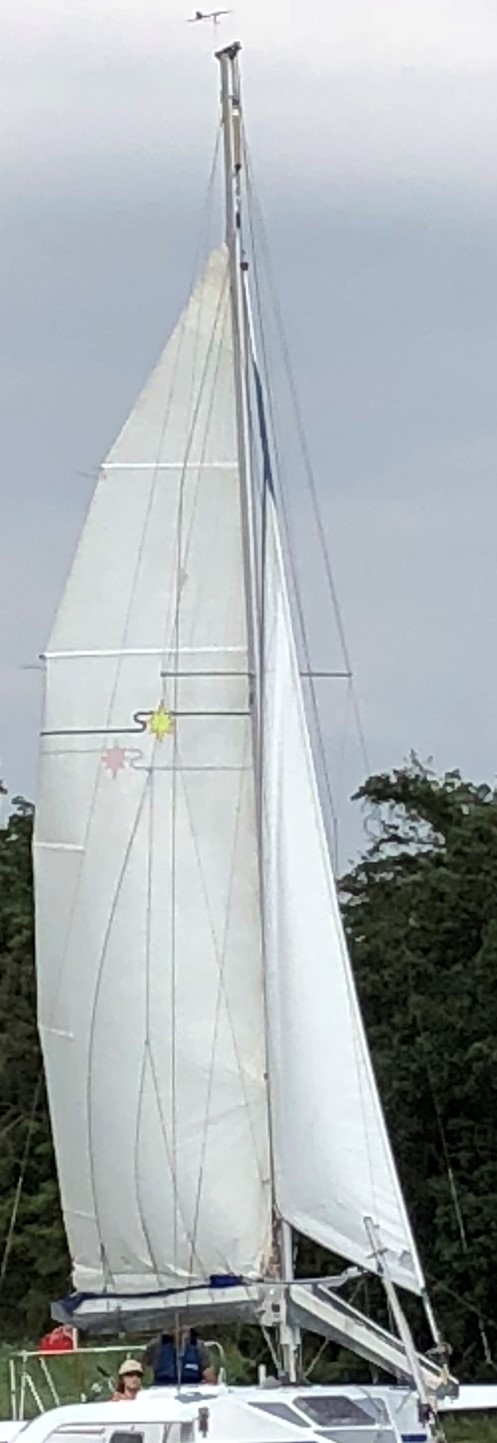
This is conventional. To arrive at the area required I looked at comparable craft. I also remembered the advice of Derek Kelsall who said that races were won when there was little wind, not when there was a strong wind. It was the ability of the boat to keep going in the lightest of airs that made the difference. Having decided on the right sail area for ‘normal’ sailing. I made that the area for the first reef, then I added some more for light airs. It has turned out to be good advice, although as fashions have changed in the intervening years, I would now increase that sail area yet again. The boat sails best when it has all of its sail up. I liked the sail shape used by multihull designer, Richard Woods which used extended battens near the top to give a sweeping curve and fuller roach. This allows the sail to maintain a wider-width higher and gives more drive. Although it has a couple of long battens towards the top it avoids the fully-battened rig, which becomes expensive when using batten cars and has potential problems with battens jamming against the mast when being lowered. Whilst I am a ‘cruising sailor’ it is always beneficial to keep an eye on racing developments to see if anything can be transferred from racing boats to almost effortlessly increase the performance of cruisers. The boat still uses its original, cruising main sail. Racers now use ‘square head’ or’ flat head’ mainsails to achieve a similar result and they Reefed main need mast extensions for backstay attachment, but I can’t say that I admire their beauty.
Mainsail handling
· The sail is hoisted with an aft-lead halliard to a small winch, passing through a clutch.
· The clew is attached to a track that can adjust foot tension, but actually it is usually set and left untouched. For reefing, a single-line clew outhaul is also attached through blocks to the tack downhaul and led aft to exit the boom onto a horn cleat. Tensioning this line pulls down both the clew and the tack – single-line reefing. When double reefing, the line is released and the two snap-hooks on clew and tack are moved up to the next reefing cringles. The line is re-tensioned onto the boom cleat and the sail is then reefed. This avoids long reefing penants dangling from the sail at all times in duplicated reefing systems..
· There is an additional clipped line at the clew that can be moved along the track to double up on the holding power, for a clew downhaul is needed in addition to the outhaul just mentioned. This is due to the extra heavy load passing through this point from the leech of the sail in the Swing rig.
· A line is laced across the sail passing through the reefing cringles.. Another tight line runs along the length of the boom channel with small hooks attached to it (seen above). When the main is to be reefed the sail is eased, clew and tack secured and then the hooks are attached to the line across the sail through cringles to control the bunt (loose sail cloth) of the sail that has just been reefed.
· The whole reefing system of lines, outhauls, downhauls is simple, single line and can be used again for the next reefing position. Using clips at clew and tack avoids the use of three sets of dedicated reefing, colour-coded lines, dangling from the sail at all times.
The mainsheet
In the yachting magazine articles, much attention was paid to the single-part, lightly loaded, mainsheet of the Aero rig and also the ability of the rig to rotate through 360 degrees. My rig, as has been mentioned, only has the conventional range of movement, due to standing-rigging restrictions. I did wonder what happens with the mainsheet of the Aero rig after being wrapped around the mast following a couple of rotations! – but nobody mentioned it.
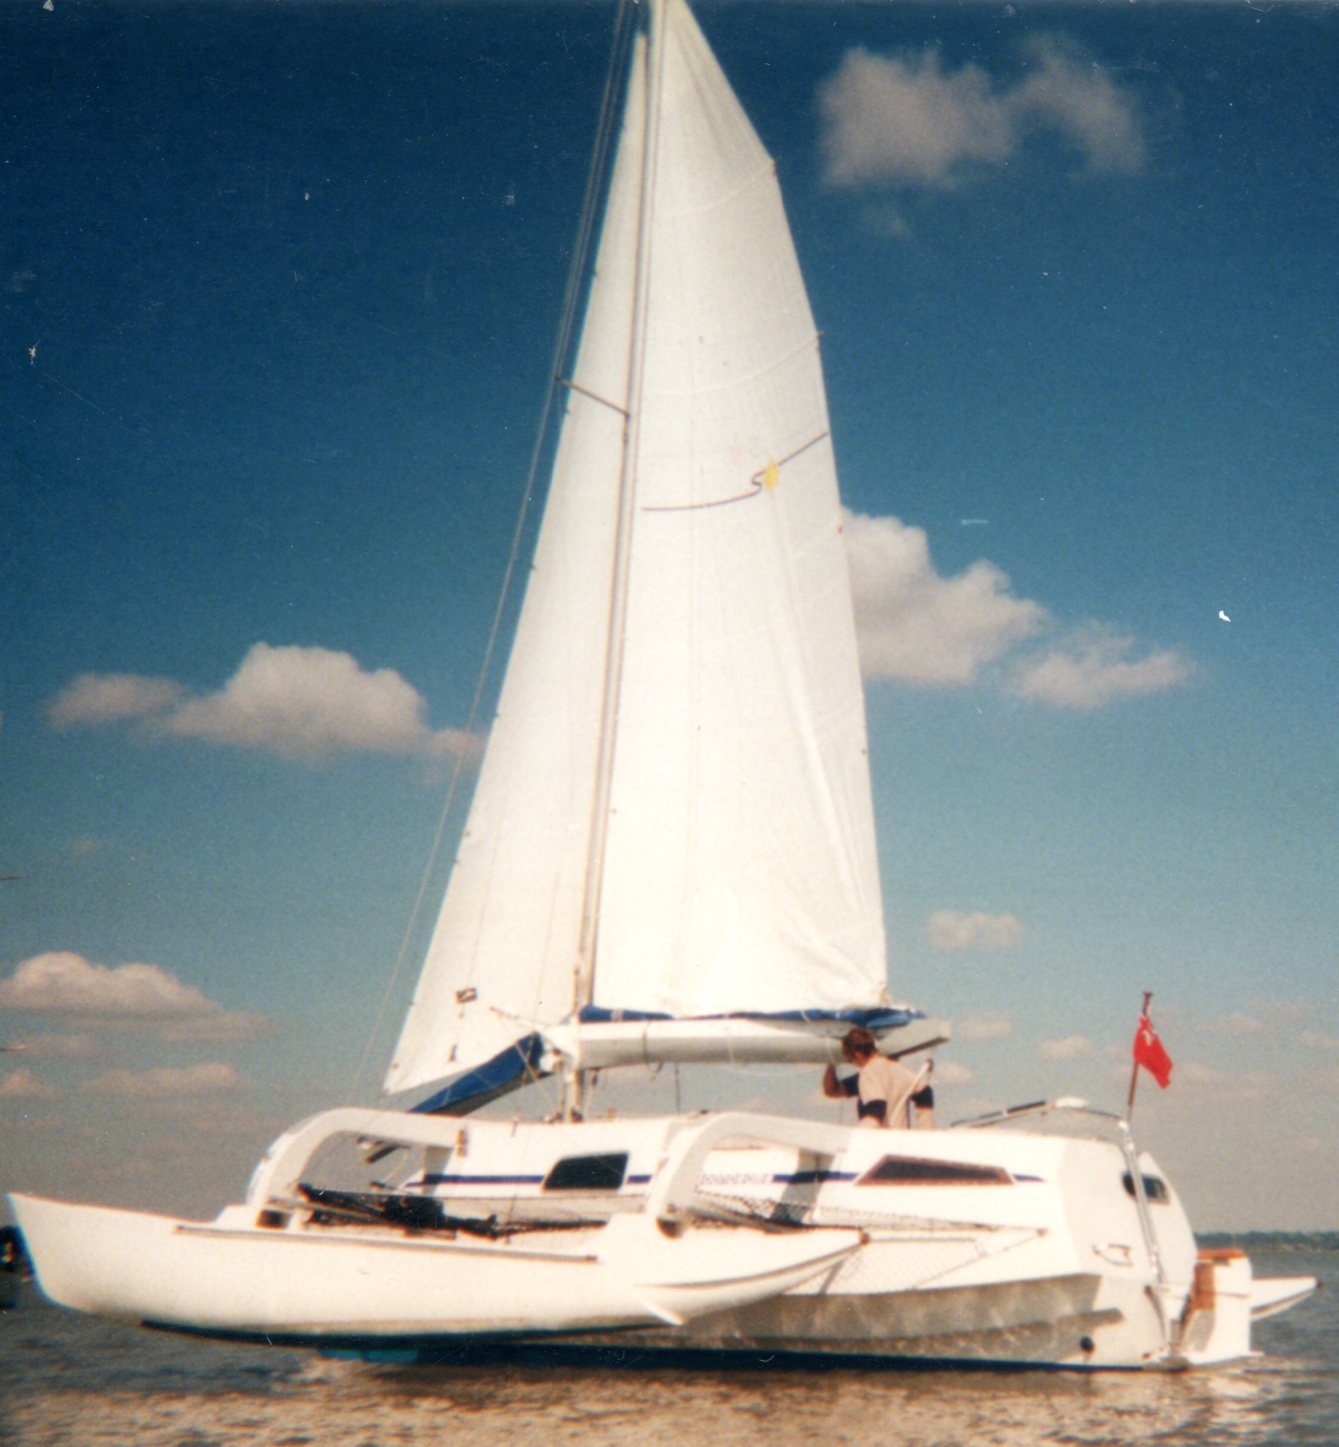
To return to being rather more serious, I saw that the single sheet could be attached at either end of the yard. I attached mine to the front, from the foredeck to the jib boom (see below). This has the effect of leading it into the cockpit from the front of the boat and also, It does not pass across the cockpit during a gybe. This removes the chance of it wrapping around the necks of the crew. It is 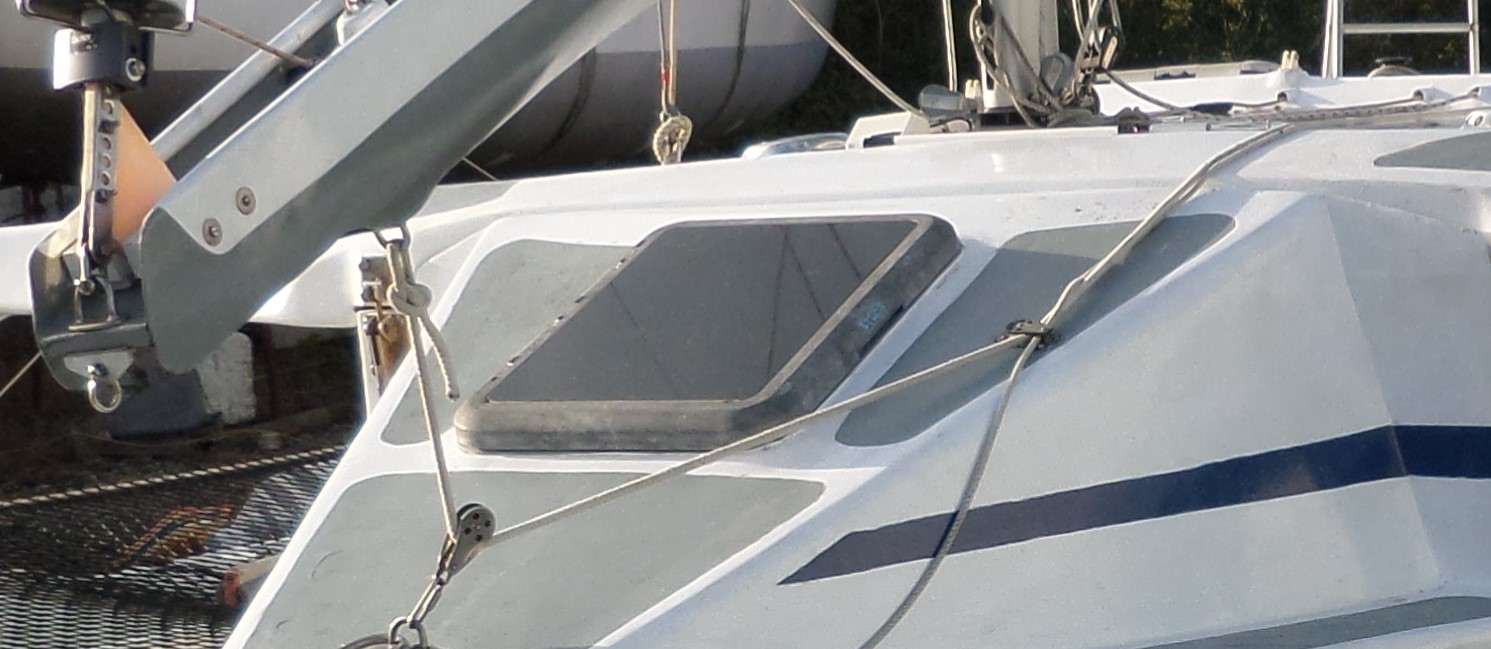 interesting to ask sailing visitors when starting to sail, what they think of the mainsheet. They immediately look up at the back of the main boom and realise that there is nothing there. It seems like a magic trick. It is always entertaining to see their amazement and surprise as they ask, 'Where it is?'
The boat CAN be sailed and IS sailed with just a single sheet, but it is not the optimum all-round solution for maximum efficiency on ALL points of sail. Going to windward and beating in short waves there is an enormous amount of inertia in the weight of the yard, sail, rig and mast. This will create movement that is difficult to secure by a single rope attachment. No amount of downhauling the yard will stop it ‘falling off’ at the bow when close-hauled. To locate a conventional boom the mainsheet triangulates it firmly across the boat at its rear end, whilst the gooseneck on the mast locks the front end. This cannot be done with a single rope which allows side-to-side and up-and-down movement. The same lack of firm positioning also applies to the front of the yard. This is easy on a model yacht, but the old problem of ‘scale’ and the forces involved on a larger craft demand measures additional to a single rope.
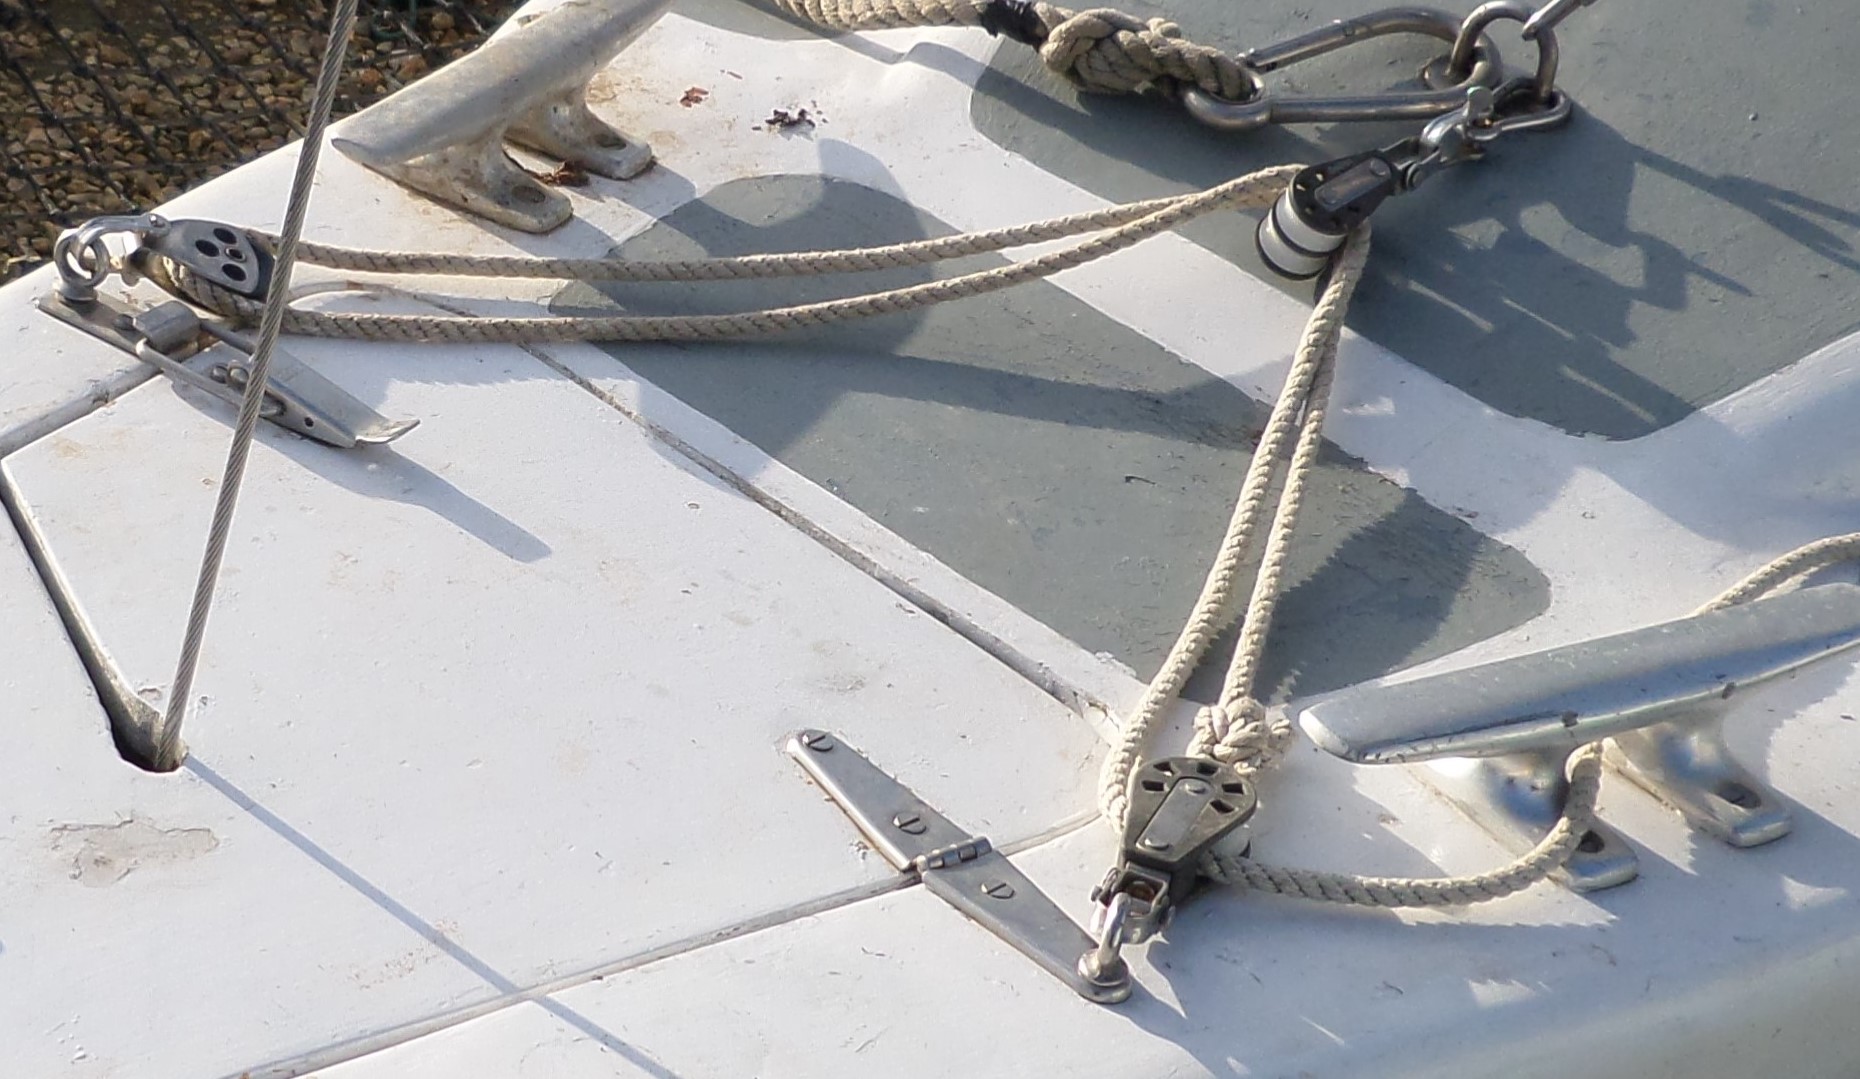 I use a separate, clip-on, triangulated sheet on the front of the yard to increase the rigidity in the luff of the jib for going to windward (in the picture right it is unclipped from the yard). It works well, but it was not good for off-the-wind work as there was too much length of line and too much friction for controlling the yard’s sweeping movement in a gybe as is experienced in a conventional mainsheet arrangement. Due to my yard being able to see-saw from front back, pulling down the front meant lifting the back, so the mainsail leech slackens off. I therefore use a normal mainsheet system clipped onto the back of the yard and use it to downhaul the yard, sufficient to counterbalance the pull on the yard at the front. This works well. The sails flatten out, the boat points really well, going to windward at 6 or 7 knots and following the wind naturally. Off the wind, I remove the additional sheets and use the single sheet only.
Rig Comparisons
Now it might be said that all this 'complexity' is self-defeating for the rig’s main selling point was ‘simplicity’, but I would argue that it is not such a black & white story. Those magazine articles were guardedly optimistic about the Aero rig, but the reviewers were sailing for a short, single, time in benevolent conditions. If the rig was so good, why has it not found greater acceptance and why is the standard Bermuda arrangement in some form, still the rig of choice in 95% of modern,western sailing craft? Is it just expense? Is it that the sailing world is too conservative? I think not. Was it all looking a bit too good to be true in those magazines?
The rig has some very good points, but no rig is ALL good. People want to be reassured about possible drawbacks. They want to hear the full story and that can only be told from the experience of sailing with it in many and various circumstances, such as I have experienced. The Bermuda rig has been evolved and simplified to a point where it is hard to produce better, for the money. Compare my yard with a conventional aluminium boom. Compare a gooseneck fitting with my mast collar. Think of the simplicity resulting from having a fixed jib luff.
The Bermuda rig is cheap, because it has been evolved for such a long time and all the components have been manufactured in quantity. However, in its simple commercial form, it may not be ultra-efficient and it needs a number of additions to optimise it for different points of sail especially when racing - big winches, cunninghams, kickers, adjustable backstays, mast rams, genoa track sliders, barber haulers, etc. etc. will be needed to increase efficiency and get the very best from it. All rigs need tweaking for ultimate efficiency.
 In this respect my rig, on my boat, needs tweaking for optimum performance. It CAN be sailed with one, single-line sheet on all points of sail, just like the standard, basic rig supplied on any new boat whatever its type. To improve efficiency in certain conditions I have discovered the tweaks that increase its basic performance. It is still good in its single-sheet form and when not on-the-wind we always revert to single-sheet control. For some things, such as close-manoeuvring in confined spaces, it is excellent, which can’t be said for every multihulls – and, let it be said, many monohulls with a number of different rigs, especially those that need re-winching after each tack. Self-tacking jibs are superb; irrespective of the craft or the rig. Not having to winch in the jib sheets after each tack is wonderful, but surprisingly, often not noticed by most new crew. It has to be drawn to their attention that they are not having to release the jib sheets to winch them in again. I believe that this constant winching could be a prime reason why these days, most cruising yachts only sail the river in one direction – they sail downwind, under genoa alone and then motor back. It is just too much effort for most of today's 'softy' sailors to tack back upwind. They made them tough in the old days!
Comparative performance
The boat was optimised to sail in rivers, in shallow water and, in confined spaces, such as through moorings. It can and does sea sail with a 'normal' performance like other craft, but it excels in the rivers. We know this because it excites attention wherever it goes and it is always an object of curiosity, because for most sailors, trimarans are a rare sight. Trimarans ‘sailing’ are even more rare and small trimarans with ‘unusual’ rigs such as this, are ‘never’ seen. When we are sailing we can see and often hear the reactions of other sailors, especially when they have to 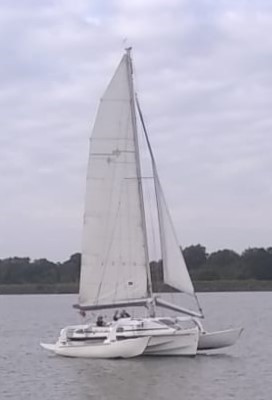 raise their voices above the noise of their engines. Skippers are often explaining to crew that it is a ‘Catamaran’. We can see explanations of what are sometimes called the ‘stabilisers’ as they lift and lower both hands in a weighing action. For some skippers actually under sail, they want to know how the performance of their boat compares with ours. They show this in several ways. If we are going to windward, which they usually choose, they will change course to come closer and then put their craft on-the-wind, slightly ahead and to windward of us, to see if they are better than we are. Not 'racing' of course, you'll understand. Much depends on wind speed. In a good wind that puts our float down, with our full rig and fully ‘tweaked’, we are difficult to out-sail to windward. Their helm-person has to be skilled and their crew must be sharply practiced with their headsail winching if we are tacking. Their boat has to be a full-racer, or modern performance cruiser usually over 28–30ft in length. More traditionally-shaped craft will be heeled on their ears and none of them can sail in shallow water, which also gives us an edge. In many years of sailing, we have rarely been matched by comparable full-cruiser, monohulls even to windward.
Off the wind there is no contest. As soon as we can ease the sheet a gulf in performance becomes apparent and most other craft recognise this and rarely try to compare. The only time other craft might try to match us is in very light airs when we are almost drifting along, hardly appearing to move. In such conditions we can hear winches beginning to tick, or see sails being poled out where previously boats were being sailed with relaxed disregard for efficiency. Our ‘ace’ performance is running or broad reaching against the tide. Our main board is up, our trim board set shallow, so that we have very little boat in the water. It would need racing craft using assymetrics and laminate sails to do what our boat does naturally with its working sails . I cannot recall any comparable craft up to 38ft even getting close to us in such conditions. This is written not from a sense of superiority, but with a reassurance that a good all-round performance can be available to the home-builder, in a modest 25ft full-cruising craft.
Everything is not perfection, however. Here is an interesting situation.
A tricky manoeuvre
One manoeuvre that is not totally conventional with the Swing rig is, picking up a mooring under sail, wind-against-tide. The classic way to do this is to round up and drop the mainsail, then using the headsail only, begin to run towards the mooring. As the mooring approaches reduce the sail area to allow the adverse tide to bring the boat to a stop at the mooring. It is the easiest mooring pick-up when executed properly.
With Swing rig the first part of the process is where the difference is, luffing into wind and dropping the mainsail, if the jib still set. If this is done when the mainsheet has been released, the jib can take over and try to swing itself downwind. It can be like a gybe, as it takes the yard with it. You have to be aware of it. The simplest action is to have the mainsheet secured to stop the jib from moving the yard any distance. It can be eased once the boat turns to run up to the mooring, as this will use the windage 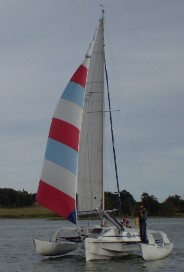 of the boom as sail area, as well as the jib. However, depending of wind strength the trimaran usually has sufficient windage to sail up to a mooring wind-against-tide without the headsail, so it is a very rare manoeuvre. Daggerboard drag might be used to slightly slow the boat. When stopping conventionally, it is usual to always take the jib off first, before the main.
The Reacher
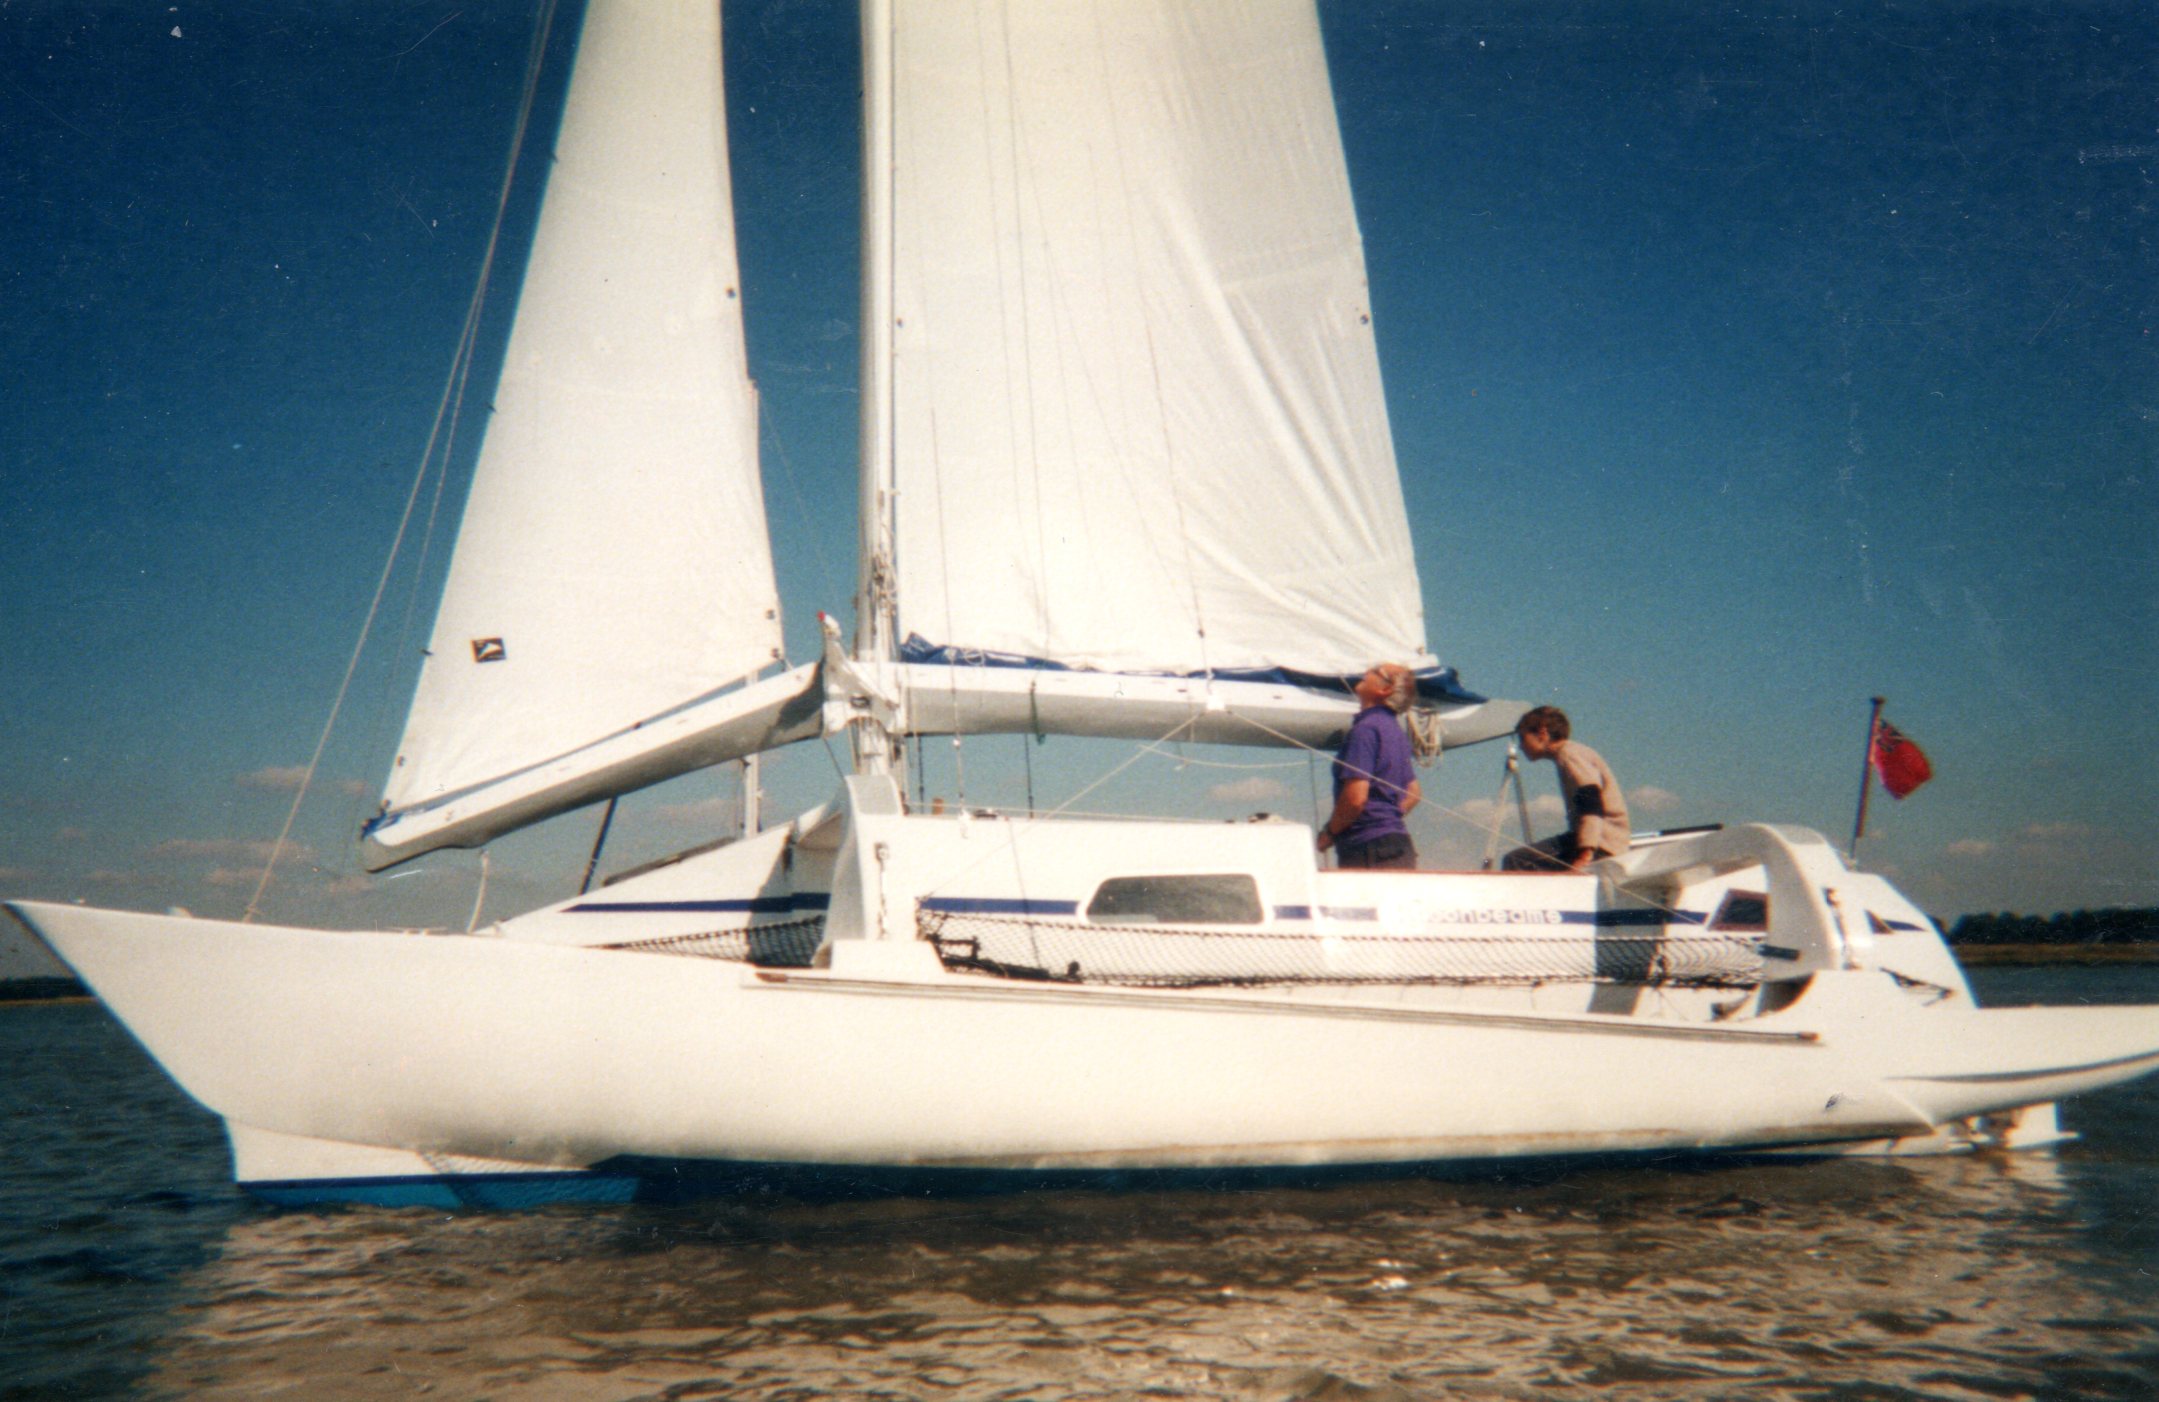
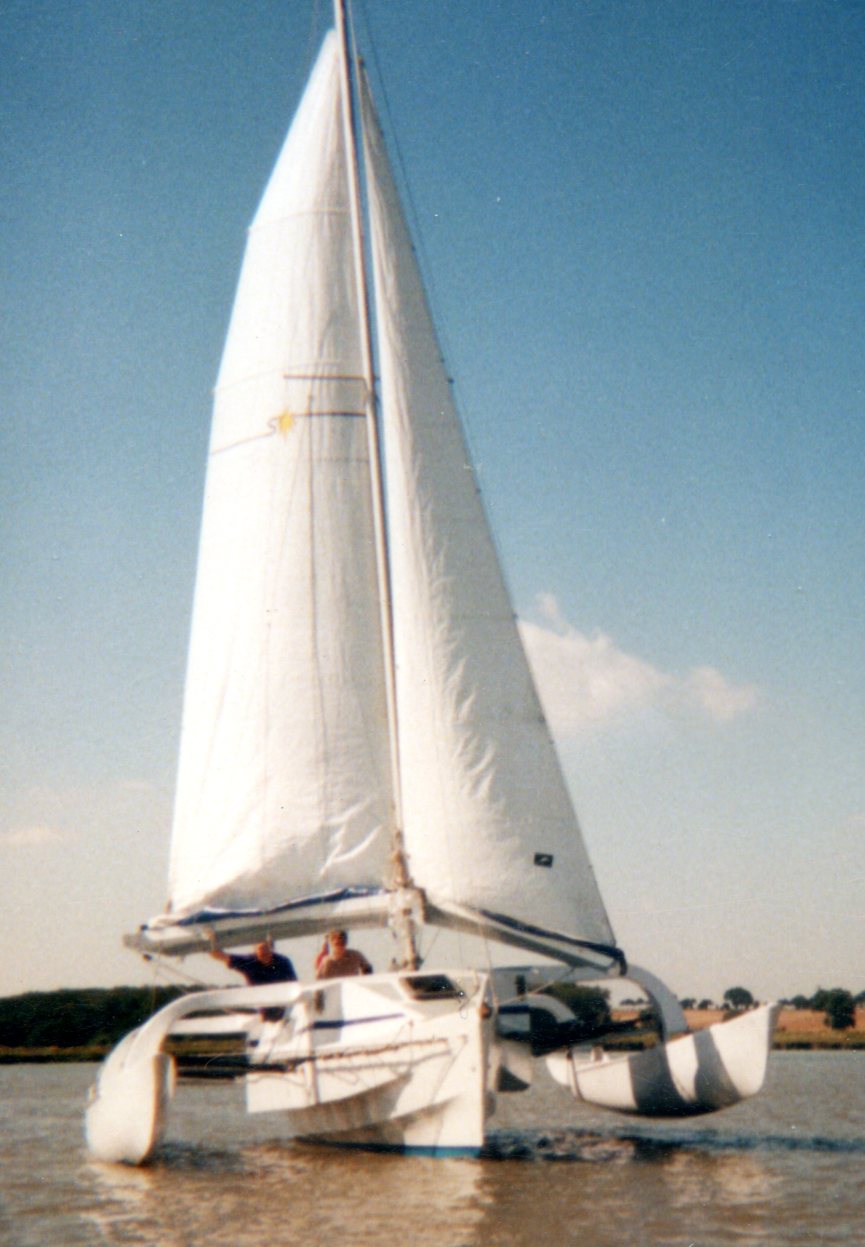
In very light airs, more sail is always needed on every craft. This was provided by a Reacher set on the end of a folding bowsprit. We have used a sock to control it, but it was always tricky to set it and douse it quickly, when its tack was so far ahead of the bow. Experiments were ongoing and now the bowsprit is no longer needed (See Section 7. Modifications) When the Reacher is in use, the jib is usually rolled, though it can be retained. It is easier to monitor the Reacher, when the jib is not set. The jib boom usually moves in the opposite direction to the Reacher as in the picture. The Reacher control lines (sheets) may foul the end of the jib boom, but they can be monitored. They run out to the floats. The clew can be sheeted back to about the cap shroud on a tight reach The wind needs to be behind the beam when the sail is deployed as the boat accelerates, bringing the apparent wind further forward. It will immediately bring the speed up from loitering at 2 knots, to 6+ knots. In such conditions most other boats have stopped sailing. In all the sailing pictures the sail is reefed except above right
Stays
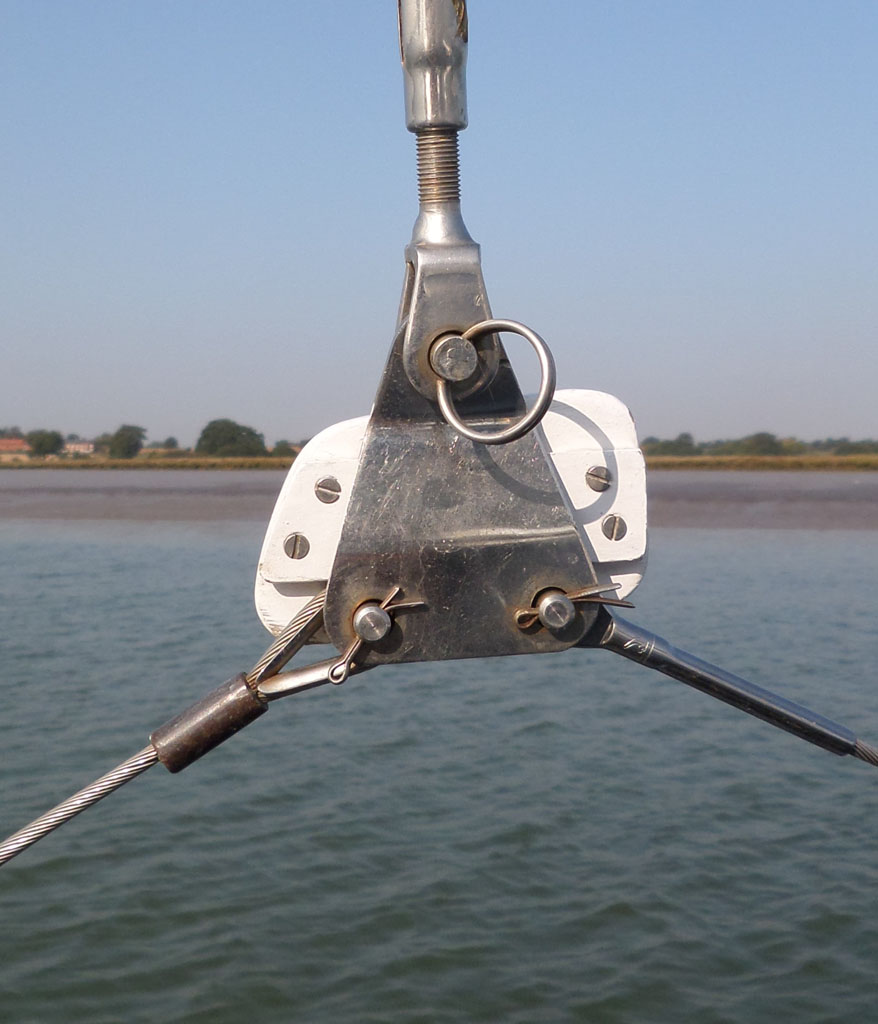 My mast has single diamond stays, lower shrouds to the cabin sides and cap shrouds to the beam ends. To attach to the beam ends there has to be a rigging span linking both beams to the bottom of the cap shroud. The link plate (see right) for the attachment also houses a holder for the nav light. As a recreational, summer sailor I rarely need to use navigation lights, so I use battery-powered lights that save all the complexity and weight of wiring runs. LEDs now make battery power perfectly adequate. The lights are at eye-height and indicate the unusual width of the boat. Due to the curved roach of the sail I don’t use a backstay, so I get sufficient support behind the mast using my cap shrouds which restrict the boom. This means that I am slightly limited in the distance that the boom can be let out. This is alright as it rarely pays to dead-run. The running sail-set with the jib automatically poling itself out from behind the main, can be seen in the pictures above. Conventionally-rigged craft lose their headsail power in this situation.
The forestay runs from the mast head to the foredeck where it is secured below deck in the anchor well. The forward end of the jib-boom rotates inside it and is supported by the jib luff spar which is three-quarter rigged. There is a short length of rigging beyond the top end of the spar, before it enters the mast. The flexibility of this section of stay allows the yard to be lifted and lowered. It is not apparent in the pictures above, which were taken in light conditions but with the boat reefed.
The later Reacher arrangement with full Mainsail described in Section 7. Some Modifications Picture Below. Alex Powell