7. GRP Estuary Cruiser.
Some Modifications.
With any boat approaching 40 years old there will be modifications.
Mine are constantly ongoing and so I’ll cover some of them here, so that you can see where ideas change and why.
Main entrance
When the trimaran was designed, some thought was given to the ‘great fear’ of monohull sailors ‘What happens if it capsizes?’ The standard multihull reply has always been ‘It won’t sink.’ - followed by the return question – ‘What happens if you get a hole in your monohull?’ The stock answer to which is to get into an inflatable, unballasted boat (liferaft). The pros and cons of this debate can go on endlessly and the best solution is for every sailor to sail in the craft type that they are most comfortable with and believe in.
There are now accounts of what can happen whenever any craft capsizes, has a keel fall off, or is holed and these are to be avoided at all costs. Reading some of the incidents involved shows that if the craft does not sink, any loose contents will soon be washed out by the rising and falling of wave action. It is important to be able to seal the entrance(s) to retain equipment on board. With this in mind the three entrances on this boat were all hatches lockable from inside and initially all ventilators were mushroom screw-down, to prevent the pumping action of the water inside the hull which causes items to be sucked out through open entrances. This would increase the chances of the crew and craft being recovered.
 This effect is very well described in Chapter 6 of Tony Bullimore’s book ‘Saved’. He found fame by surviving in a monohull Exide Challenger deep in the Southern Ocean in 1997 when his keel fell off whilst racing in the Vendee Globe. He survived 5 days in the upturned foam-sandwich hull before being rescued. He had already capsized on a racing trimaran Spirit of Apricot in the English Channel in 1989 with the unfortunate loss of a crewman. He says of Exide Challenger, which had a broken window - ‘The suction is dismantling the boat from the inside. (I) can feel the pressure as the boat rises. The vacuum effect wants to suck me towards the hole.’
The main hatch on my boat has for many years been a 500mm square hatch, set at an angle and this took some agility to get into and also to exit. It can be seen in the previous Section 6. Interior & Deck. We, who use the boat regularly were quite accustomed to it, but some visitors did not find it easy, especially the larger, or the more elderly. I came to recognise that the chances of capsize where we sailed, were so small that this tricky entrance should be modified, but how? Taking the hatch out and reworking it with washboards was going to make an enormous job, particularly of the internal trim in the vicinity of the hatch. In addition, on a previous craft, wooden washboards had proved no problem for thieves.
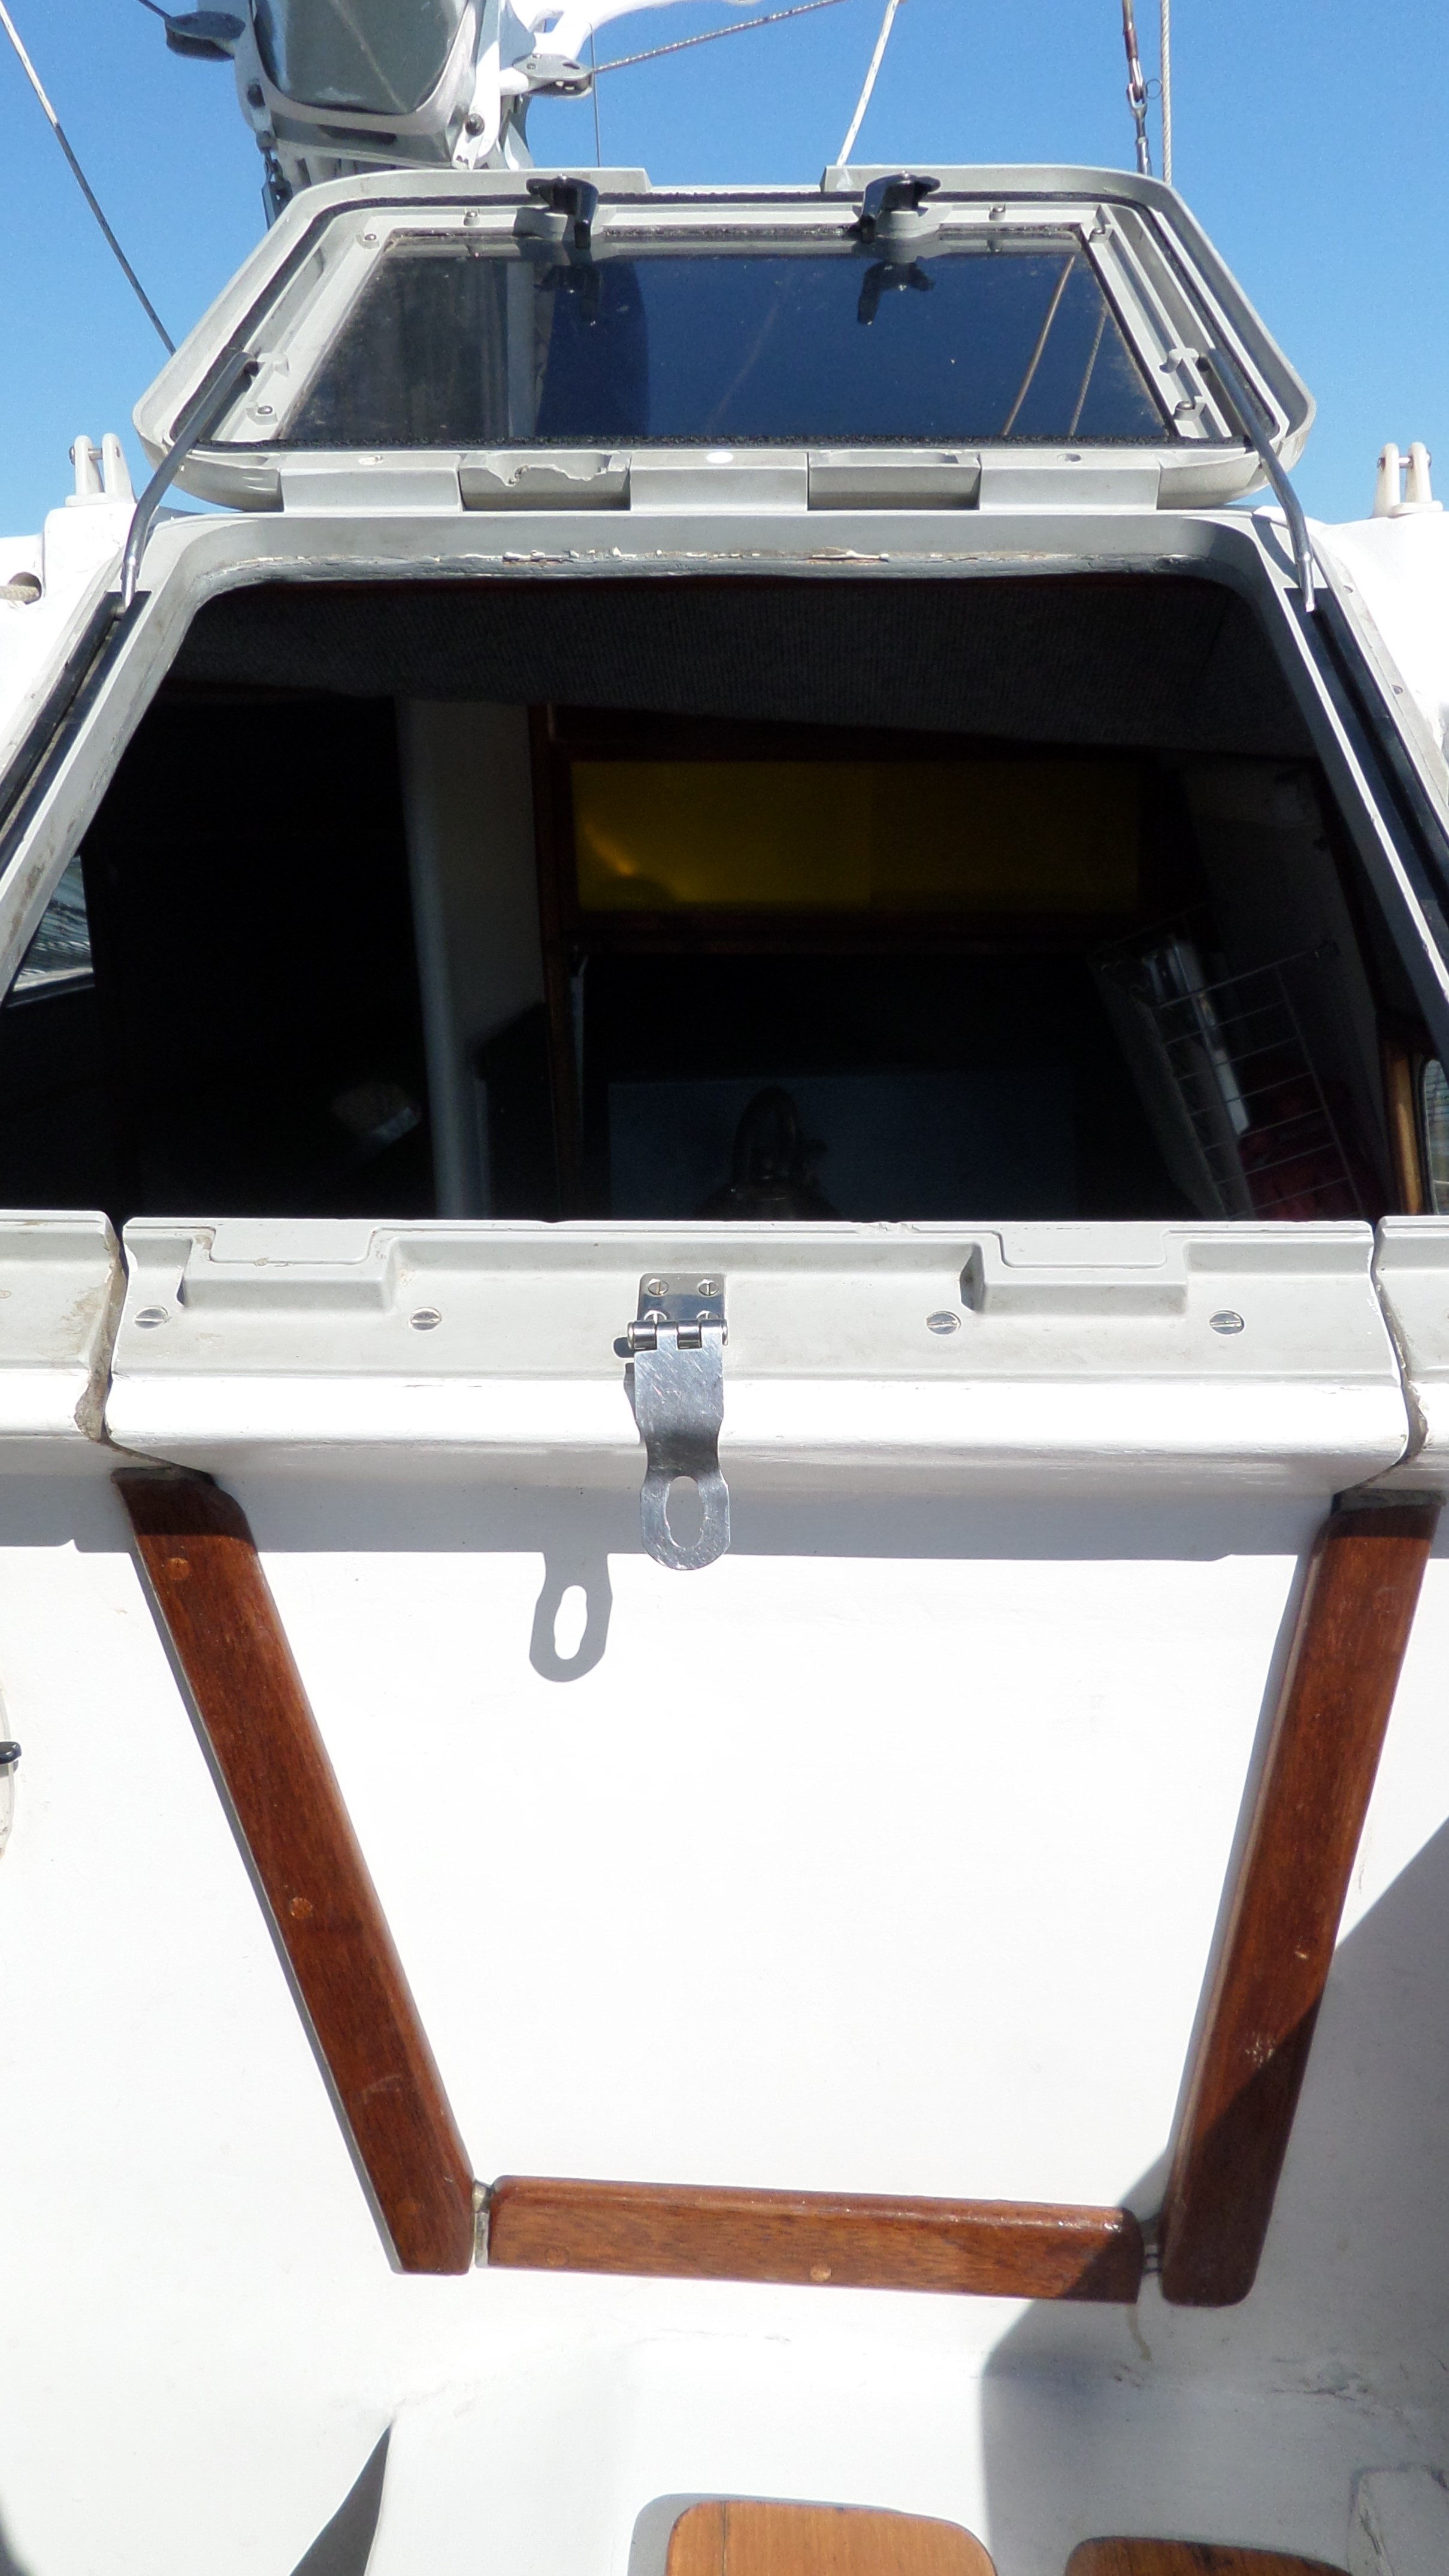
 The ‘breakthrough-thought’ that made changing the entrance possible was that I could cut the existing hatch (not the opening lid), then use the cut section as a washboard. This is not something that is normally contemplated, but for me it worked. I had to avoid its fixing bolts and I had to check both the exterior and the interior to ensure it would work. It was easily cut with a grinder disc and jigsaw, then the edges made good. Timber screwed/bolted in place inside and out formed the walls of the retaining groove with the washboard section being secured with clips from inside.
This quite small change has been a great success, not just for entry and exit, but it allows the person below to see what is in the cockpit and to pass and retrieve objects onto the seats adjacent to the entrance, especially food when eating alfresco.
The Reacher
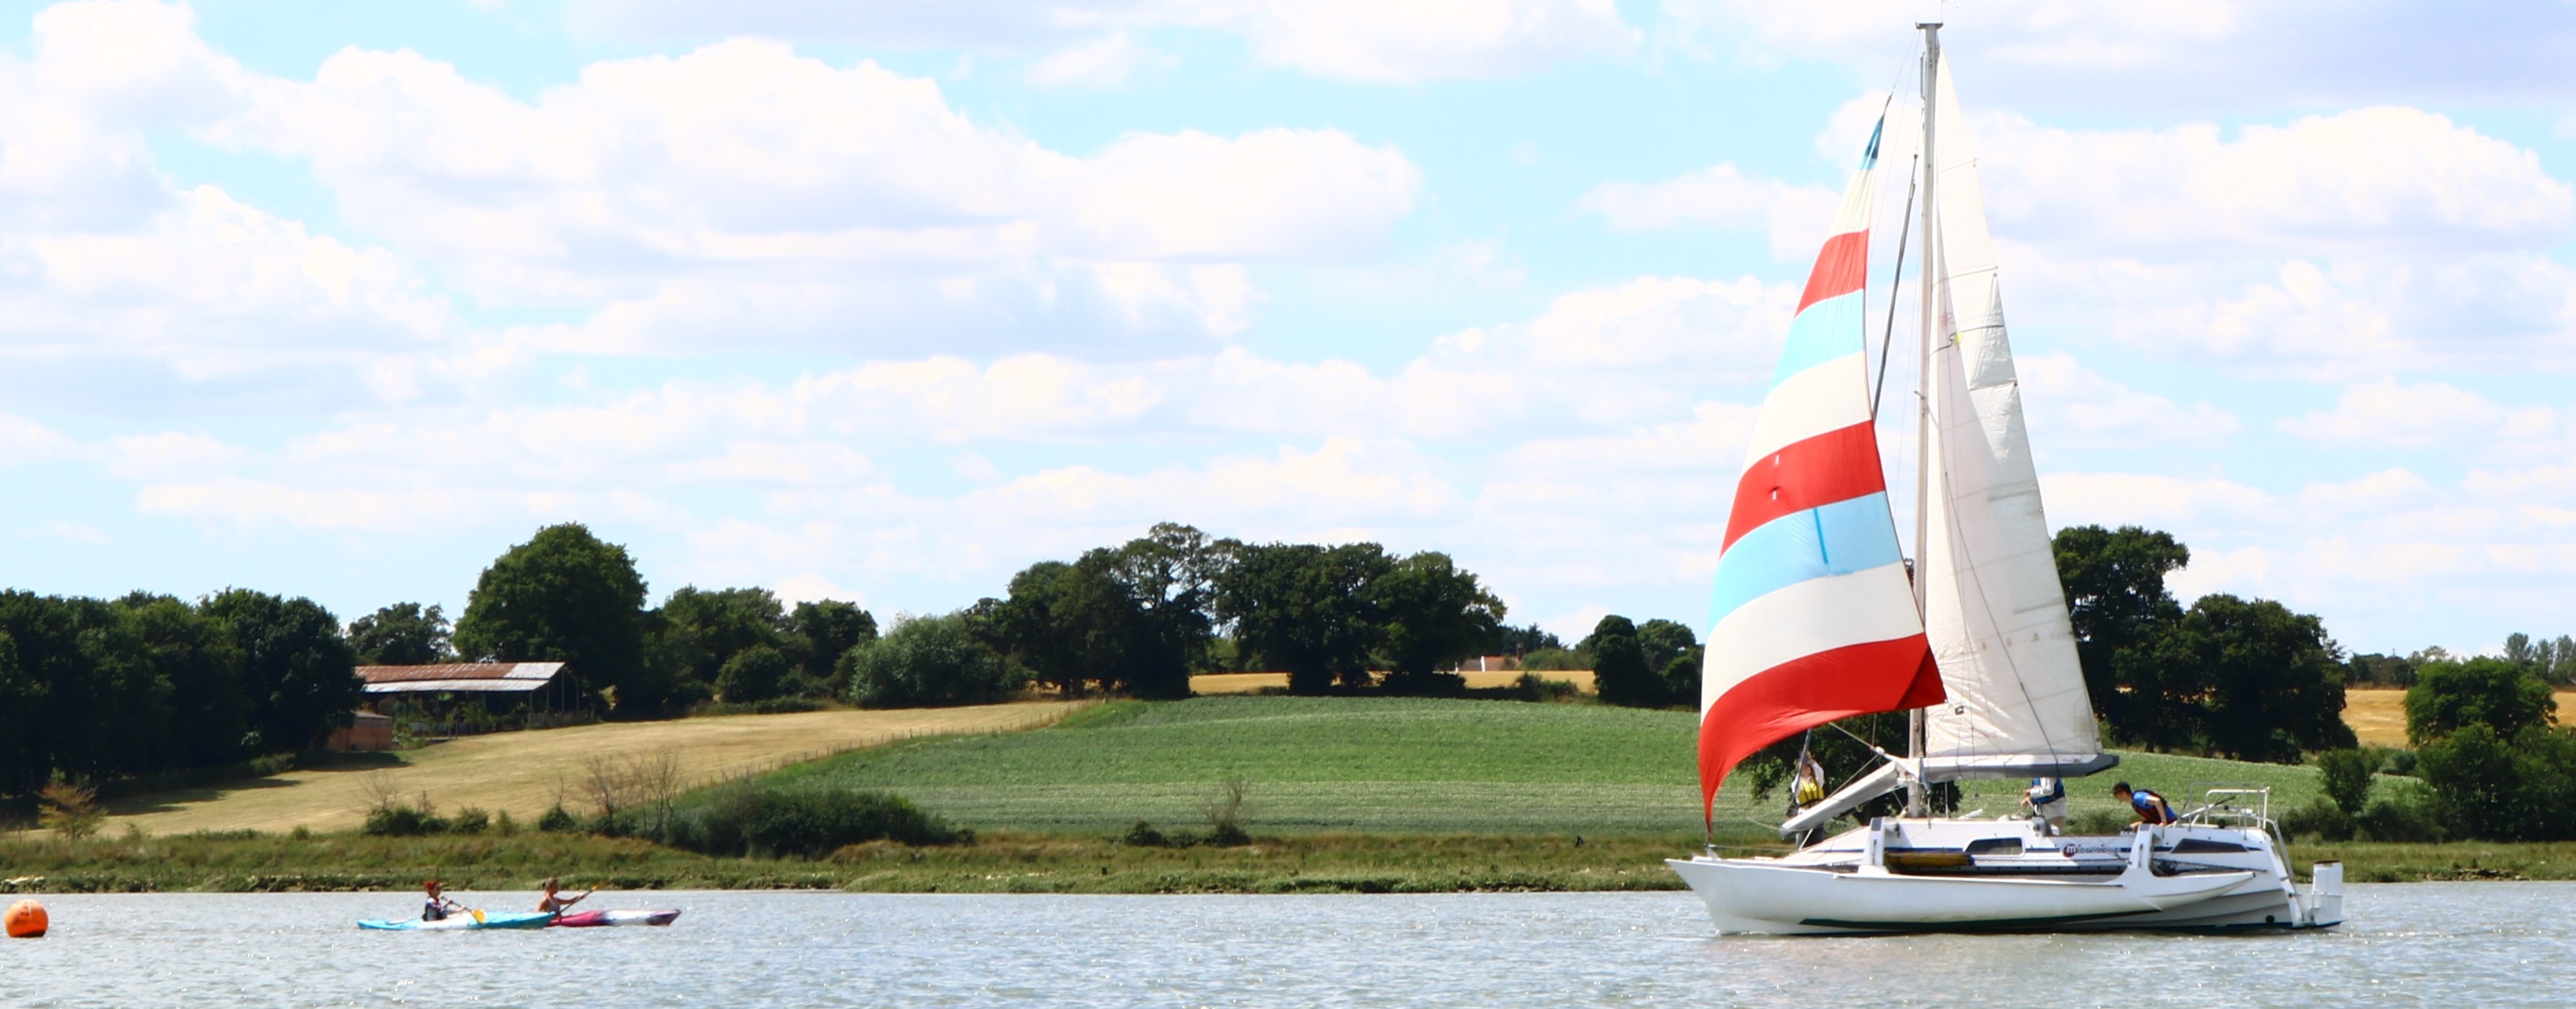
The longest running, experimental saga on the boat, after the Swing rig has been the Reacher. The plain jib and main are excellent for windward work and their combined efficiency off the wind exceeds the performance of all other boats up to 30ft LOA using such sails. When the wind falls below about 5mph and we are running or very broad reaching, we need more sail. I can understand that almost all other craft would be either stopped or motoring in such conditions, but we CAN sail and sail quite quickly – if we have the right sails.
 On a previous boat I had a flat-cut spinnaker that did this job. Having the width of the trimaran means that a spinnaker pole is not needed as it can be replaced by a couple of ‘sheets’ (I’ll omit the ‘guy’ terminology) on either side. In the river with winding courses, the boat is almost always broad reaching on one gybe or another, rather than dead-running. At sea it may be different.
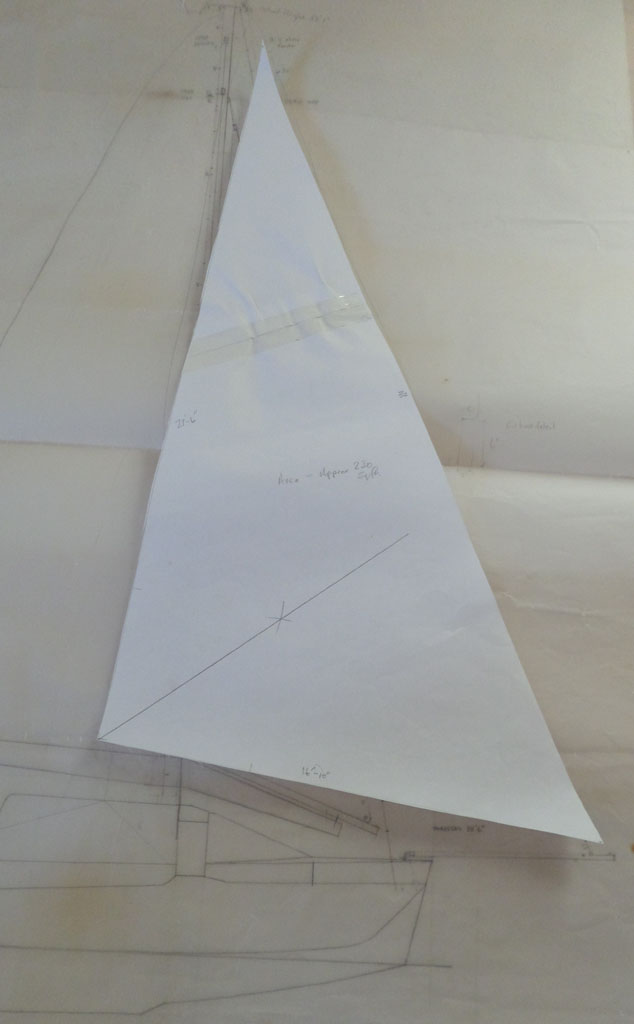
I went to the drawing board (left) and calculated the sail size that I needed. I cut out a paper scale-sail and checked the sheet angles on the drawing and managed to get a second-hand sail close to my dimensions for a reasonable price. It can be seen in My Rig, No 5 on this website. It is rip-stop nylon with a tape luff. It is very lightweight, but generates an amazing amount of power that needs careful handling. What follows is an outline of the difficulties of using this sail, how they have been addressed and what the current (most successful) solution looks like.
Bowsprit
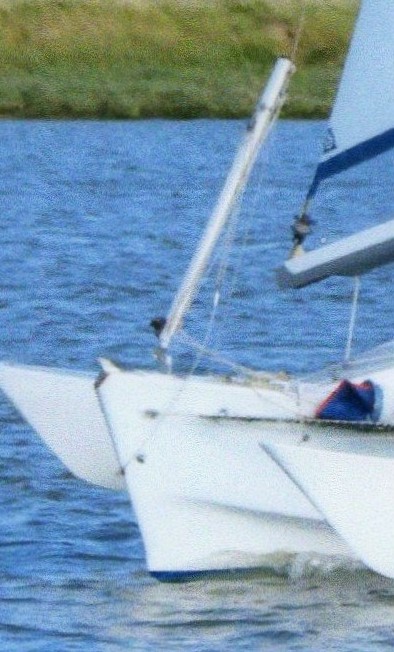 The boat is very short at 25ft with restricted space between forestay and jib-boom roller-luff-spar. There is little length between forestay and bow, which is rather narrow. To set a sail ahead of the forestay there must be clearance for that sail to move from one side of the boat to the other without wrapping it round the forestay. The classic solution is to use a bowsprit to extend the fixing for the tack well ahead of the bow and to provide the space needed for the sail to pass ahead of the forestay. As the sail is rarely used the bowsprit is usually made to retract or fold. Ours folded upwards (right). To secure it requires a bobstay to hold it down and side stays to the tips of either float. The stays needed to be adjustable and needed securing points. It was not a quick or easy procedure to deploy all this whilst balancing on the end of the bow.
Attaching the sail Imagine the sail in its bag. It has to be withdrawn, attached and hoisted. The tack has to be secured to the outer end of the pole bowsprit and the sheets attached to the high clew. To get the sail to the end of the bowsprit means fixing it before the bowsprit is lowered or having an outhaul to pull it out. The process becomes complex as the sail must be under control at all times. The sheets have to be in place around the boat ready for use and the clew has to be at an accessible height from the bow, or fixed before the sail is outhauled.
Sail control
The obvious answer to keeping the sail docile is to use a ‘sock’ or ‘squeezer’ which has a continuous line to lift or pull down the ‘bucket’ at its mouth. Hoisting the bucket is okay, but pulling it down once the sail is at the end of the bowsprit is not easy, if it is even possible. The angle of pull is wrong for a person on deck with the sail billowing out, unless there is an additional turning block for the downhaul on the bowsprit end, or the outhaul is released to bring the sail back inboard.
Complexity
The whole process is now getting highly complex with many lines that must be rigged in the right order and with them correctly overlaid on one another. It is so easy to get the outhaul over the sheets etc. The sail has to be hoisted and the correct pressure applied to the sheets to set the sail whilst steering. When everything goes smoothly this was always a lengthy process, but then the wind would change and the sail would need to be ‘snuffed’. Trying to go to windward under either sail or motor caused the whole hoisted ‘bag of sail’ to pant back and forth. Another problem was twist. The sock’s lifting control line tended to twist around the sail, stopping it from being properly hoisted or pulled down.
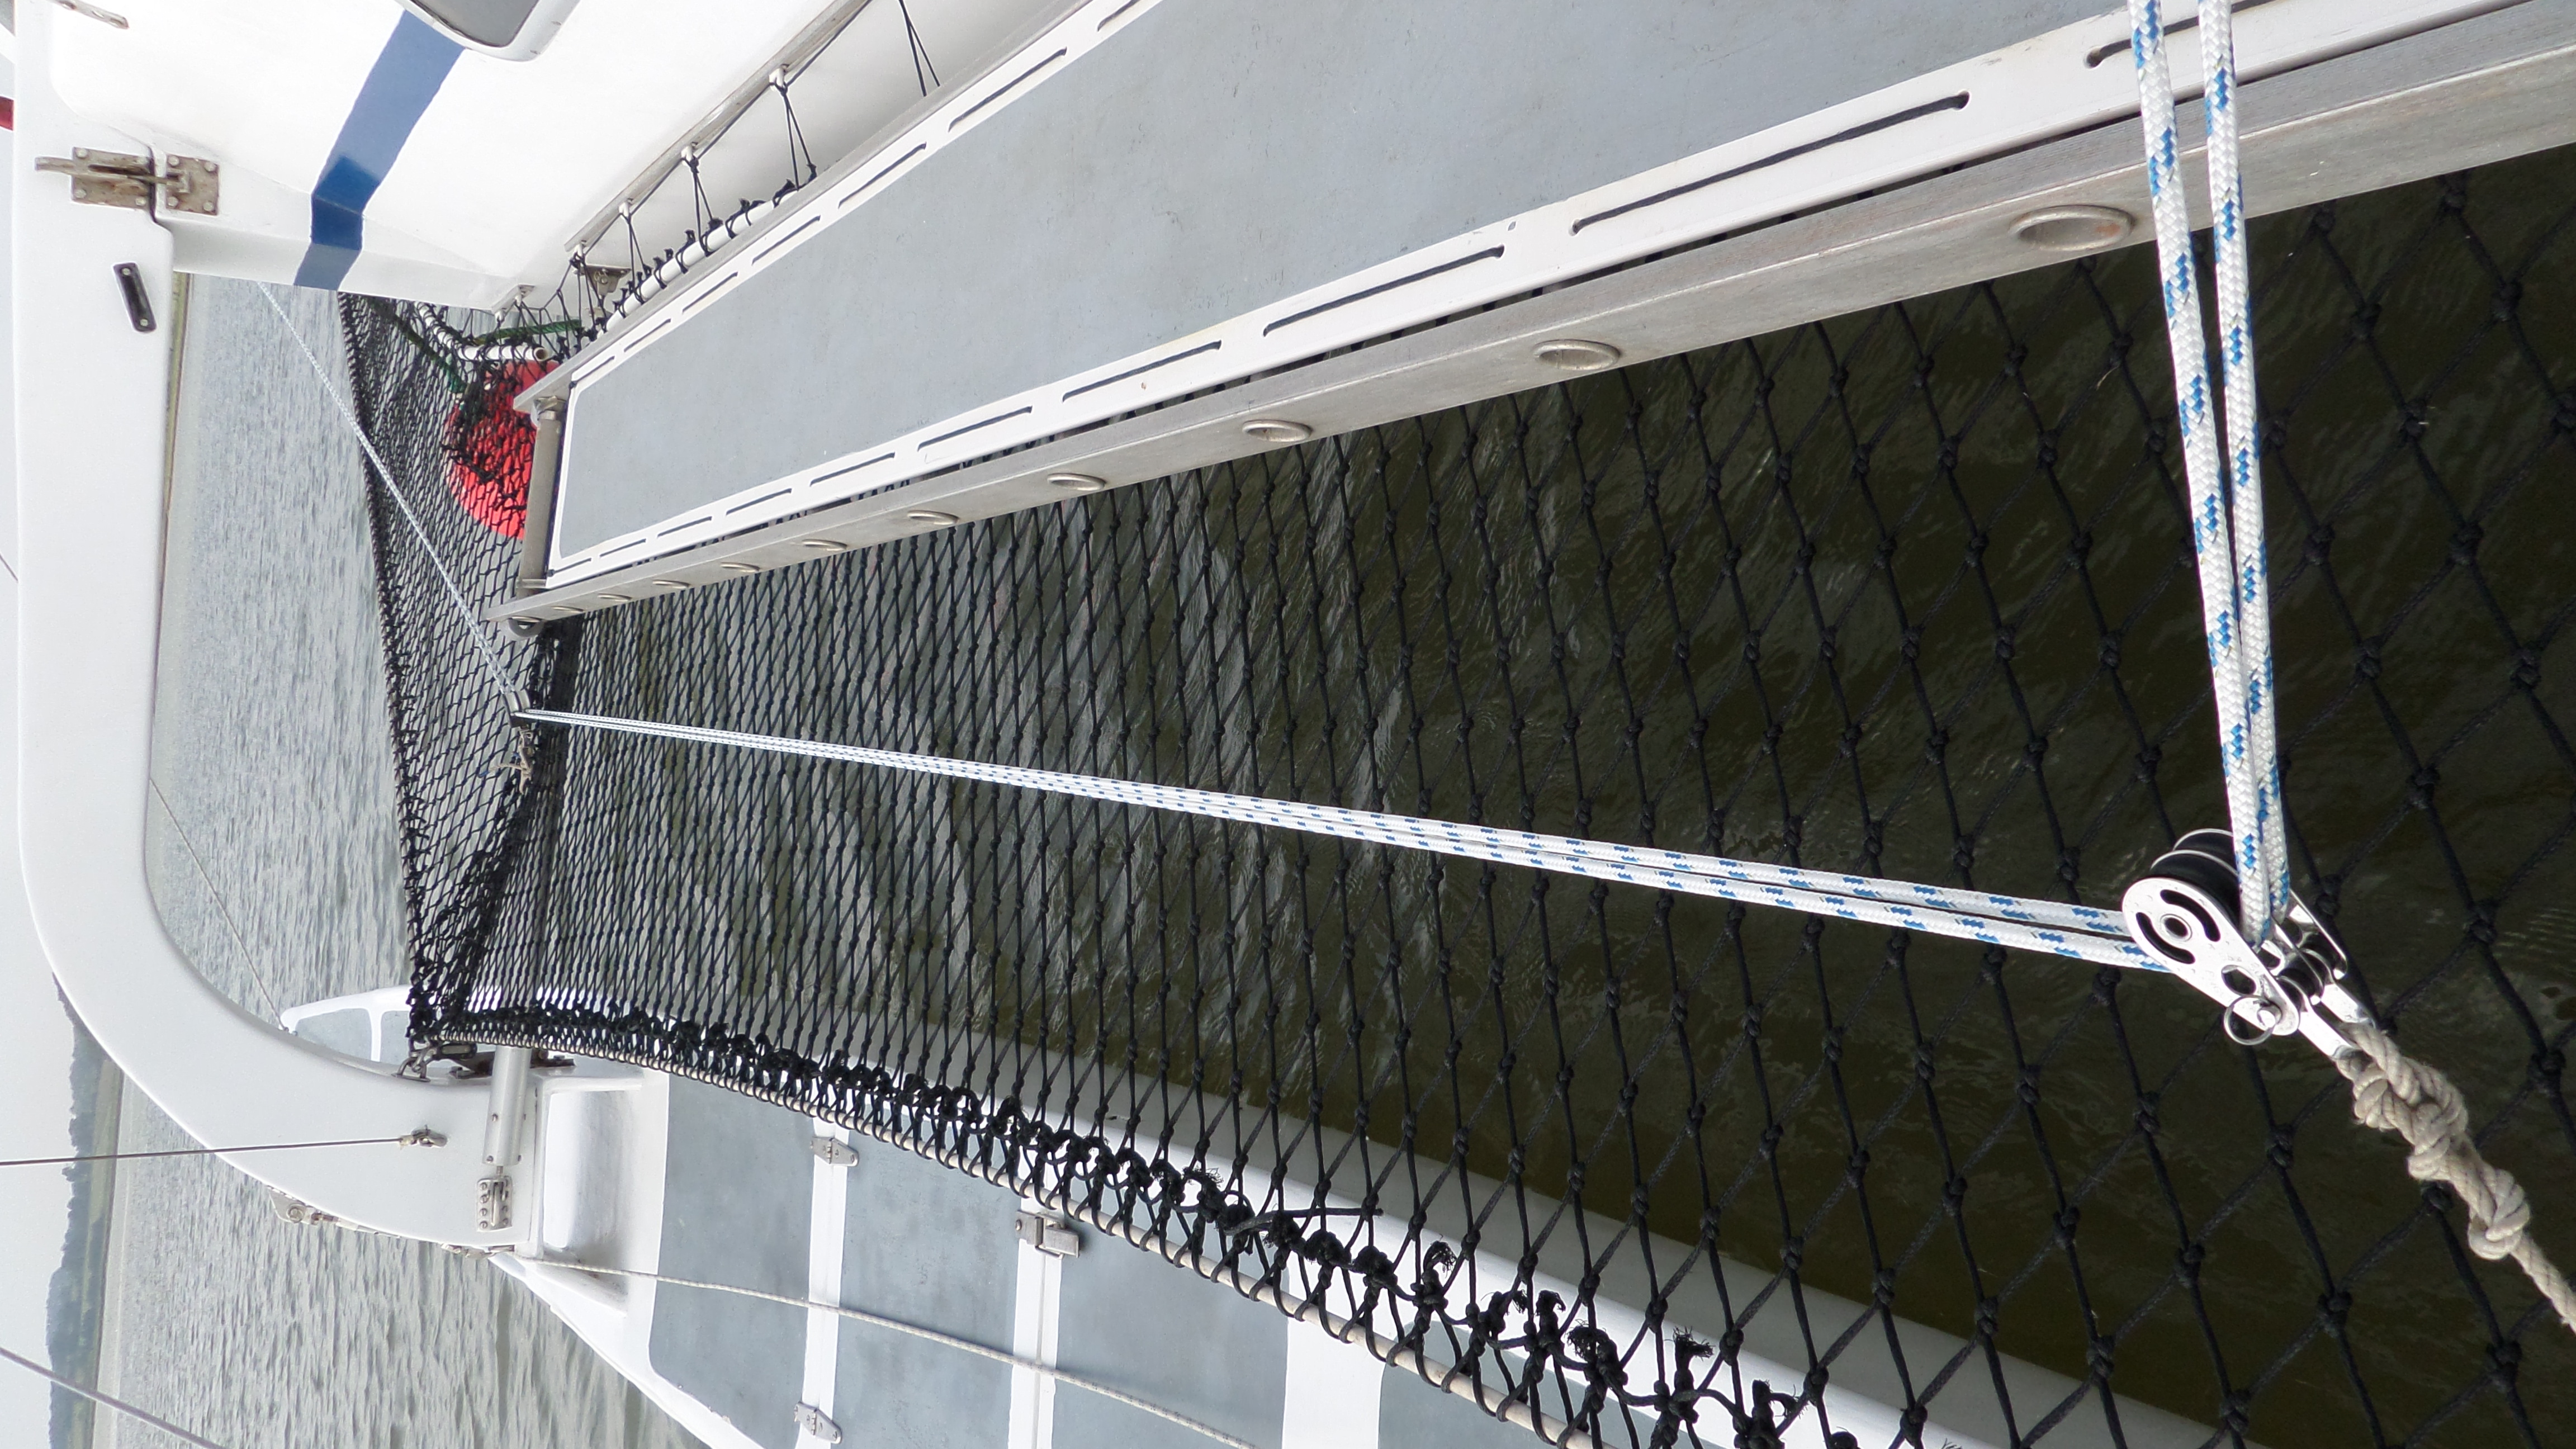
As the sail came down it had to be laid along the side-deck, which was excellent for this purpose, but there was an unsupported length from the bowsprit end to the side netting that would allow the sail to sag down towards the water. An extra clip-on netting tried to address this problem.
Whilst other people may have great success with these systems, we never felt that we had a foolproof, easy, method. On a couple of occasions, we had a real wrestling match, mainly when we had to retrieve the sail due to big wind shifts or a sudden increase in windspeed that set the whole lot flogging. The halliard had to be eased and the sail had to be tamed. On one occasion the sail dropped into the sea going under the boat. For a time, it looked as though this sea-anchor might not be retrieved. When it was recovered it was torn (Note patches on later pics). The crew threatened mutiny or desertion if the sail was used again. It was time to rethink again.
Roller-furlers
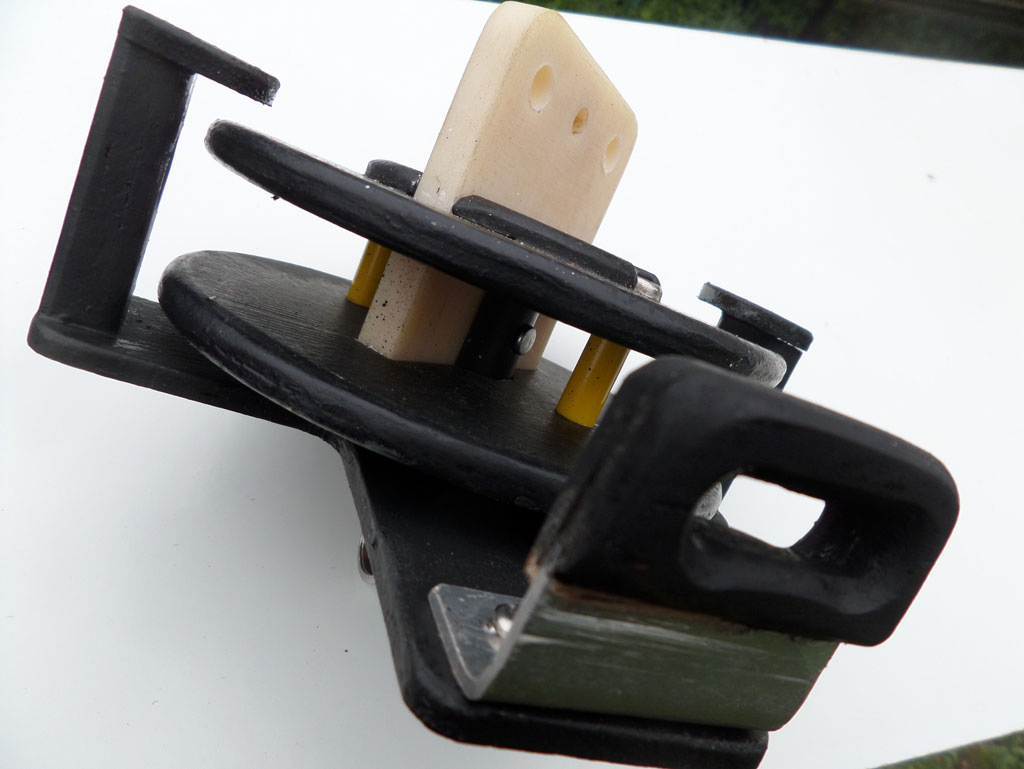 The advent of roller-furlers offered an alternative. Having watched all the videos of the many different systems I made one up (see left & right) based on Barton swivels to experiment with it. Commercial systems are expensive, so I needed to see what was involved. I was able to use it to investigate several systems - single luff lines, double luff lines, padded luffs etc. This was a
  useful exercise as I came to understand the problems better and knew what qualities I needed. I wasn’t using a spinnaker, so the top-down system was not essential for me - though I checked it out. I still had the problem of the length of the bowsprit. The angle of the furling line going onto the furling reel needs to be about right, which means the line needs to pass through a controlling block somewhere along the pole. I had a problem making the cage that surrounds the reel to keep the line engaged and maintaining the reel’s grip on the line.
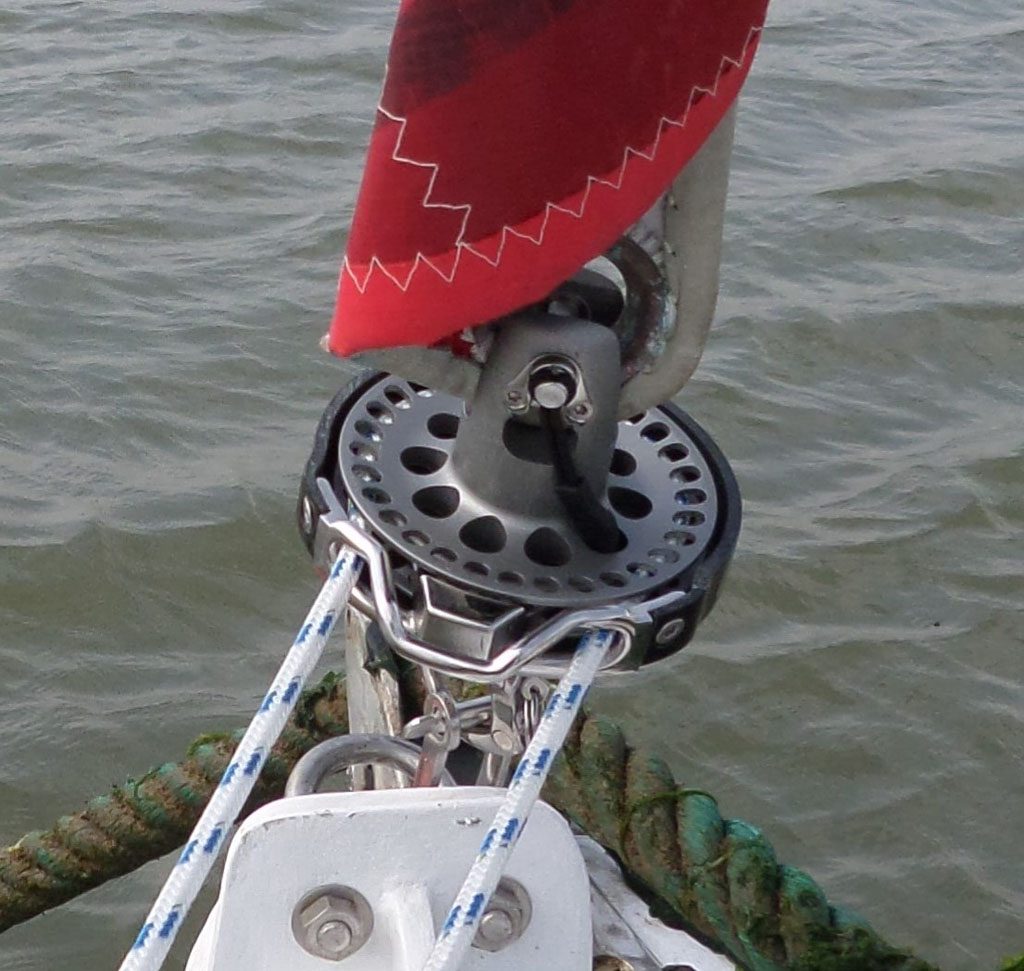 It has never been my intention to advertise, but for ease and clarity I found what I wanted with the (French) Facnor FX+ drum and top swivel (see right). It’s not cheap, but no systems are. It is well engineered, neat and has a number of clever ideas such as its locking, attachment pin and the notched drum for introducing the reeling line. I did not buy guiding blocks; normal ones will do if they are left on the continuous line. Only two double blocks were needed. I did not know the length of continuous line required as I lead it away from the mainhull. I made up the line by welding and sewing it together. I later saw an article in PBO No 670 by Roger Hughes on correctly splicing a continuous line for exactly this purpose on the same type of reel.
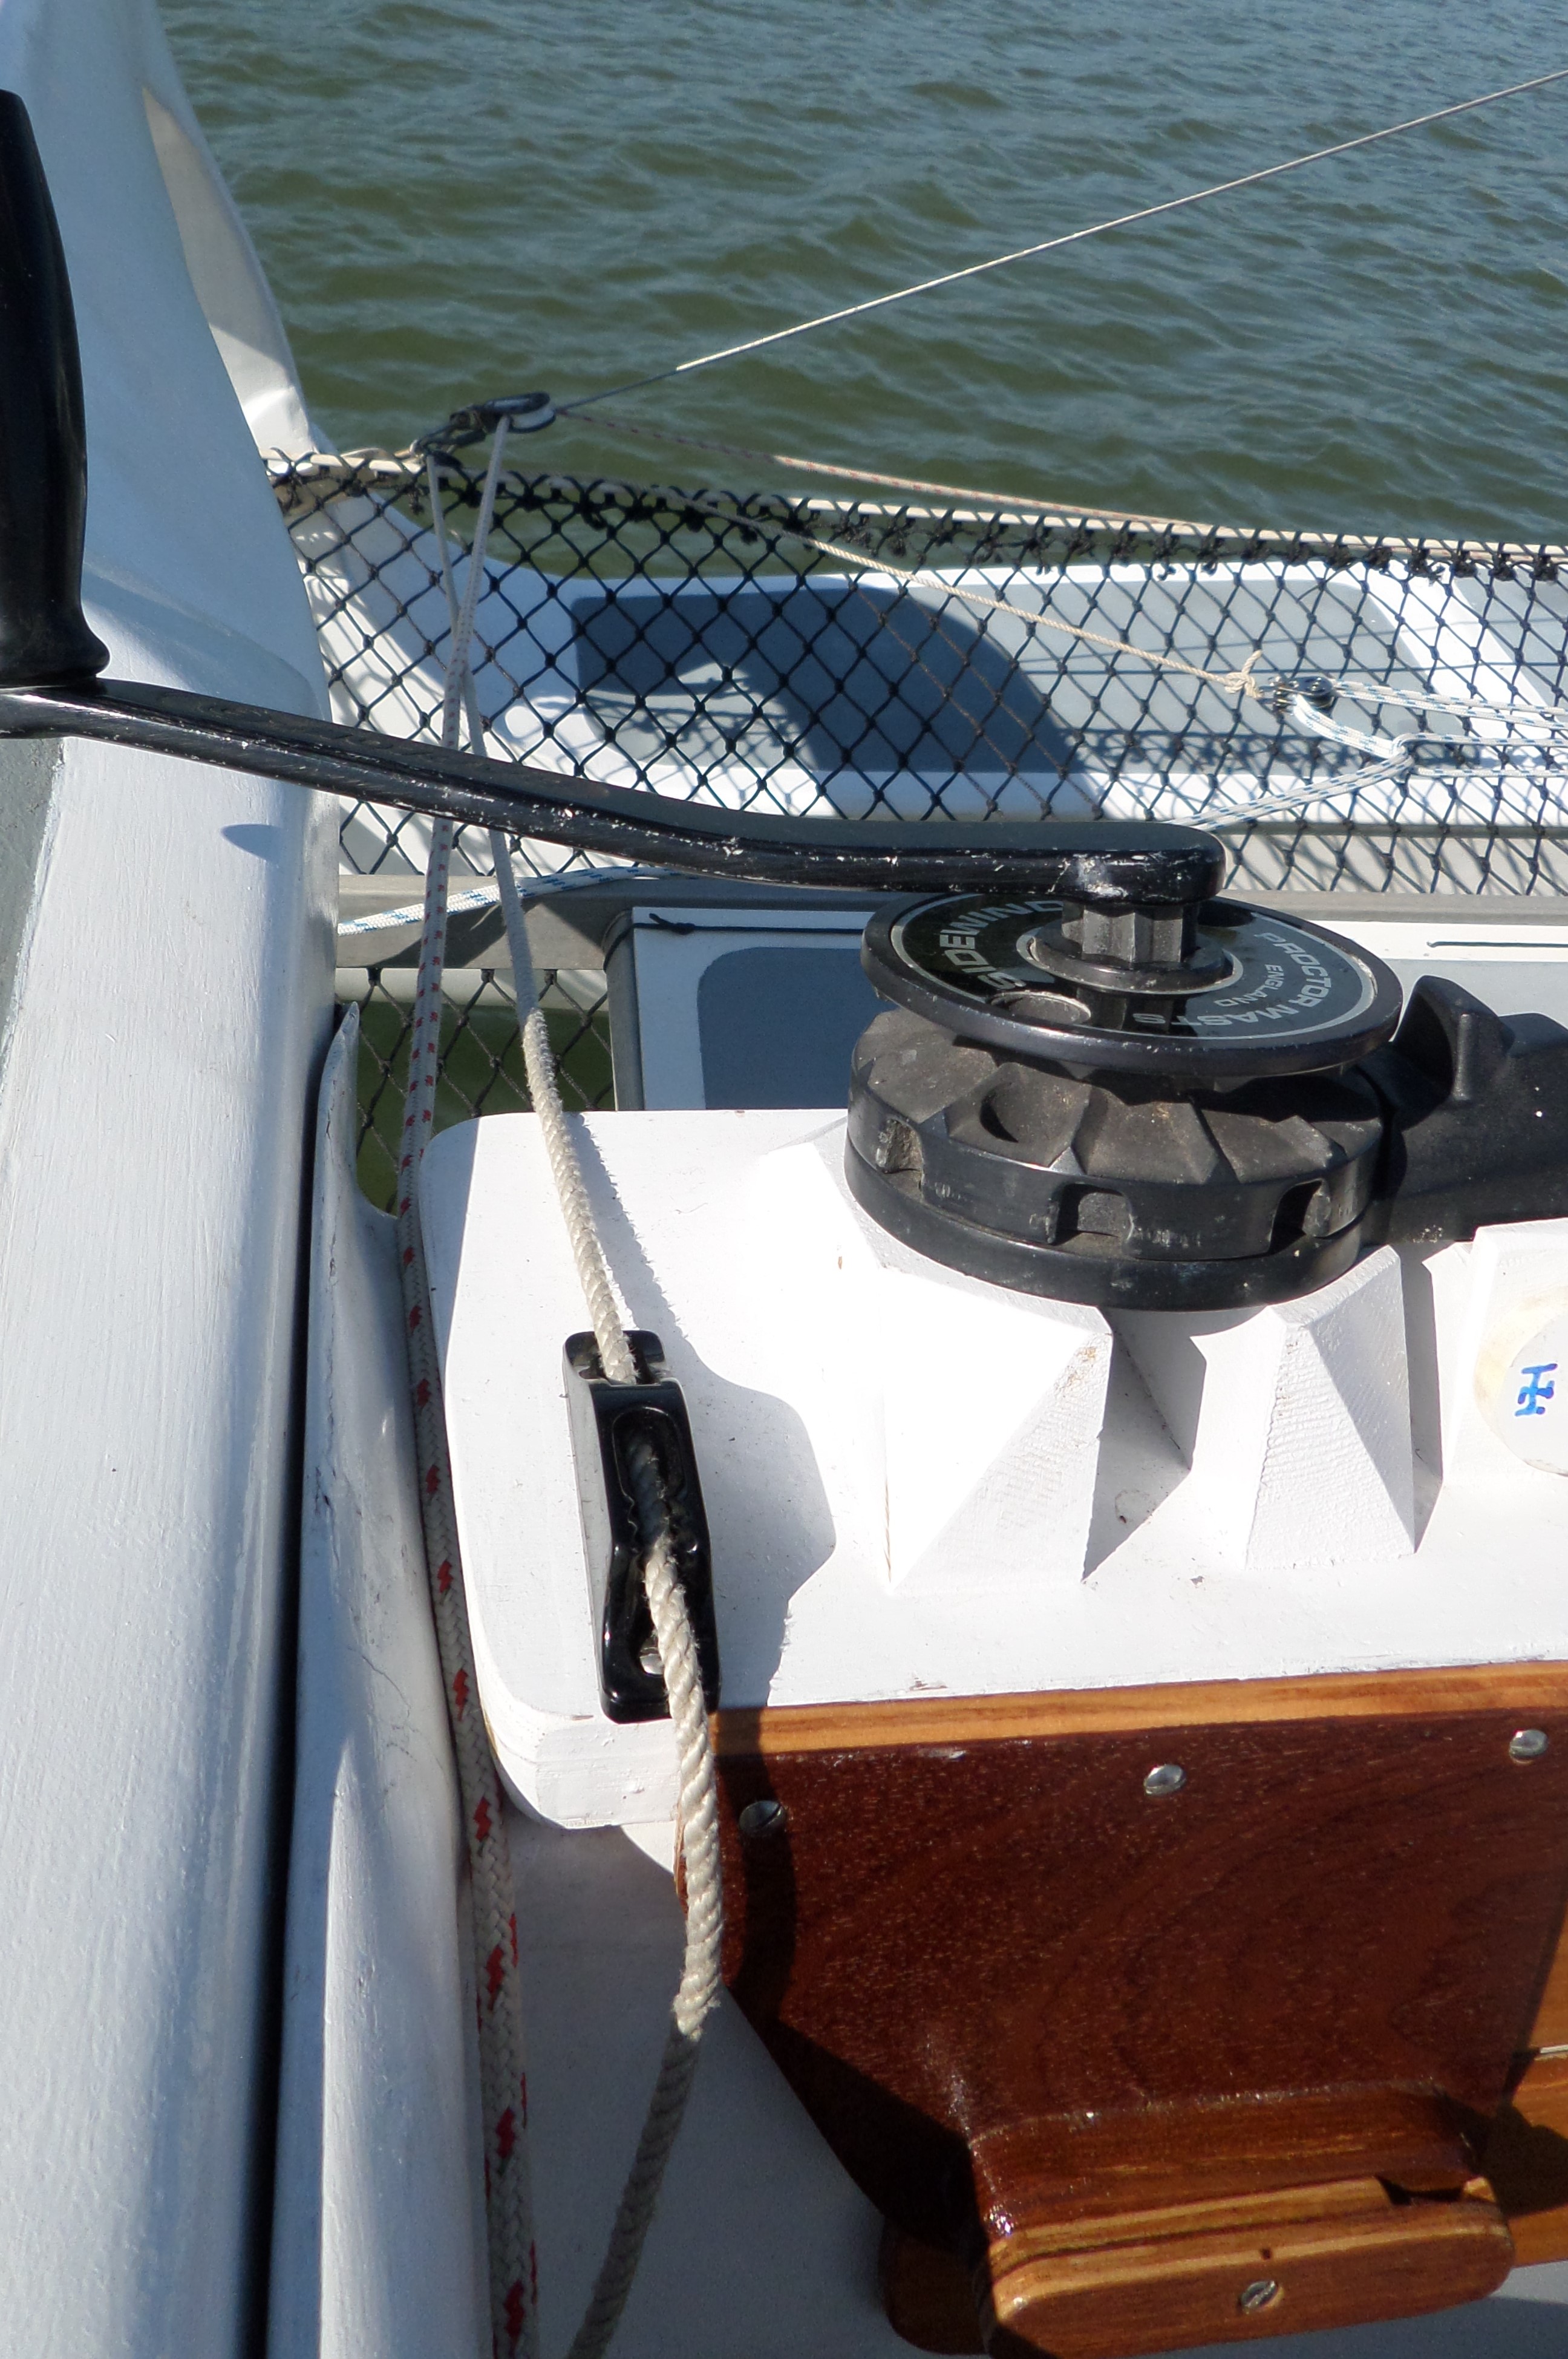
I found that the line could be controlled by hand, but would need to be secured once the sail was furled. I was fortunate to have acquired an elderly Proctor Sidewinder which I could use as the cockpit end of the control line. It can be locked. I secured the Sidewinder without drilling holes in my boat - taking into account:
- being out of the way of all existing sailing systems
- the angle it needed for alignment to the first turning blocks
- having a tension system for the continuous line
- the clearance around it for the length of the winch handle
- an indication of which way to turn the handle to reel it in or out, which can change.
Furler Operation
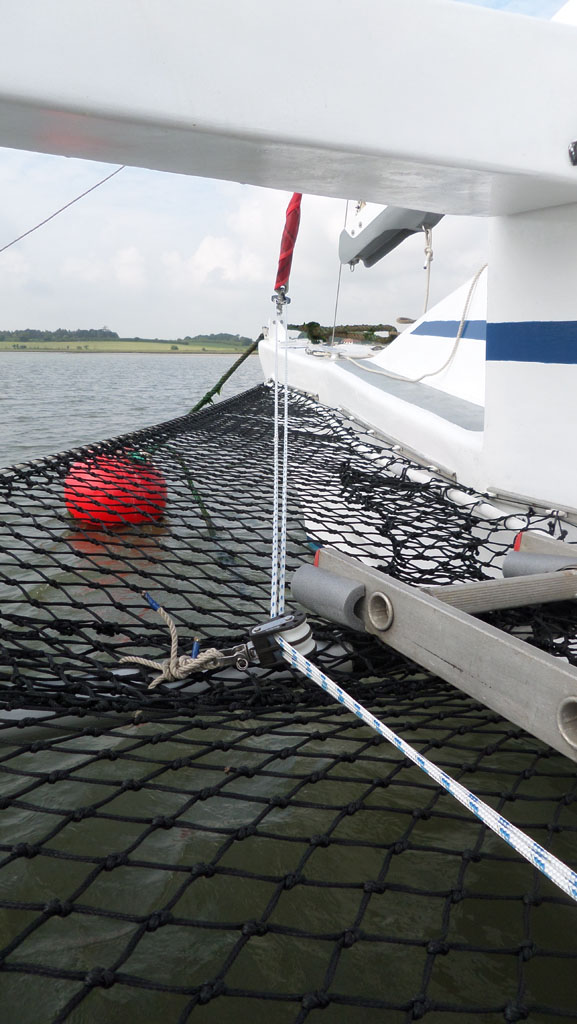
 The major advantage of the system is that the bowsprit is no longer required. This removes its weight and the need to deploy it and secure it. The reel is attached to the bracket that once supported the inner end of the bowsprit. This means that there is a very small gap for passing the sail outside the forestay. This is the greatest disadvantage. A crew person can go forward to hand it round or the sail can be wound in before going from one gybe to another and then redeployed on the opposite side of the boat. This IS possible. It is secure and it removes the anxiety of possible tangles aloft. It is a reasonable price to pay. The sail rolls tightly and surprisingly small onto its luff. This means that it can be left hoisted
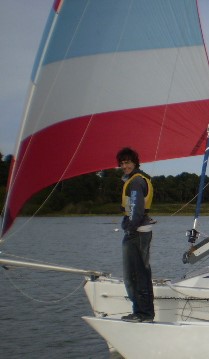
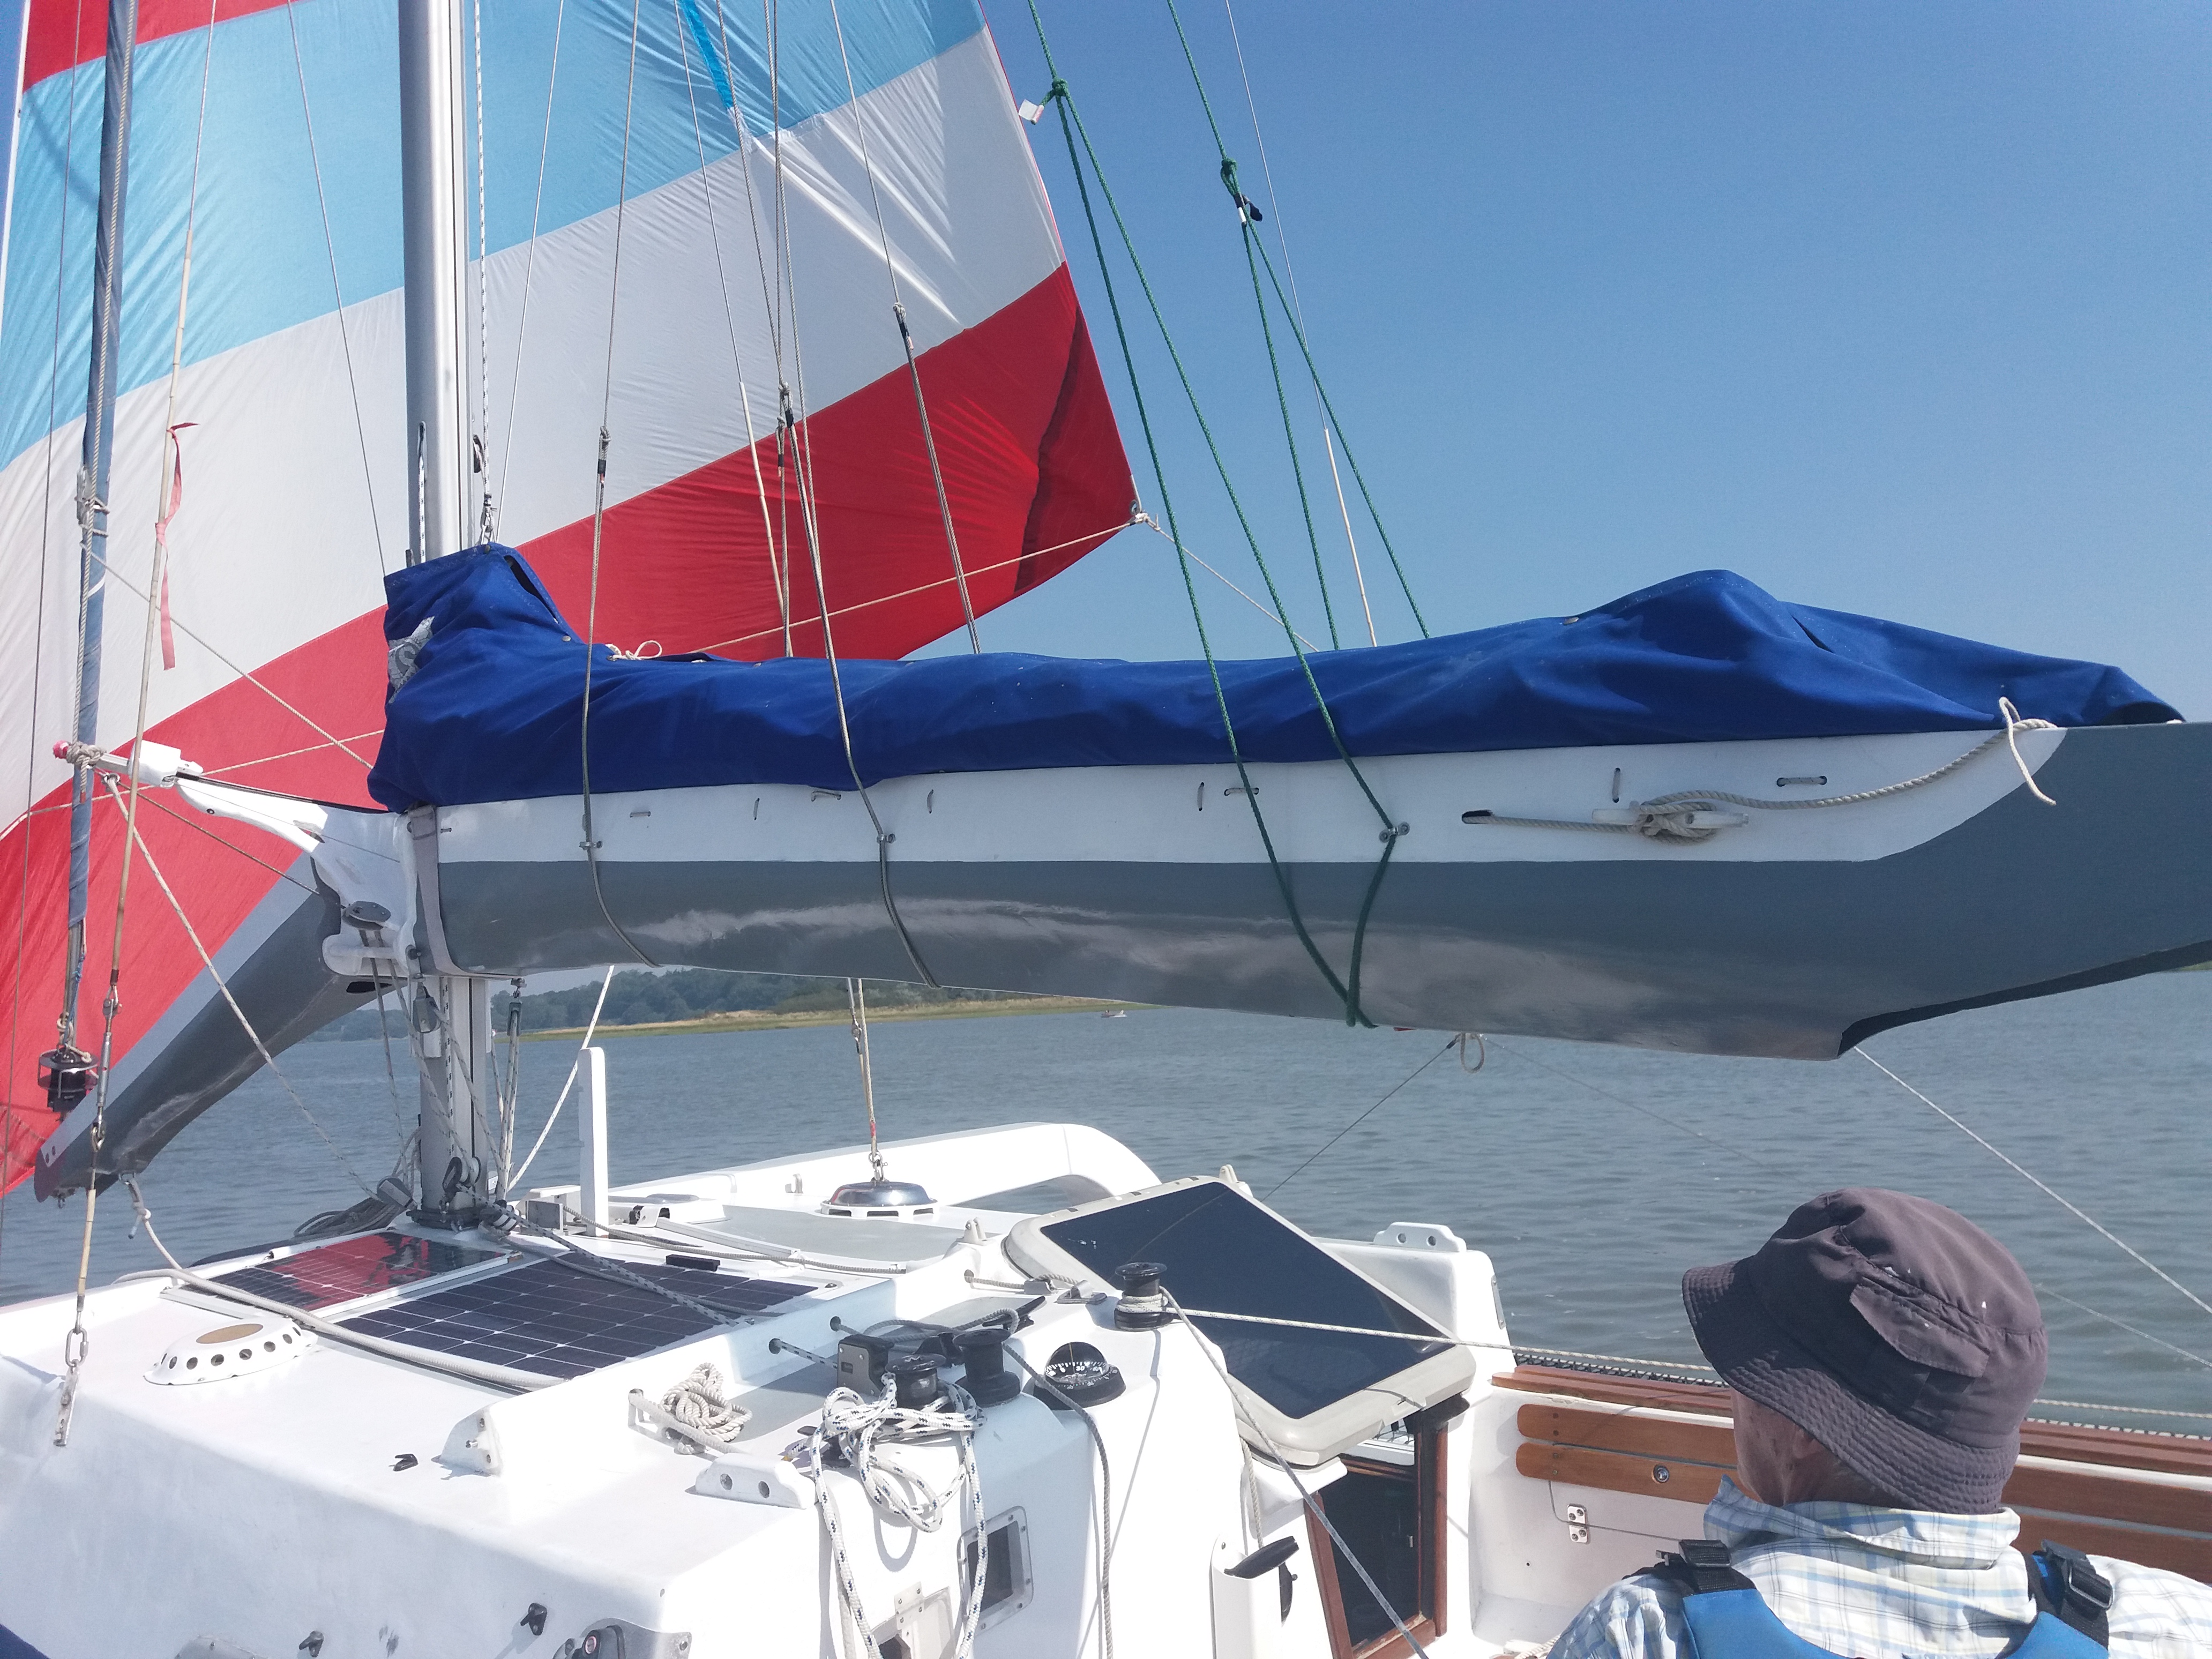
  when all other sailing functions are being followed. We can sail all points-of-sail with it in place. Rolling it away, almost by definition, means that another, different sailing process is about to follow, but there is no immediate need to put it away. It can be temporaily forgotten as the replacement sails are being set up for the next sailing configuration. Only when that operation is complete is there a need to pay attention to the reacher again. It can be put in place ready for later use before the boat departs, or during sailing. It is a great improvement on the ‘hoisted bag’ of the snuffer system previously mentioned. The sail can be used without the other sails (see above) as it is then visible and easily adjusted on the winch usually reserved for hoisting the daggerboard should that be necessary. Using the sail needs at least three hands. Having the helm impeder (see below) on the tiller assists greatly, whilst reducing stress considerably.
Sail modifications.
We had a problem with the tabling on the peak of the sail. There are several layers of cloth which make the sail stiff and broad at this point. This area was fouling the forestay as it nears at the top of the mast, for the gap between the two is much reduced. I folded the sail vertically and bound it tightly with cable-ties to reduce its size, so the clearance is now sufficient for the sail to roll, keeping it away from the stay. The reacher sheets can foul the jib boom if they are not being used when the reacher is hoisted but rolled away. They are stored away by being led vertically down to a carbine hook on the reel’s deck-fixing bracket, to keep them clear. Photo below. Alex Powell
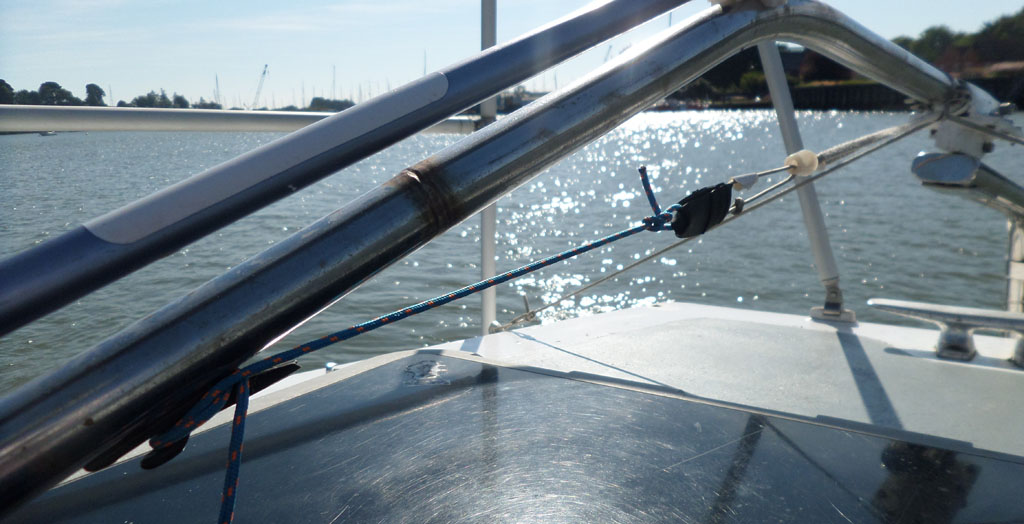
 Helm impeder
This is a fancy name for a device to grip the tiller in place wherever you want it. It is not a late modification, just a very useful device.
It was devised by John Huntingford and described in the Dinghy Cruising bulletin 86 of the Dinghy Cruising Association. I describe it on page 60 of my book Practical Dinghy Cruiser, but I mention it here as it is so simple, but effective for tiller steered craft. It allows the helmperson to release the tiller to manipulate reacher sheets to put them onto or release them from a winch. The beauty of the system is that the tiller can be moved at all times and the pressure on it can be eased or increased.
My pictures show the simple components, a hook (top left) some thin string attaching it to a piece of cycle inner tube (or elastic), more, longer, thin string is also tied to the inner tube. A small cleat is on the underside of the tiller towards the handle. A small deck loop is also on the underside of the tiller, towards the rear. A longer loose piece of soft string is attached on either side of the deck below the rear of the tiller.
Invent it for yourself to suit your boat.
To set it up, take the middle of the deck string and poke it through the deck loop on the underside of the tiller. Catch this string-loop with the hook of the impeder and pull it forwards. The harder you pull it the greater the resistance will be to restrict the tiller movement. You retain the pressure by taking your thin (blue) string to the cleat at the front of the tiller. The greater the tension, the more solid the tiller. It can also be used to reduce the tiller pressure, constantly pulling (weather helm) when going to windward, if your boat needs it.
It is invaluable for holding the boat into wind when hoisting/winching the main with both hands and for many other uses.
Make one!
And Finally
 The purpose of having a boat is to sail and enjoy the rivers and the sea and in so doing to enjoy the sights that 'Nature' may arrange for us. One very misty morning in Waldringfield, I put my head out of the aft hatch and this was the scene (click on the clink below) as it changed, taking no more than a few minutes.
Morning Waldringfield
https://www.youtube.com/watch?v=5GaAg-mz-b0
Music: Debussy - The Girl with the Flaxen Hair
Watch full screen with good sound to hear the gulls.